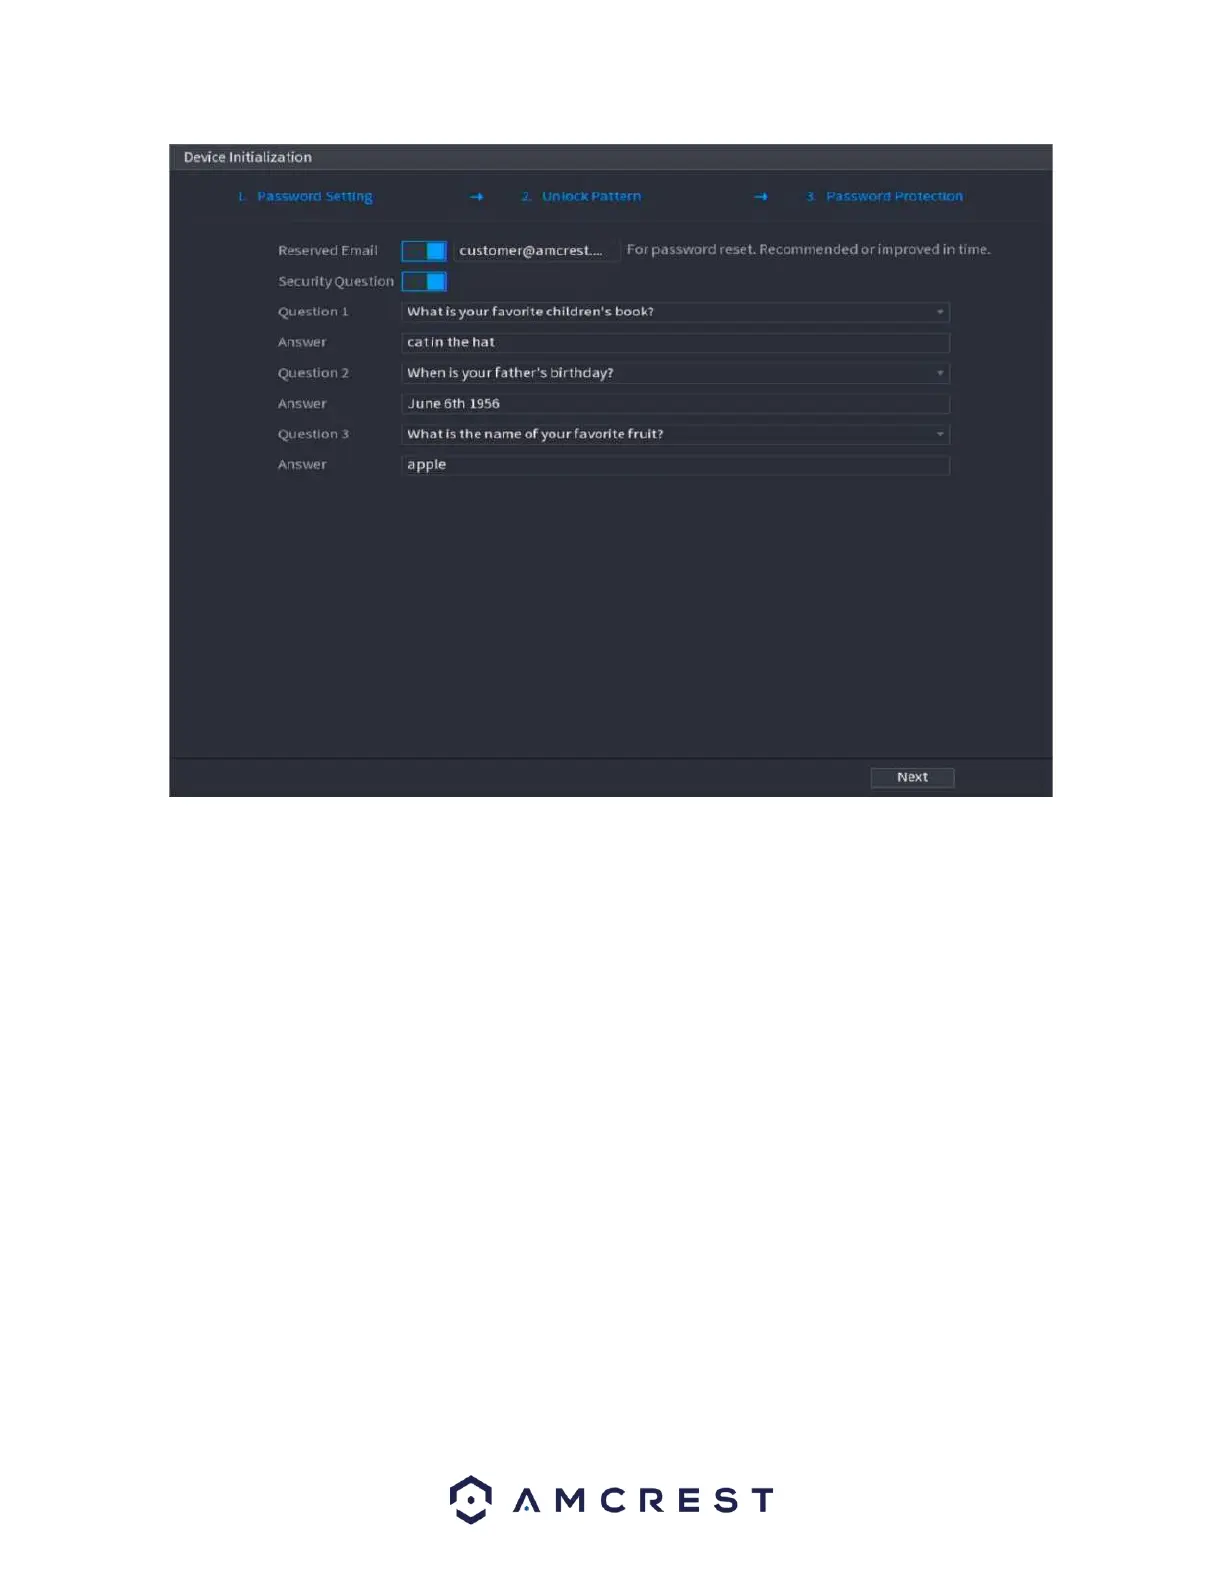
Once this section is complete, click on the Next button to Save your information to the device.
Startup Wizard Walkthrough
The first page of the Startup Wizard will appear which allows you to setup any network, P2P, camera, and
hard drive (HDD) settings.
Network
Unless you have a specific reason to change these settings, it is best to leave them as they are. Please
note, the IP address for the NVR will be the address used to access your NVR’s web user interface on a
laptop or PC. It is highly recommended to make sure the IP is set as static. To set the NVR to a static IP
address, click on “Modify” and disable the DHCP toggle switch. Click Save. This will set the network mode
to Static.
Click the Test to test the overall health and status of your network connection once complete, click the
Back button to return to the previous menu. Click Next.
P2P
The next screen that appears is the P2P screen. This screen allows you to connect your NVR to your mobile
device using the Amcrest View Pro App. Ensure the P2P toggle switch is enabled and the P2P status reads