Enter a valid email address and then select and answer the security questions provided in the
dropdown menu. Click OK when done.
When the NVR has been setup successfully you will hear a beep from the NVR and a prompt in
the browser letting you know that the initialization is complete. You will then be taken to the
login screen. Enter the username and password for your NVR then click Login.
Note: Please allow all permissions to allow the plugins to function in your browser. Once the
plugins are allowed the main menu screen will appear.
Accessing the Web User Interface Remotely
For the purposes of this guide, we will outline the most common method for setting up web access. Port
forwarding using the HTTP protocol and using Dynamic Domain Name Server (DDNS) is the easiest way to
setup stable remote access.
For this method, you should have direct access to your router as well as the ability to port forward the
device using the router’s built-in interface.
Below is a step-by-step walk through which details how to setup the NVR for remote web access using
DDNS.
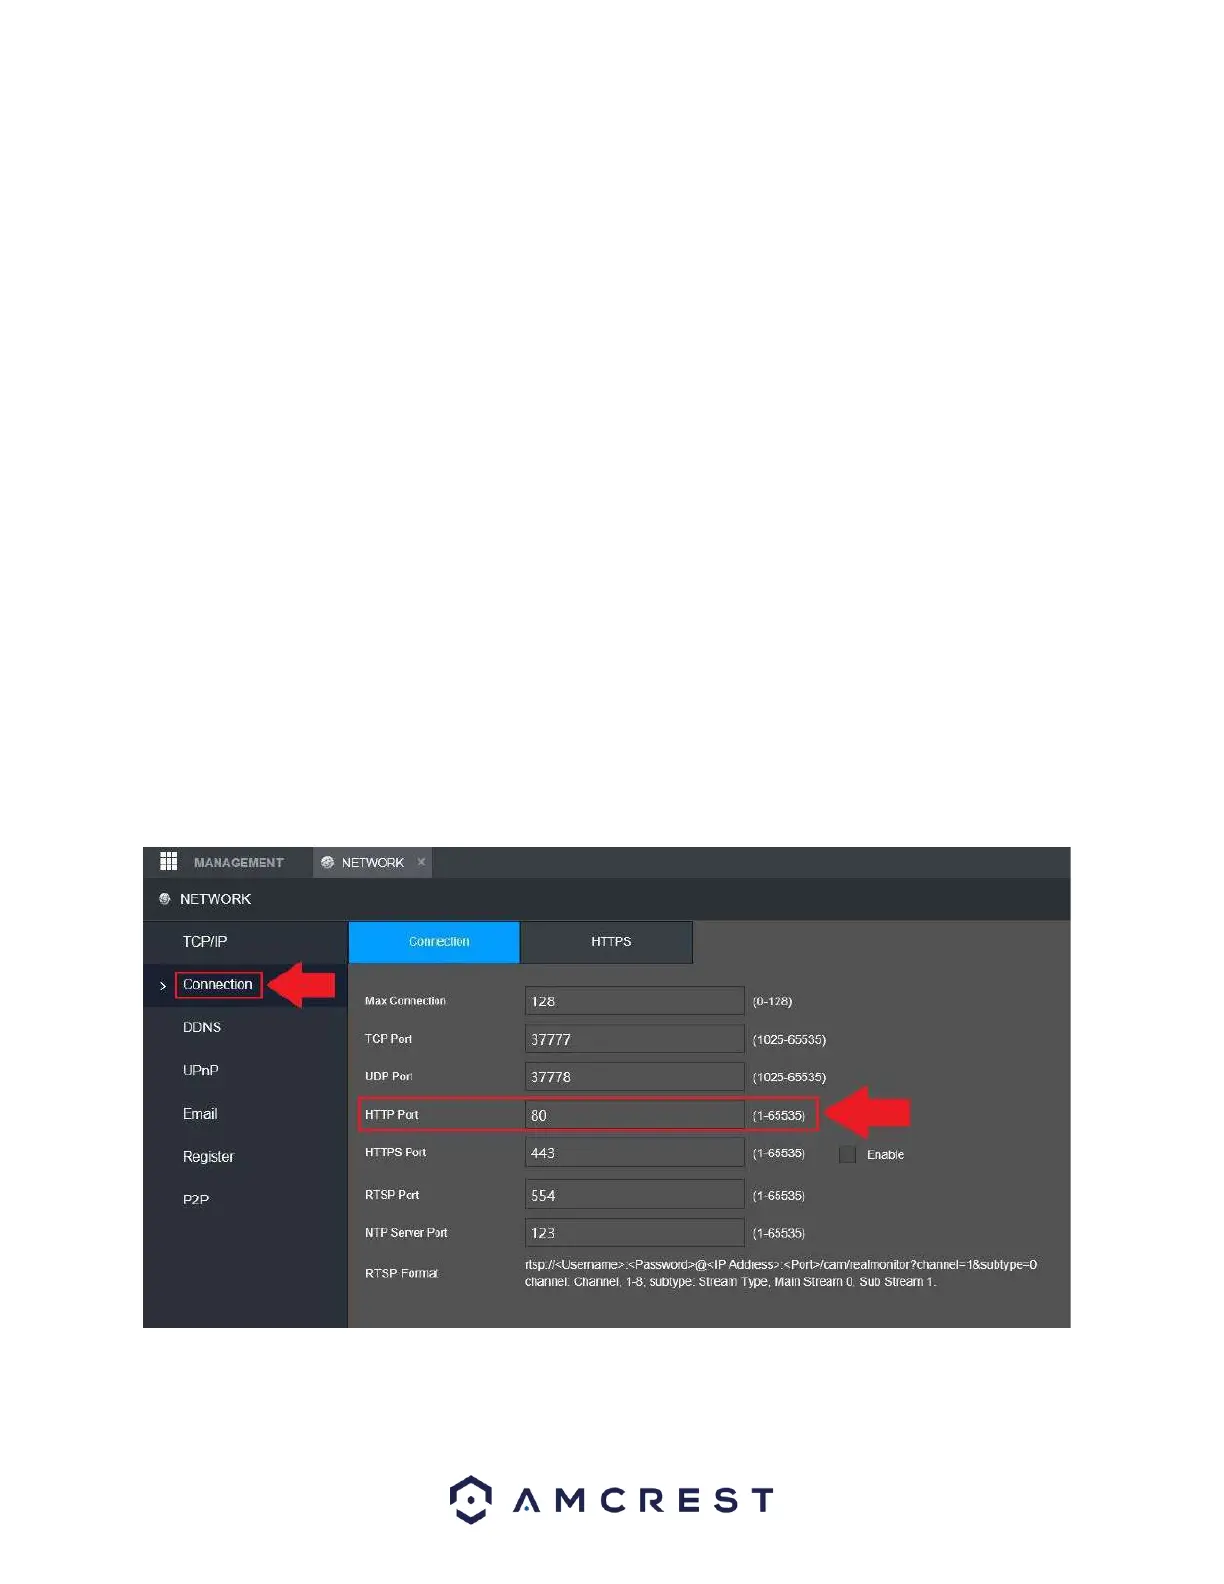
1. Log into the web UI and go to Management>>Network>>Connection. In the Connection tab,
note the HTTP Port information for your NVR.