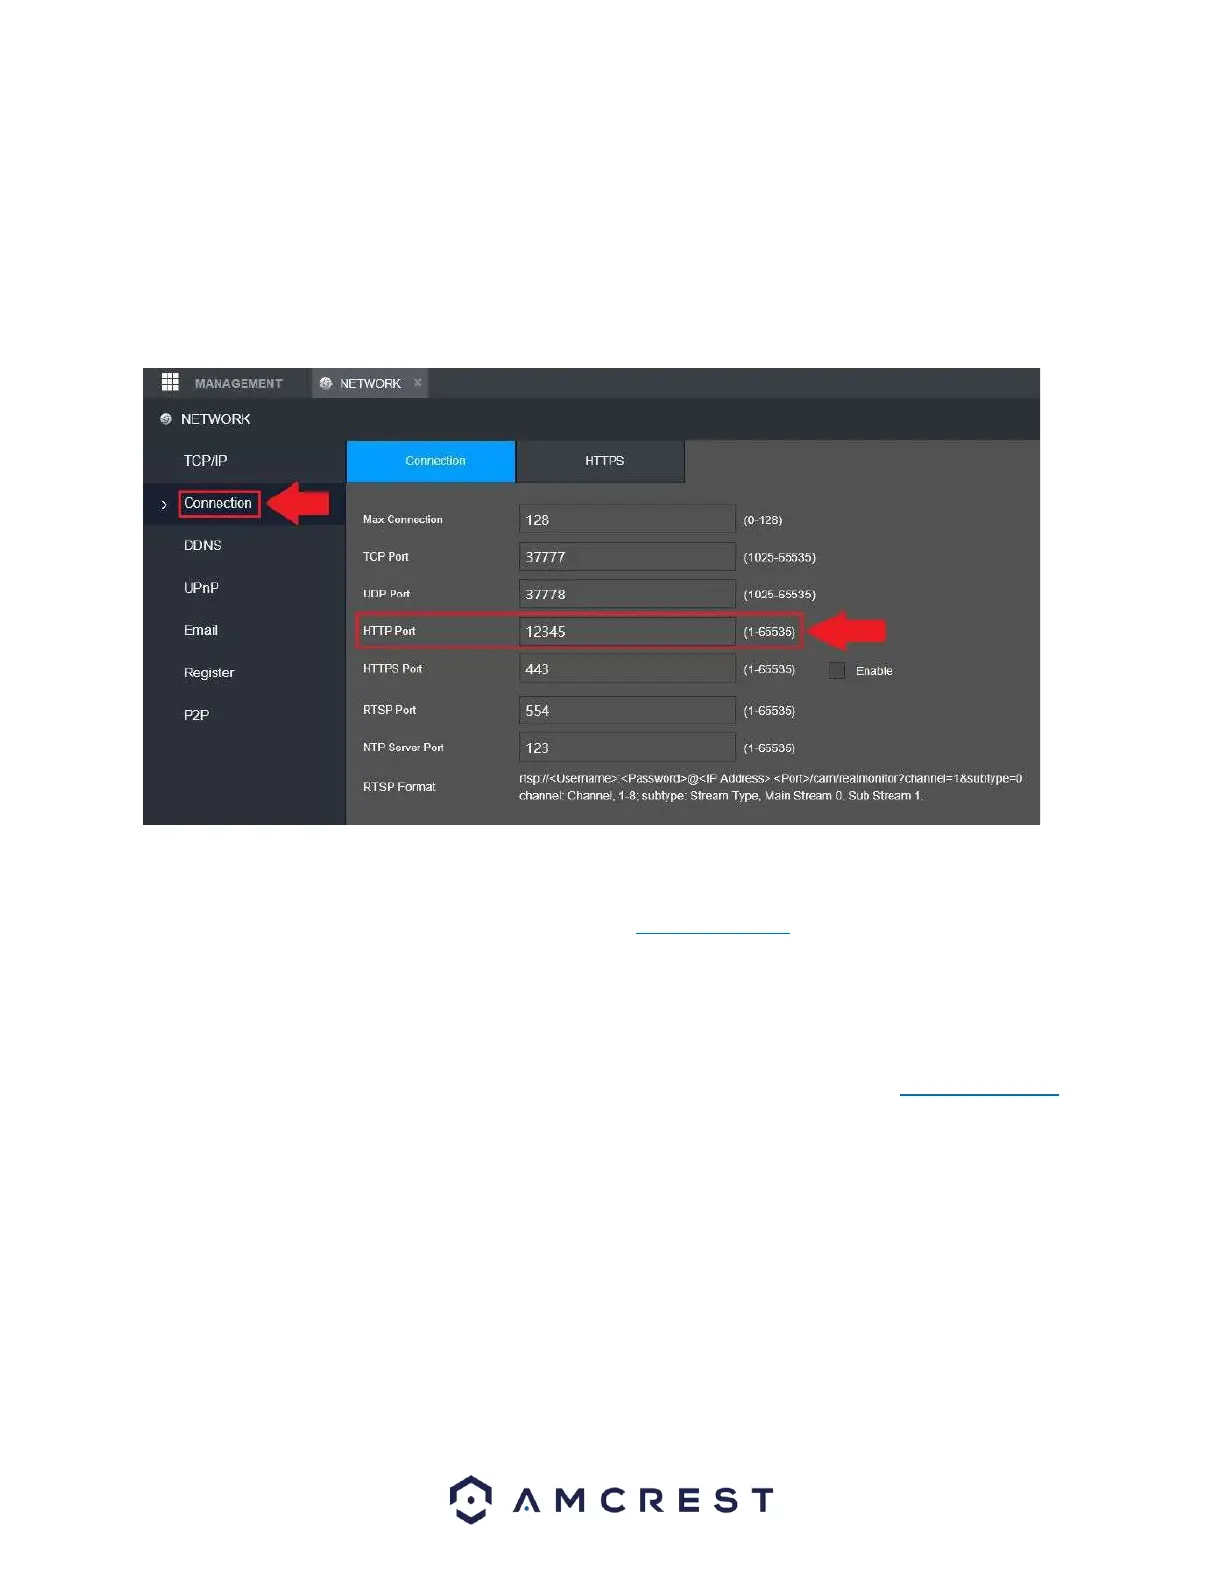
It is recommended to ensure the port number is at least 5 digits long to prevent any port conflicts. You
can change the port to any 5-digit number that is less than 65535 (e.g., 12345) by clicking the number
field and entering a new port number. Write it down, then click OK.
2. The system will need to reboot for this change to take effect. Click OK.
3. Once the NVR has come back online, log back into the web UI and navigate back to the Connection
menu to verify the HTTP port has been updated properly.
4. Access your router's user interface and port forward the device using the HTTP port information
displayed in the system. Every router's port forwarding protocols are unique. For more information on
how to port forward your specific device, please visit portforward.com or refer to the user manual for
your specific router.
Note: When port forwarding the NVR in your router, make sure to use the TCP, UDP and updated HTTP
protocols displayed in the NVR. If DDNS is not an option, the device can be accessed remotely using the
public IP address for your network and the HTTP port used that was port forwarded in your router. To
locate your public IP address and verify the connectivity of your system, please visit: canyouseeme.org
5. Click on the DDNS menu located in the Network tab in the left panel. In the DDNS menu, click on the
Enable checkbox to enable DDNS. Make sure the AMCREST DDNS type is selected and a domain name for
the NVR (one you create) is entered in the Domain Name field. As an example, the Domain Name will be
in the following format: mynewNVR.amcrestddns.com
Click Save once the DDNS information is entered.
Accessing the Device Remotely
After setting up the NVR in the previous steps provided, open a web browser, and enter in the DDNS
domain name address previously setup for your NVR.