Do you have a question about the American Standard 2A7A8030 and is the answer not in the manual?
Warning about the intended use of this information and potential risks.
Benefits of installing matched indoor and outdoor systems for efficiency and reliability.
Verify electrical power availability matches the unit's nameplate.
Procedure for removing basepan tabs by cutting.
Unit must be set on a level pad, at least as large as the base pan.
Maintain minimum 12" clearance from walls/shrubbery for adequate airflow.
Top discharge area must be unobstructed for at least five (5) feet above the unit.
Ensure roof supports unit weight and use isolation for vibration.
Maximum length of refrigerant lines from outdoor to indoor unit should not exceed sixty (60) feet.
Limits for refrigerant line lift (suction and liquid) based on unit orientation.
Caution to ensure all joints are brazed, not soldered, when reusing lines.
Route tubing, make required bends, and secure lines to prevent vibration noise.
Avoid direct contact between uninsulated liquid and gas lines.
Take precautions to avoid heat damage to valve cores and basepan during brazing.
Use dry nitrogen purge during brazing for proper connections.
Description of factory-shipped service valves and pressure tap port function.
Warning about extreme caution when opening service valves.
Pressurize lines with dry nitrogen and use soap bubbles to check for leaks.
Evacuate refrigerant lines and indoor coil before opening service valves.
Evacuate the system until the micron gauge reads no higher than 350 microns.
Detailed steps for opening liquid and gas line service valves.
Adjust refrigerant charge if line sets differ from recommendations.
Guidelines for power wiring, grounding, and disconnect switch installation.
Table defining maximum low voltage wiring lengths based on wire size.
Procedure to prevent compressor overload trip at initial start-up.
Perform operational checks and charge adjustments as per instructions.
Information on the availability of a seacoast kit for corrosive environments.
Chart to diagnose system faults and identify primary and secondary causes.
Diagram showing wiring connections between indoor and outdoor units.
Setting dip switches for line length and lift before entering Charge Assist mode.
How the system indicates low charge, correct charge, or high charge.
Feature that automatically controls refrigerant flow using a charging solenoid.
Table for R-22 subcooling values based on liquid temperature and pressure.
Corrections for subcooling charging based on line length and lift.
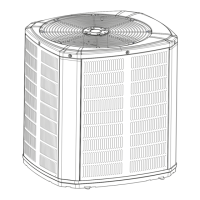
Table showing dimensions (A-K) for various condensing unit models.
Diagram indicating the location and pattern for mounting holes.
Checklist for ensuring the entire system is properly installed and functioning.
Test the indoor coil drain line by pouring water into the drain pan.
| Brand | American Standard |
|---|---|
| Model | 2A7A8030 |
| Category | Air Conditioner |
| Language | English |