EasyManua.ls Logo

AMP Research BEDXTENDER HD MAX 74841-00A User Manual

Default Icon
9 pages
To Next Page IconTo Next Page
Page #1 background imageLoading...
Page #1 background image
rev 05.02.19
1/7
www.amp-research.com
ASSEMBLY & INSTALLATION GUIDE
1
APPLICATION YEAR
GM Silverado/Sierra 2019
Remove contents from box and check for damage.
Verify all parts against parts list.
Read and understand instructions completely before attempting assembly
and installation.
INSTALLATION TIME
SKILL LEVEL
1= Easy
2 3
4
PART #
74841-00A (Silver)
74841-01A (Black)
TOOLS REQUIRED
Phillips screw driver
Torx T-20 driver
Torx T-25 driver
Power drill
1/8” drill bit
21/64” drill bit
Center punch
Supplied templates
Soapy Water
Masking Tape
BEDXTENDER HD™ shown assembled and installed on truck.
1 Hour
Invented, engineered and manufactured exclusively by AMP Research in the USA. May be covered by one of the
following patents:
5,700,047; 6,113,173; 6,402,215; 6,805,392; 7,063,366; 7,393,035; 7,654,598; 7,681,935; 7,841,638
3-Year Limited Warranty
WARRANTY
Question and Answer IconNeed help?

Do you have a question about the AMP Research BEDXTENDER HD MAX 74841-00A and is the answer not in the manual?

AMP Research BEDXTENDER HD MAX 74841-00A Specifications

General IconGeneral
BrandAMP Research
ModelBEDXTENDER HD MAX 74841-00A
CategoryAutomobile Accessories
LanguageEnglish

Summary

Parts List and Hardware Identification

Mounting Bracket Installation

Bracket Plate Assembly

Assemble U-Nuts on to bracket plates in the specified orientation.

Tail Light Removal

Remove tail lights using a T20 torx driver to access mounting points.

Drilling and Bracket Mounting

Enlarge holes and fasten quick mount brackets to the vehicle's D-pillar.

Bed X-Tender Assembly

Center Tube Assembly

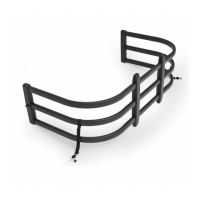
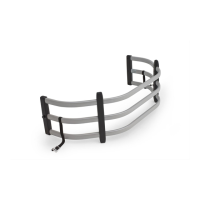
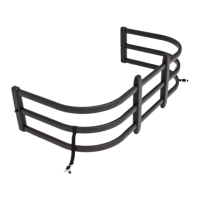
Measure and slide center tubes into the bent tubes for proper assembly.

Connecting Bed X-Tender Halves

Connect the two halves, ensuring at least 3 inches of overlap on bent tubes.

Upright and Bumper Attachment

Attach plastic uprights and place rubber bumpers into the tube junctures.

Securing Bed X-Tender

Tighten PT-Screws and adjust strap buckles to lock the assembly.

BedXTender HD Operation and Warranty

Product Usage Instructions

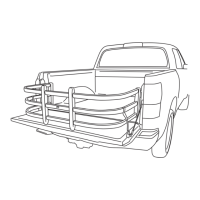
Instructions for placing, flipping, and securing the BedXTender.

Limited Warranty Policy

Details the three-year limited warranty for material and workmanship defects.

Critical Installation Warning

Emphasizes following instructions precisely to avoid dangerous situations.

Related product manuals