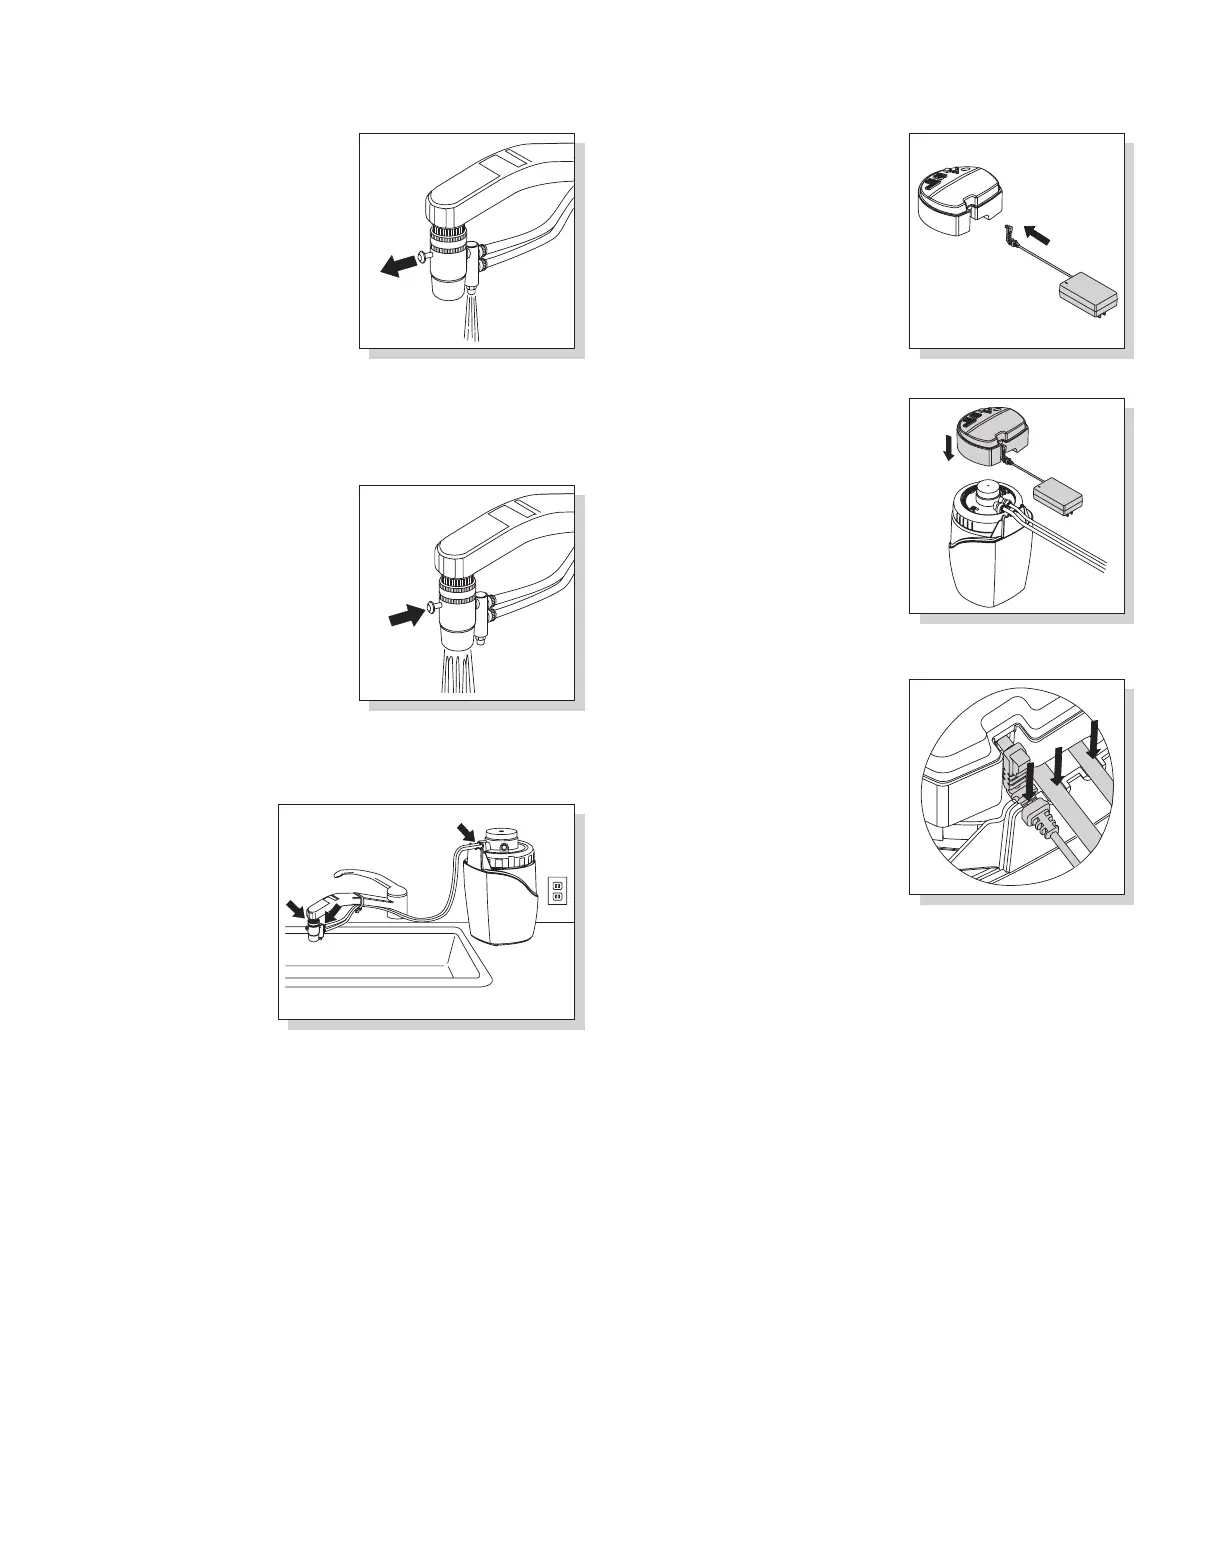
8. The Diverter controls the fl ow of
water according to the position of
the pin.
a) Pin pulled out - Treated water
(Fig. 19A).
b) Pin pushed in - Untreated
water (Fig. 20A).
9. Turn on cold water faucet and pull
out the Diverter pin.
NOTE: It will take a short time for water
to saturate the Cartridge and fl ow from
the Diverter. Flush for 5 minutes to
remove air pockets and carbon dust. It
may take 5-15 minutes to clear.
10. Check for any signs of
leakage at the Diverter
and at all tubing con-
nections (Fig. 21A).
If there is leaking or
bubbling, refer to
Troubleshooting (p. 12).
11. Push in the pin and turn
off the water after each
use.
1. Insert Power Adapter into
Electronic Module (Fig. 22A).
2. Replace the Electronic Module
(Fig. 23A).
3. Push cord strain relief into notch
on Base Housing (Fig. 24A).
NOTE: Make sure the tubes are in the
notches on the back of the Base Housing.
COMPLETING THE INSTALLATION
5
Fig. 22A
Fig. 24A
Fig. 23A
Fig. 20A
Fig. 19A
Fig. 21A