Web Interface Pages
23
NXB-CCG-K NetLinx® Clear Connect™ Gateway
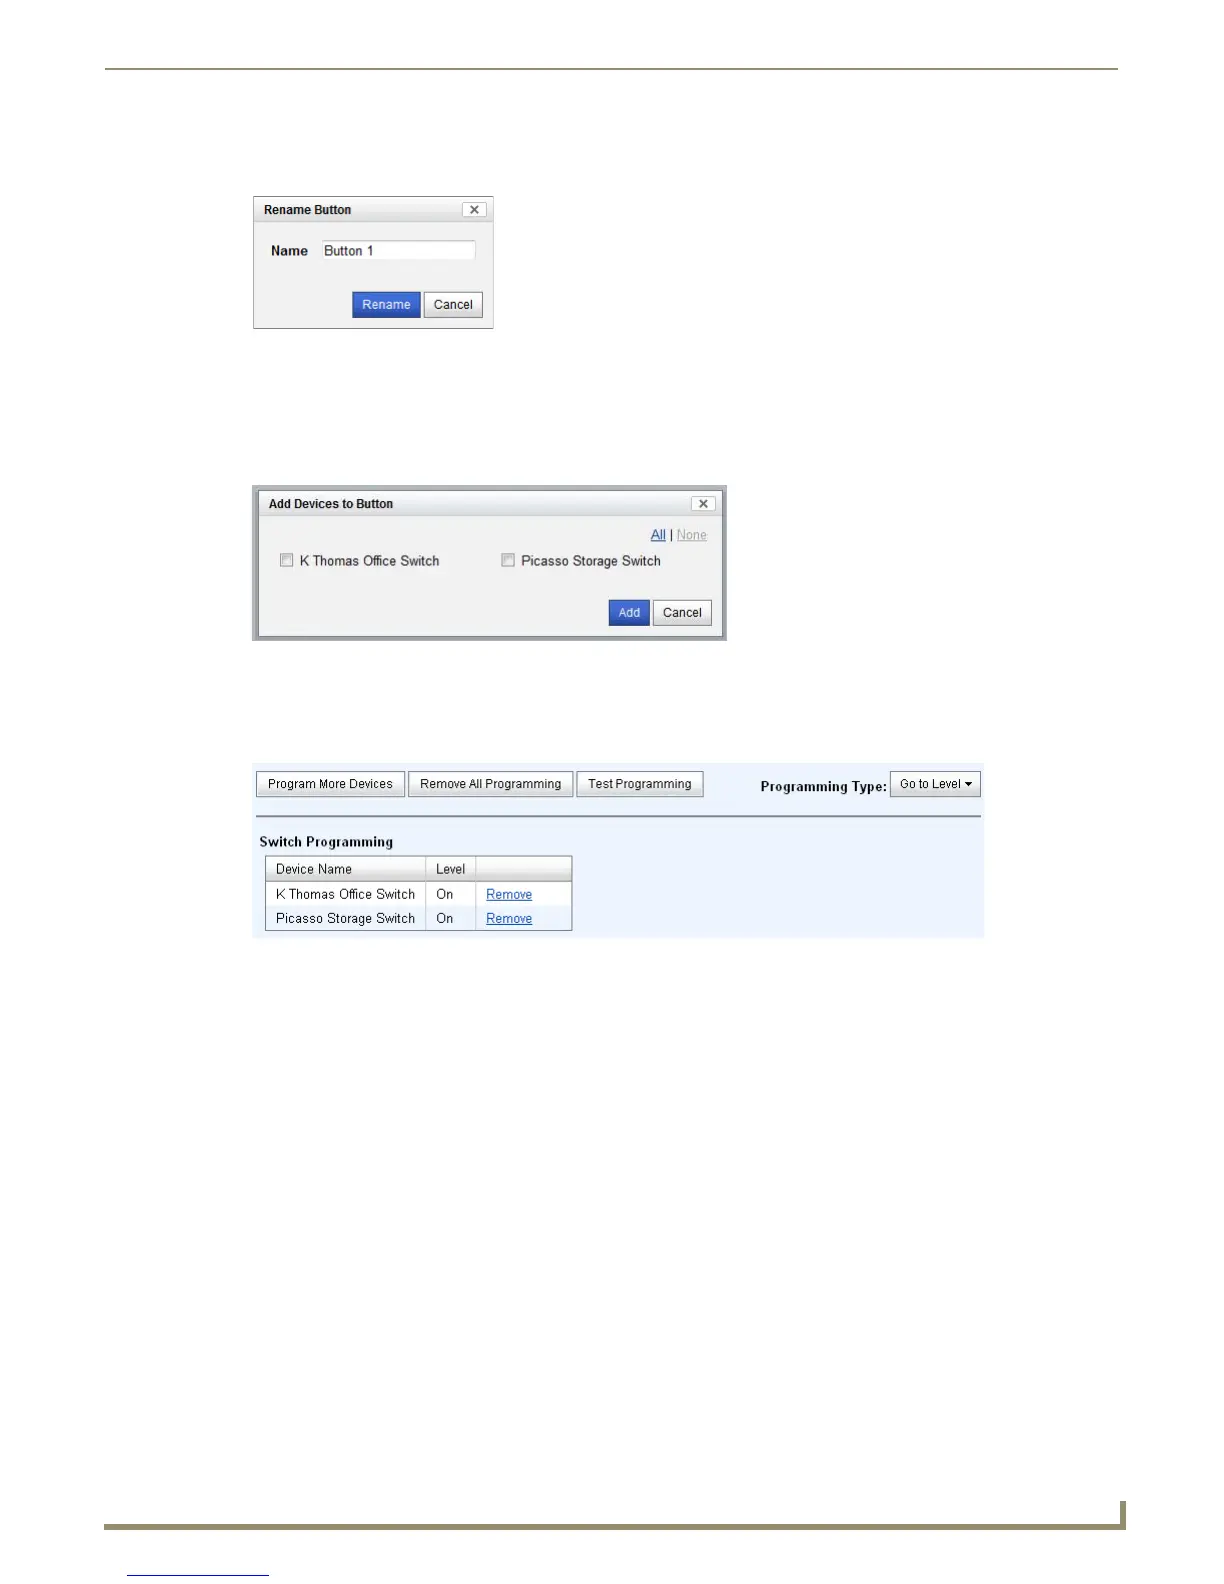
To add more available buttons for programming, right-click the device name to add ten more buttons to the list below the
device. To change the name of a given button, right-click the button name to open the Rename Button window (FIG. 41).
Button Details
To add devices to the button:
1. Click the Program Devices button in the Button Details pane (FIG. 40) to open the Add Devices to Button window
(FIG. 42).
2. Select the devices to add by clicking the appropriate check boxes. To select all of the available devices, click All,
and clear your selections by clicking None.
3. Click Add to save your changes. This opens the Switch Programming pane (FIG. 43).
When a button already contains programming, this programming is displayed in the button details window. Clicking the
Test Programming button will test the current programming by sending the devices to those levels. Devices can be
removed from the button by clicking the Remove link on the row corresponding to the device to be removed.
Adding Virtual Buttons
The NXB-CCG-K has 100 virtual buttons that can be programmed for integration purposes. When the NXB-CCG-K
Processor entry is expanded in the Devices tree view only 10 buttons are shown by default. If you need to program more
than 10 virtual buttons, you can show more of the 100 by right clicking the NXB-CCG-K Processor text in the Devices
tree view. Clicking this prompt will show additional virtual buttons 11 through 20, and so on.
FIG. 41 Rename Button window
FIG. 42 Add Devices to Button window
FIG. 43 Switch Programming details
 Loading...