Web Interface Pages
17
NXB-CCG-K NetLinx® Clear Connect™ Gateway
Add Devices Page
The Add Devices page (FIG. 26) allows you to add, remove, and manage up to 10 devices at a time within the NXB-
CCG-K network.
Entering Activation Mode
To enter Activation Mode:
1. In the Add Devices page, click the Add/Remove Devices button to enter the Add/Remove Devices Mode (FIG. 27).
2. Wait while the NXB-CCG-K attempts to enter activation.
a. Entering activation may fail due to another system being in activation. This will open the Unable to enter add/
remove device mode popup window (FIG. 28).
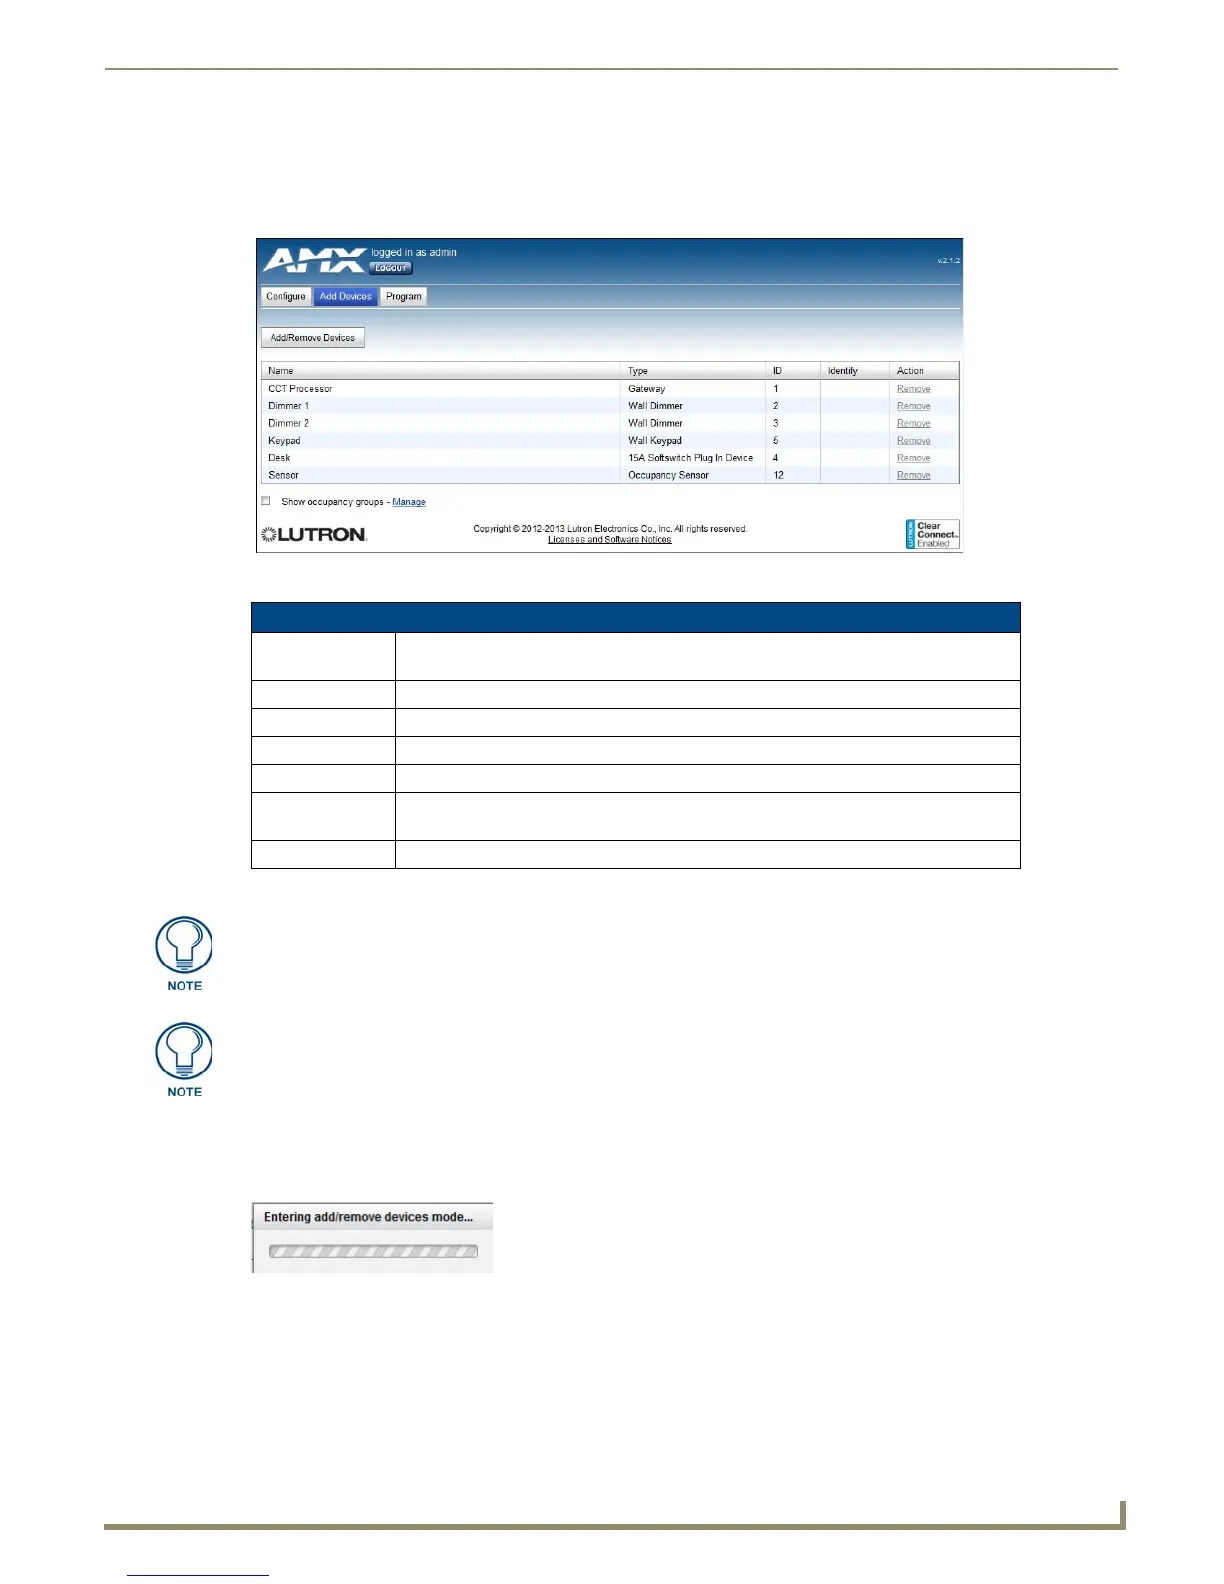
FIG. 26 Add Devices page
Add Devices Page
Add/Remove
Devices:
Click this button to add new devices to the NXB-CCG-K network.
Name: Displays the name of the device in the network.
Type: Displays the type of device in the network.
ID: Displays the device ID number (1-10) in the network.
Action: This link allows removal of the device from the network.
Show Occupancy
Groups:
Click this box to show all occupancy groups within the devices in the network.
Manage: Click this link to manage occupancy groups.
All the added devices must be set to their factory defaults before they can be added
to the system.
While the NXB-CCG-K can control up to 31 devices at one time, only ten devices at a
time may be entered via the Add Devices page. Adding more devices requires
multiple uses of the Add Devices interface.
FIG. 27 Entering Add/Remove Devices Mode
 Loading...