This document is a user manual for the Digital Microscope AD407. It provides information on safety, basic parameters, assembly, button functions, quick start guide, magnification and focus adjustment, saving and managing images with a Micro SD card, settings, and warranty.
Function Description
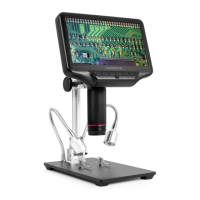
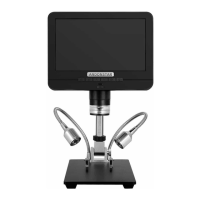
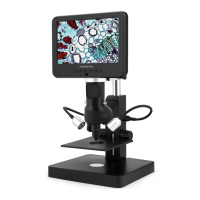
The Digital Microscope AD407 is designed for detailed observation and image/video capture of small objects. It features a high-definition display and various controls for adjusting magnification, focus, and image settings. The device can be used standalone or connected to an external HDMI monitor for a larger view. It supports saving images and videos to a Micro SD card for later review or export.
Important Technical Specifications
Image Sensor: 4 Mega Pixels HD Sensor
Video Output:
- UHD 2880x2160 at 24FPS
- FHD 1920x1080 at 60FPS/30FPS
- HD 1280x720 at 120FPS
Video Format: MP4
Magnification Ratio: Up to 270× (when using a 27-inch HDMI monitor)
Photo Resolution: MAX 4032x3024 (12M 4032x3024)
Photo Format: JPG
Minimum Focus Distance: 5cm
Frame Rate: Max 120f/s (under 600 Lux Brightness & HDP120)
Storage: Micro-SD card, up to 32GB (not included)
PC Support: No
Power Source: 5V DC
Stand Size: 20cm x 12cm x 19cm
Screen Size: 7 inch
Packing Data: 1.6KG / 32cm x 22cm x 10cm
Accessories Included:
- Metal Base
- Optical Bracket
- Power Adapter
- Switch Cable
- HDMI Cable
- Remote
- UV filter
- Screws (x2)
- Screwdriver
- Users Manual
Usage Features
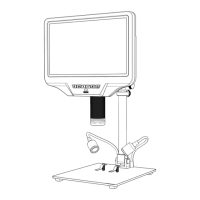
Assembly:
The microscope consists of a base, an optical bracket, and an optical stack (main device with display).
- Screw the optical bracket onto the base.
- Adjust the bracket's direction by unscrewing the locking ring, turning the bracket, and then tightening the locking ring clockwise until it is secure.
- Loosen the small thumbscrews on the optical bracket.
- Slide the optical stack into the ring of the optical bracket.
- Tighten the thumbscrews to hold the optical stack in place.
Proper assembly ensures free movement of the focus controller and adjustment of the monitor angle.
Power On/Off:
To switch on, press and hold the Power button (① on P4 "Buttons") underneath the display until the display turns on. The device may turn on automatically when connecting cables for the first time.
Adjusting Magnification and Focus:
- Optical Magnification: Use the large knobs on the optical bracket to raise or lower the optical stack. Lowering the stack increases magnification. Ensure the bottom of the stack does not contact the object. Reposition spotlights as needed.
- Focus: Turn the Focus controller (⑧ on P4 "Buttons") to achieve a clear image.
- Digital Magnification: Press and hold the Up button (③ on P4 "Buttons") to increase digital magnification (up to an additional 3x beyond optical magnification). Use the Down button (④) to decrease digital magnification.
Saving Images and Videos (Micro SD Card):
- Insert a Micro SD card (up to 32GB, not provided) into the TF slot on the top back of the monitor. Ensure the metal exposed side faces down. Push until a click is heard.
- Note: Inserting the card while the microscope is working will cause it to switch off automatically. Press and hold the Power button to restart.
- Mode Selection: Use the Mode button (② on P4 "Buttons", marked "M") to cycle between:
- Video Standby Mode (shows remaining storage for video recording).
- Still Image Mode.
- Review Mode.
- Recording Videos: In Video Standby Mode, press the OK button (⑤) briefly to start recording. Elapsed time (red color) will appear at the top left. Press OK again to stop. The OK button on the remote has the same function.
- Capturing Pictures: In Still Image Mode, press the Picture Capture button (⑥, marked with a camera) briefly to capture an image. The picture capture button on the remote has the same function.
- Note: Pictures or videos cannot be taken in Preview mode.
Reviewing and Managing Images:
- In Review Mode (selected via the Mode button), use the Up and Down buttons to cycle through saved pictures and videos.
- Playing Videos: Press the OK button to start playback. Press OK again to pause. Press the Mode button to stop playing and again to exit playback mode.
- Menu Options (while reviewing): Press and hold the Menu button (or MENU on the remote) to access options:
- Delete Current: Deletes the current image/video.
- Delete All: Deletes all unprotected images and videos.
- Protect Current/All: Protects the current/all image/video from accidental deletion (but not from Format function).
- Unlock Current/All: Unlocks the current/all image/video.
Settings:
Access settings by pressing and holding the M button (or MENU on the remote).
- Video Menu: (First menu shown in Video standby mode) Includes Resolution, Exposure, Record Audio, Date Stamp, TimeLapseRecord.
- Setup Menu: (Accessed by pressing M/MENU again) Includes Net setting, Date/Time, Language, TV Mode, HZ Frequency, Format.
Net Setting (Cross Line, Line, Direction, Position, Color, Width):
Use "Up" and "Down" to select options, and "Left" and "Right" on the remote to change settings.
- Cross Line: When "ON", displays a cross-shaped line in the middle of the view.
- Line: When "ON", displays 8 lines. Each line's direction (Horizontal "HOR" or Vertical "VER"), position, color, and width can be adjusted.
- "HOR" has 480 positions, "VER" has 800 positions. Changing direction automatically adjusts the position (e.g., HOR&160 to VER&266).
- Lines can be made "TRANSPARENT" if not desired.
Date/Time Setting:
Press "OK" to enter. Use "Up" and "Down" to select numbers for year/month/day. Press "OK" to move to the next number. Use "Left" and "Right" on the remote for quicker navigation. Press "MENU" on the remote to exit directly. Without the remote, you must cycle through all settings and press "OK" to exit.
Saving Settings:
To save all adjusted settings, turn off the device by pressing and holding the ON/OFF button on the monitor until it switches off. Settings will not be saved if the device is turned off via the switch cable or by cutting power directly.
Maintenance Features
General Cleaning:
- Lens Surface: Clean the lens at the bottom of the main device when image quality degrades. Use a few drops of lens-cleaning fluid on lens tissues or a microfiber cleaning cloth.
- Rest of Microscope: Can be cleaned with a damp cloth.
Display Care:
The display is very fragile. Handle with care. Do not drop, press hard, or touch with sharp objects. It is not waterproof; clean with a dry, soft material. Avoid pressing the display when adjusting its angle.
Troubleshooting (Display Freeze):
If the display freezes, locate the "reset" hole on the back of the monitor. Use a narrow object (e.g., unfolded paperclip) to depress the button inside. This resets all settings to factory values and restarts the display without erasing saved images or video.
Warranty Information:
The manual includes a warranty section for user's name, address, phone, email, model, purchase date, fault feedback, and date.
Warranty Exclusions:
- Inability to provide purchase proof or warranty.
- Use in improper environments (e.g., incompatible power supply, high temperature).
- Faults caused by accident, oversight, misoperation, or natural disasters.
- Faults caused by unauthorized personnel during repacking, repair, or dismantling, or if users repack, repair, or dismantle the device without following advice.
- Out of warranty period.