Hardware Installation
14 SCX 920 Installation Guide
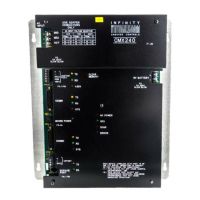
Figure 3 shows the locations of the snap latches. Note the parts of the
controller labeled here. You may want to refer to this figure for
assistance in locating parts during the installation process.
1. Turn over the SCX 920 and remove the screw in the center of the
board.
2. Turn the controller face up and lift out the snap latches around the
edges of the plastic housing to remove it from the printed circuit
board beneath it.
3. Find the slide switches to the left of the rotary override switches and
set the slide switches to the down position to disable the overrides.
Figure 3 shows the locations of the slide switches and rotary
override switches.
Now the output is under program control only. The manual control
option has been disabled.
4. Look inside the plastic housing. You’ll see two cables with pins on
the end.
Figure 3 shows the locations of the connections for these cables.
5. Plug in the cables to reconnect the LCD screen and keypad. Be
careful not to bend the pins.
6. Snap the inner plastic housing back on.
7. Turn the controller over and replace the center screw in the back.
8. Return to step 5 under Mounting.
Technical Manuals Online! - http://www.tech-man.com