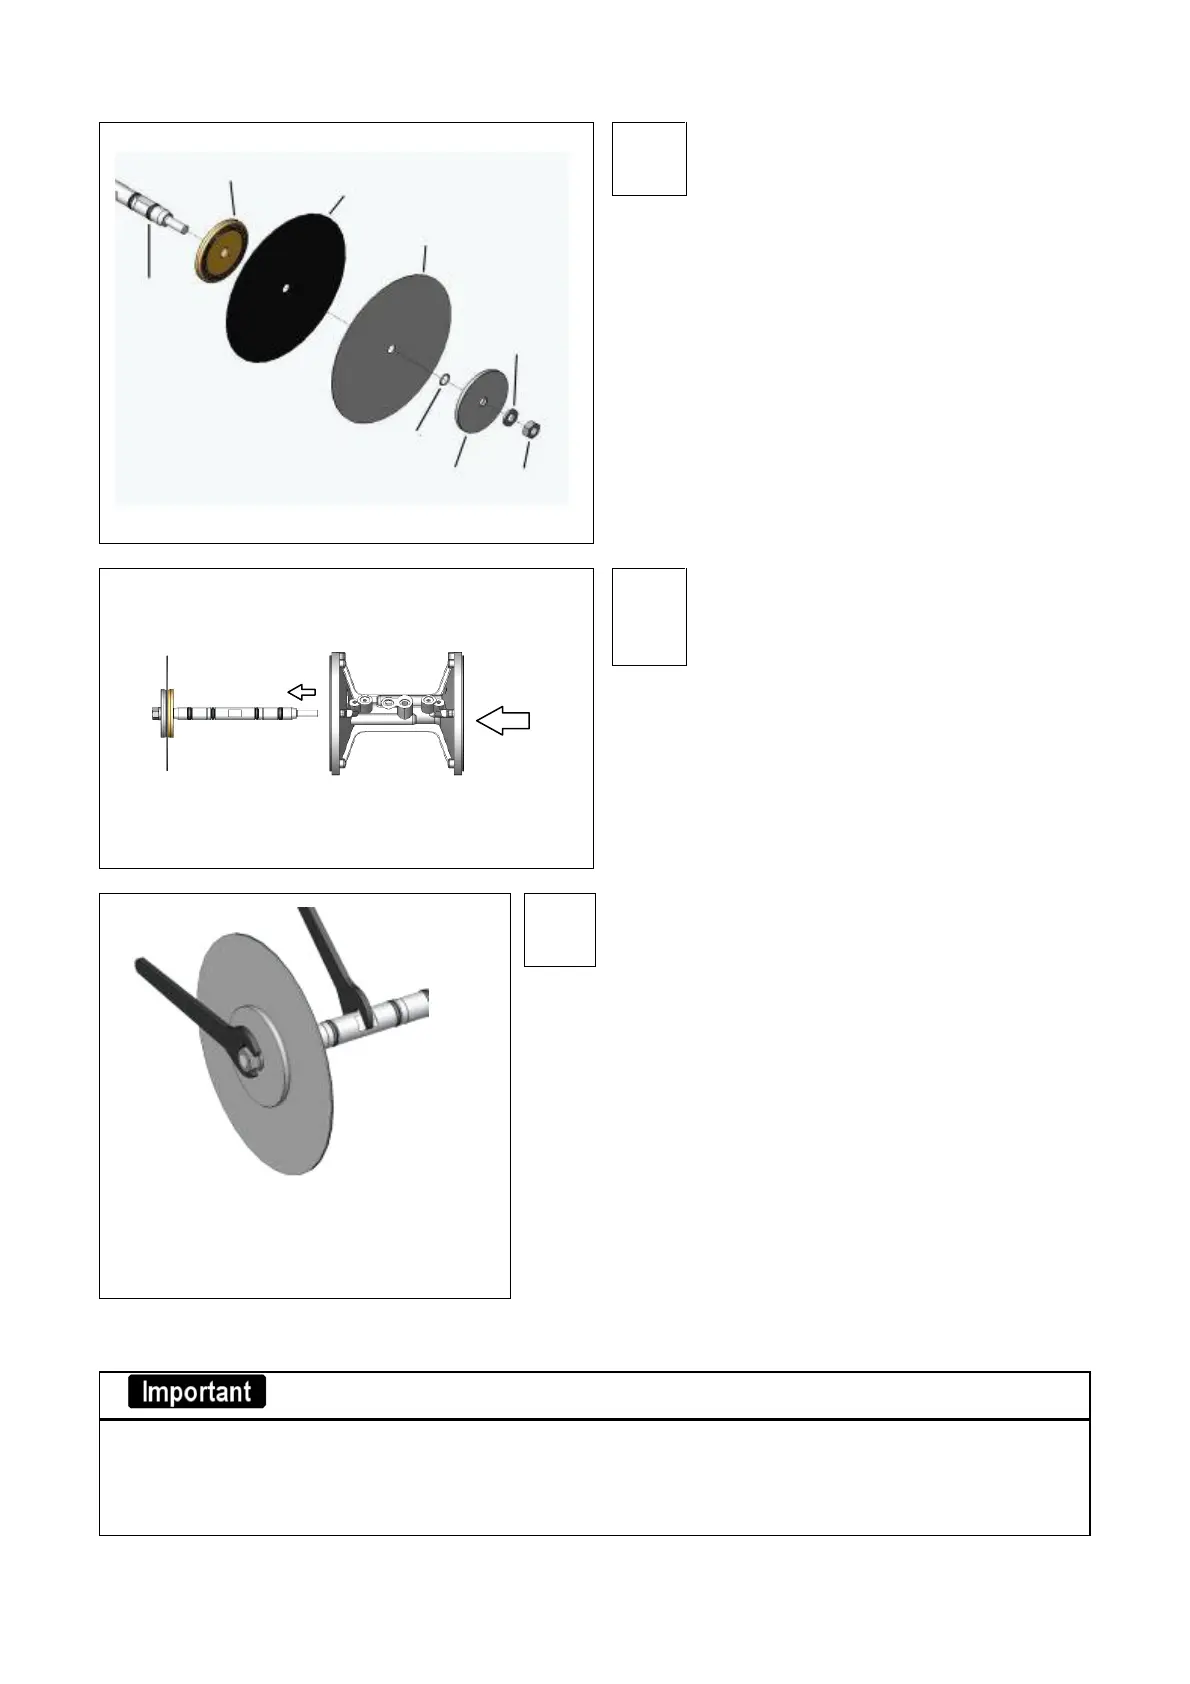
Job 2
Remove the following parts
beginning with the rod from the
side where hex. nut is removed:
①Spring washer ×1pc
②Diaphragm holder-out ×1pc
③O ring ×1pc
④Diaphragm set ×1pc
Diaphragm (white)
Diaphragm (Black)
⑤Diaphragm holder-in ×1pc
Job 3
While pushing the rod from the side
where hex.nut is removed, hold
diaphragm where hex. nut is not
removed and pull rod from main body.
Job 4
Hold center of rod, remove hex.nut
and remove following parts beginning with the ro
d.
①Spring washer ×1pc
②Diaphragm holder-out ×1pc
③O ring ×1pc
④Diaphragm set ×1pc
Diaphragm (white)
Diaphragm (Black)
⑤Diaphragm holder-in ×1pc
During assembly, please observe the following
tightening torque
90E series : 20N・m
120B series : 20N・m
10-2-4 Rod section
• Do not damage, bend rod, or attach dirt or foreign matter to it.
If done, it can damage the rod.
• When fitting Y packing or O ring to rod, be sure to grease and careful about fitting
direction.
Do not damage Y packing or O ring. Wrong fitting can fail pump.
Rod
Diaphragm holder in
Diaphragm(Black)
Diaphragm(white)
O Ring
Diaphragm holder out
Spring washer
Hexagon nut
Diaphragm
Hex. nut
Pump
Rod
Push


 To Next Page