EN 4443 EN
12. Download the app, and follow the in-app instructions to finish the microinverter configuration and Schuko cable connection.
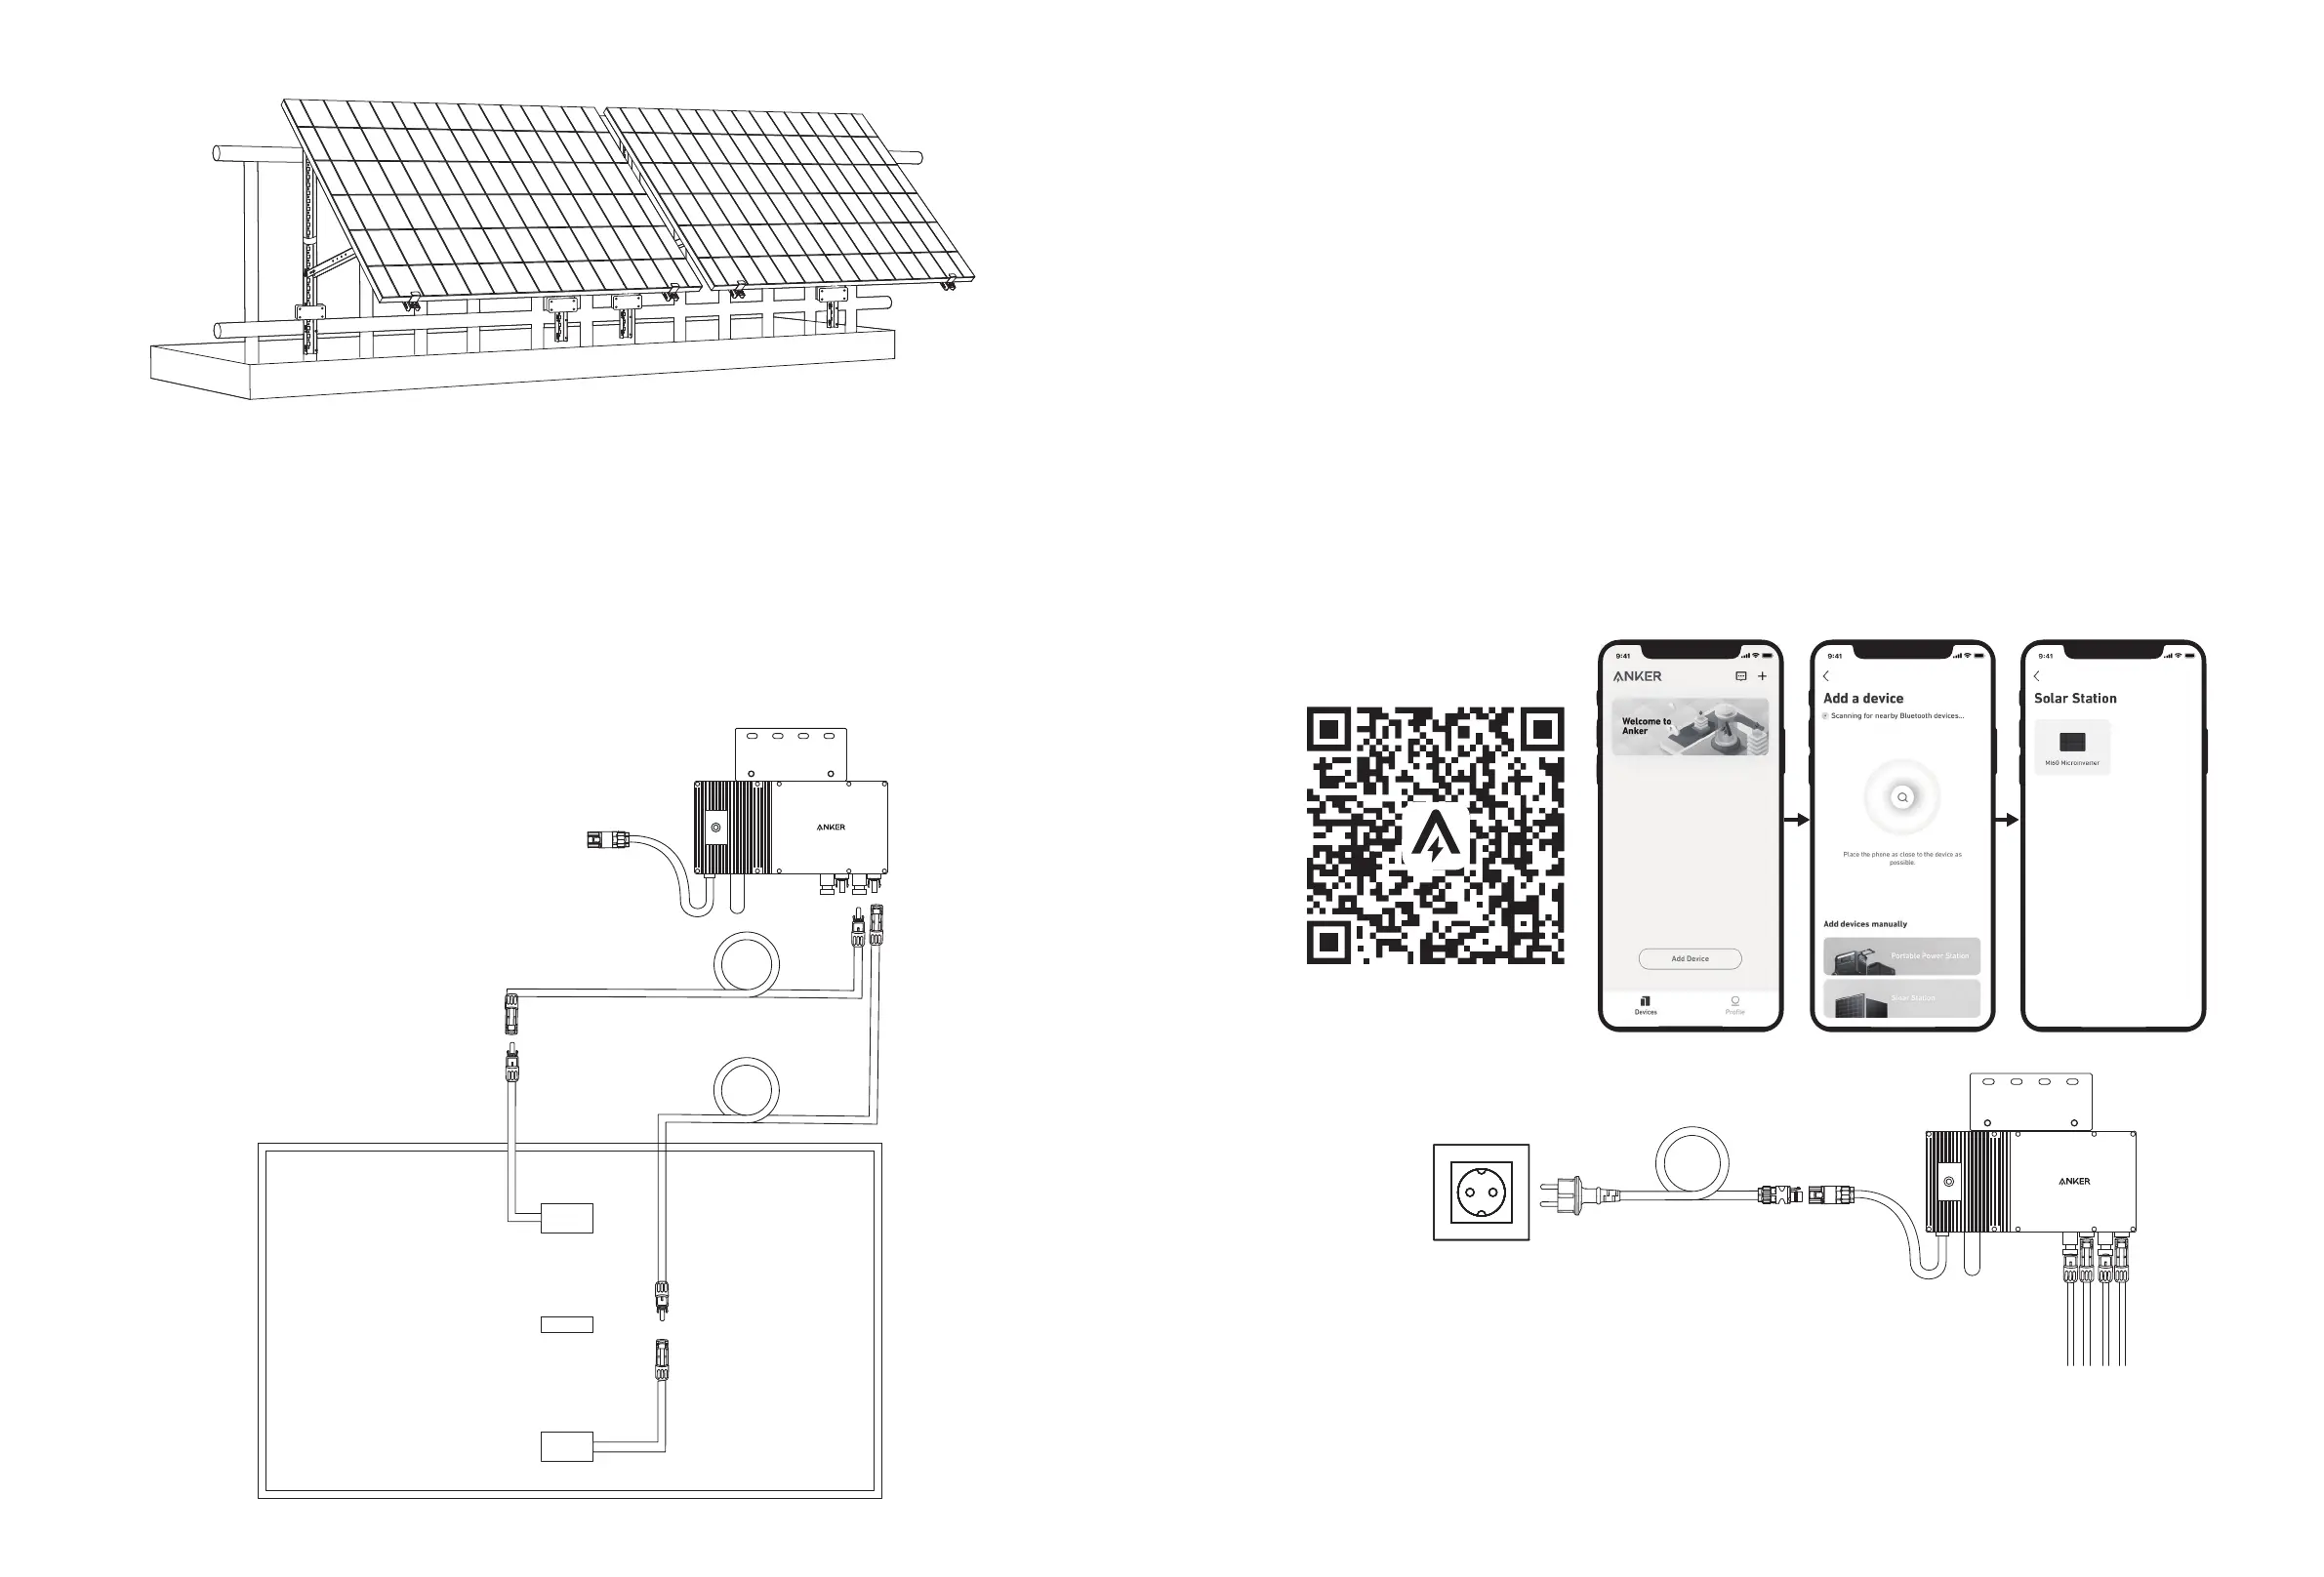
①
Scan the QR code on the microinverter or search "Anker" on the App Store, Google Play, or other ocial application stores
to download the app.
②
Tap Add Devices/"+" > Add a Device > Solar Station > MI60 Microinverter.
③
Sign up/log in to your Anker account.
④
Select your home's Wi-Fi SSID, enter the password, then click the "Next" button. You will be directed to the device's Wi-Fi
Guidelines page.
⑤
Read the guidelines, then click the "Connect to Device's Wi-Fi" button. You will be redirected to the Wi-Fi pairing list of your
devices.
⑥
Pair the microinverter's SSID (named MI-XXXXXXXX) on the Wi-Fi pairing list with your device. The default password is
12345678.
⑦
Return to the Anker app. A scanning page will be displayed; wait for a while.
⑧
If you are redirected to the No Devices Found page, press the "Retry" button, then follow the instructions to unplug all solar
panel extension cables from the microinverter. Then repeat steps 11 and 12 (excluding the download and login operations).
⑨
If you are redirected to the Distribution Network Inspection page, you can connect the microinverter to your home grid via
the Schuko cable.
Status Check:
I. If the LED light on the microinverter flashes green slowly (on for 1 second, then o for 1 second), it means the Wi-Fi connection is
successful. Move on to step 13.
II. If the LED light on the microinverter flashes orange slowly (on for 1 second, then o for 1 second), it means that communication
and connection have failed. Unplug the Schuko cable from your home grid, then unplug all solar panel extension cables from the
microinverter to disconnect. Repeat steps 11 and 12 (excluding the download and login operations).
5m
13. You will receive data from the balcony solar power system on your Anker app after 20 minutes.
Note: According to the government's regulations and to ensure safety, the microinverter can only start working after connecting to a
powered grid for 5 minutes. To improve the accuracy of the data, the system will verify and validate it for 15 minutes before showing
it on the app.
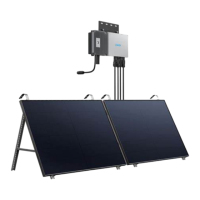
10. Repeat the steps above to install another solar panel.
11. Connect the solar panel and the microinverter with the solar panel extension cables. When the LED indicator starts flashing,
wait for 90 seconds.
Note:
1. Ensure that two solar panels have been installed before this step.
2. This step must be done while there is enough sunlight for the solar panel to provide power to the microinverter.
Status Check:
I. The LED light on the microinverter should flash red slowly (on for 2 seconds, then o for 2 seconds), which indicates that the
microinverter is ready. If not, you will need to unplug and replug the solar panel's extension cable.
II. You can find the microinverter's SSID on your device's Wi-Fi pairing page (named MI-XXXXXXXXX) (Do not pair this SSID with your
device at this time). Unplug the extension cable from the solar panel and reinstall it if you cannot locate it. After the LED light has
flashed for 90 seconds, check again.
1.5m