EN 4645 EN
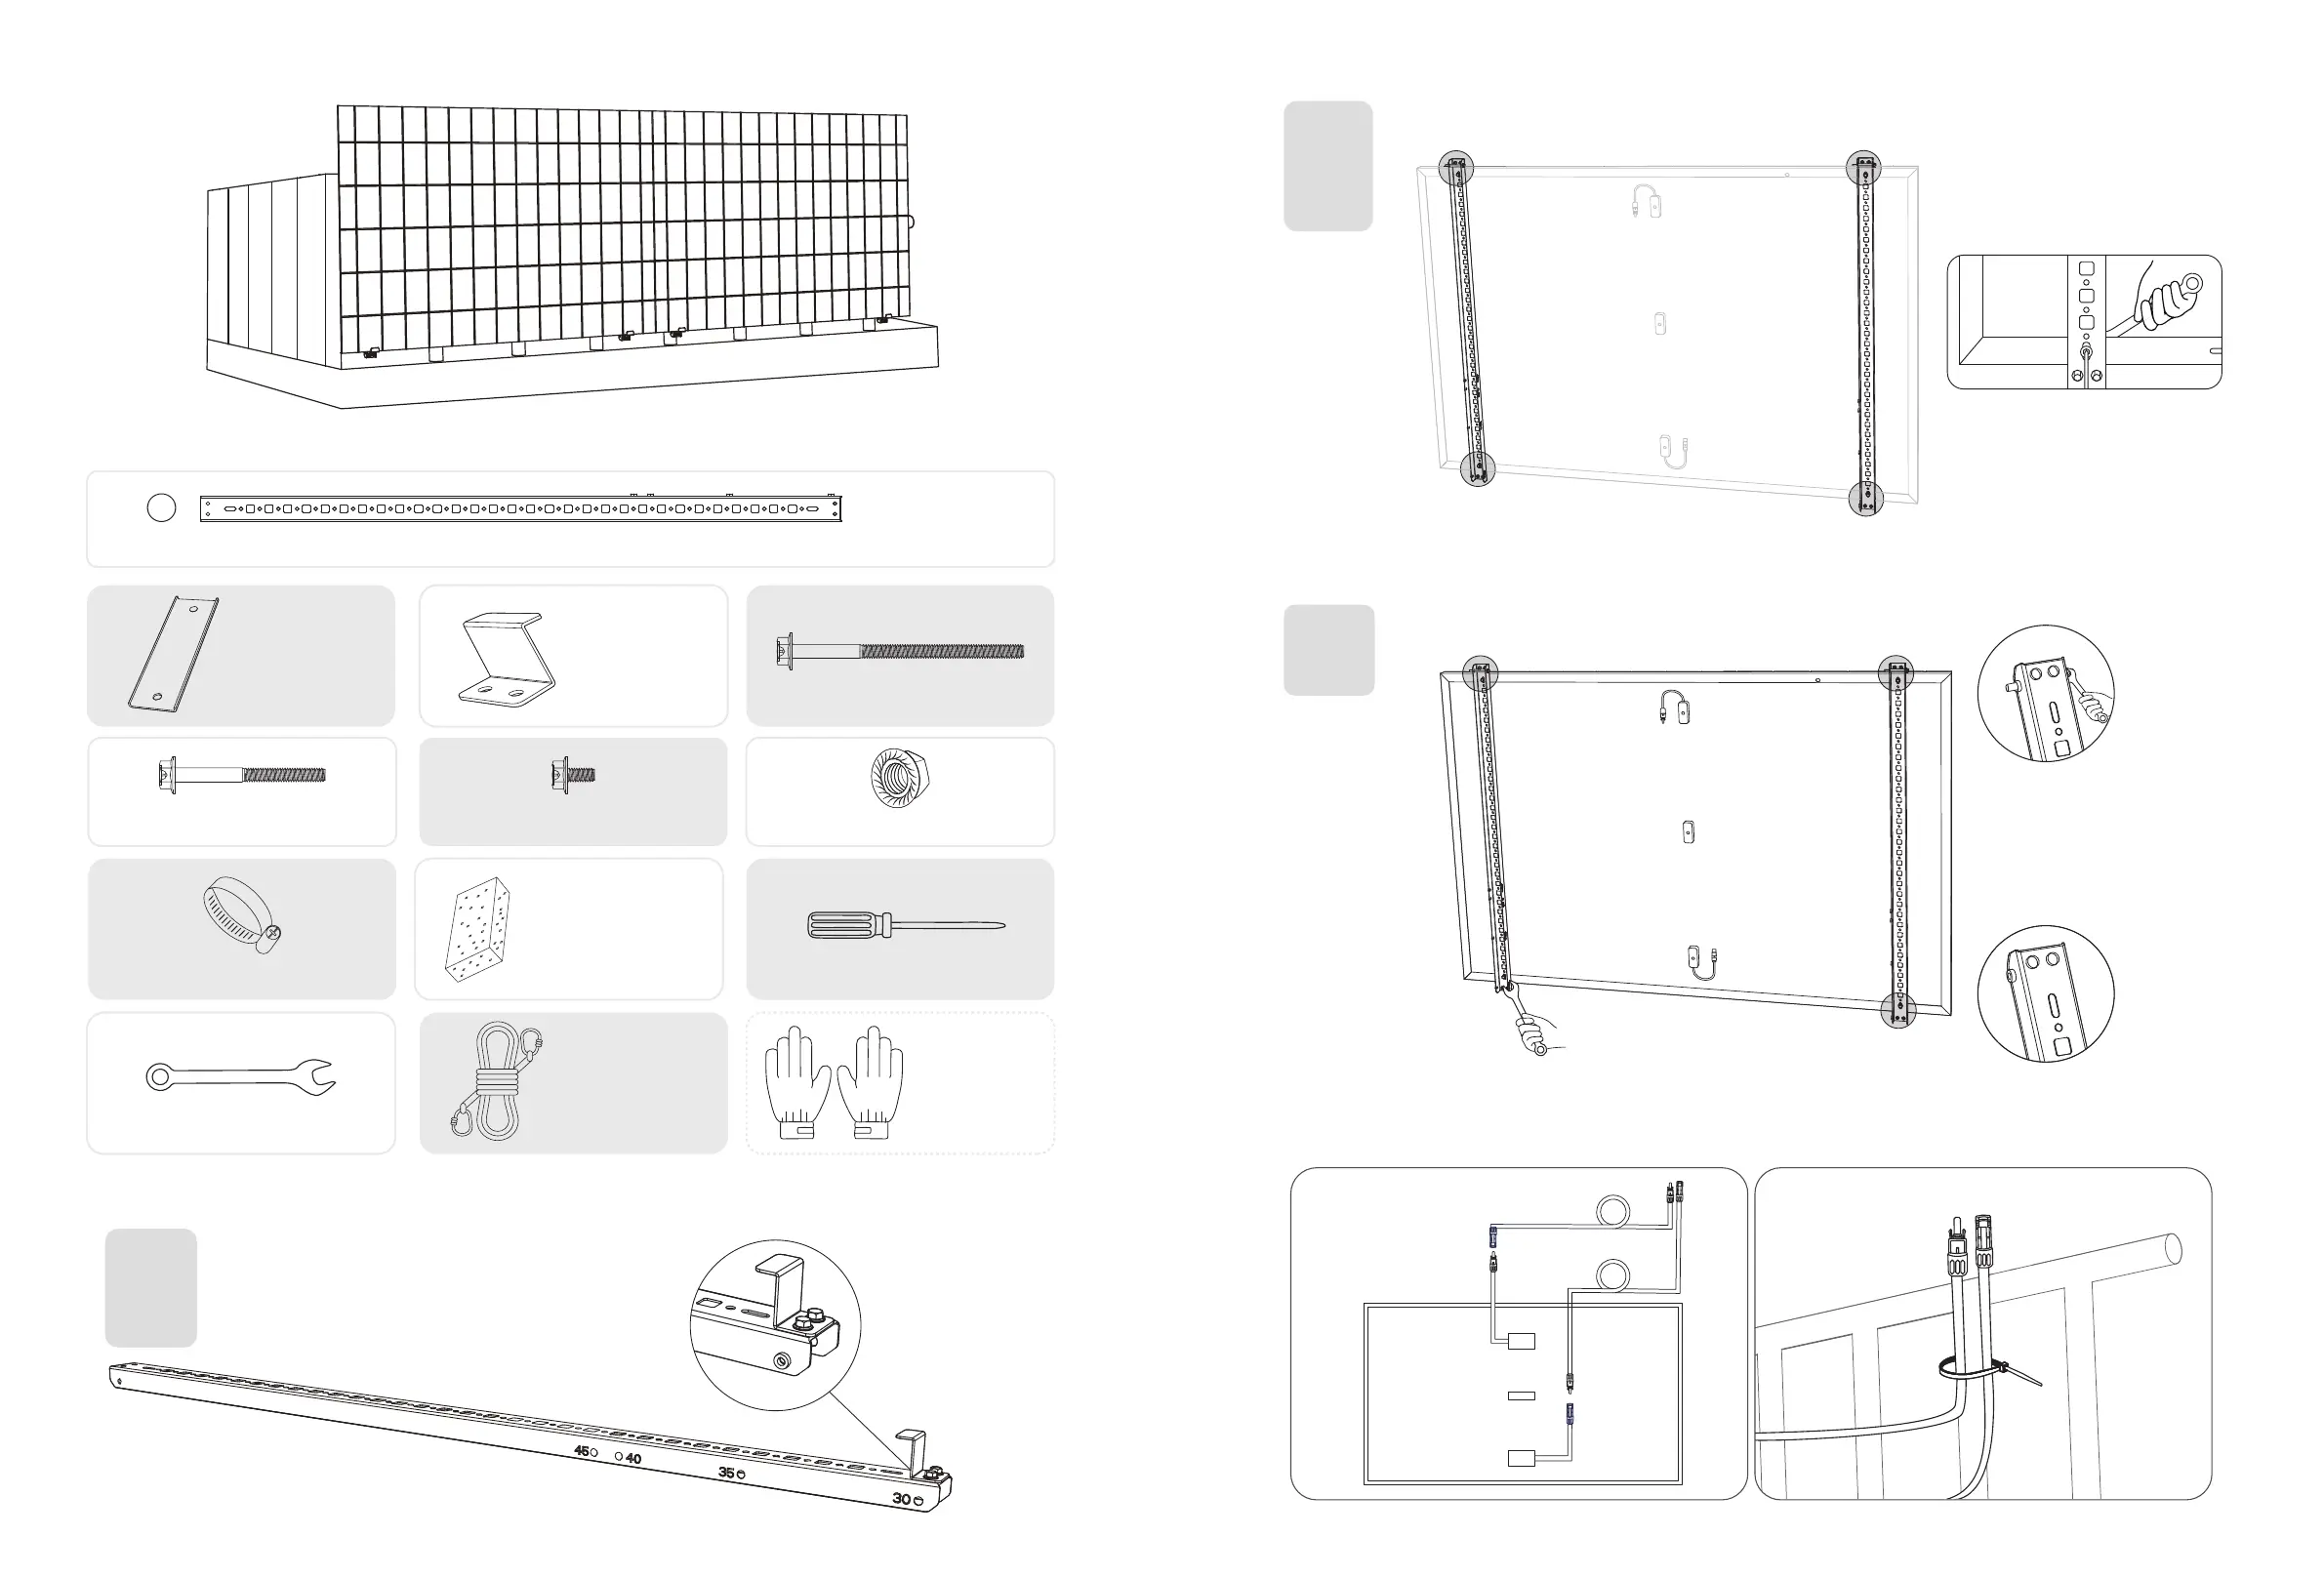
Option 2: 0° Inclination Angle
What You Need
Solar Panel Support Beam (×4)
A
mm
1200
H
I
K
L
G
M6×100 Hexagon Flange Bolt (×16)
M6×65 Hexagon Flange Bolt (×12)
M6×12 Hexagon Flange Bolt (×24)
E
Fastening Clamp (×8)
F
Limit Support (×4)
304 Stainless Steel Hose Clamp (×10)
Silicone Buer Pad (×4)
J
M6 Flange Nut (×20)
N
O
Hexagon Wrench Mounting Auxiliary Rope Work Gloves
M
Phillips Screwdriver
(Not included)
1. Attach the limit supports to the numbered end of the solar panel's support beams.
Note: Make sure that the direction of the limit support is up, as shown in the figure.
A x2
F x2
I x4
2. Mount the solar panel support beams on the solar panel.
A x2
I x4
J x4
3. Tighten all the screws with 5N.m torque.
N x1
5N.m
4. Connect the solar panel with the solar panel extension cable.
Note: To avoid falling, secure the solar panel extension cable on the balcony railings temporarily with zip ties.
1.5m