EN 5251 EN
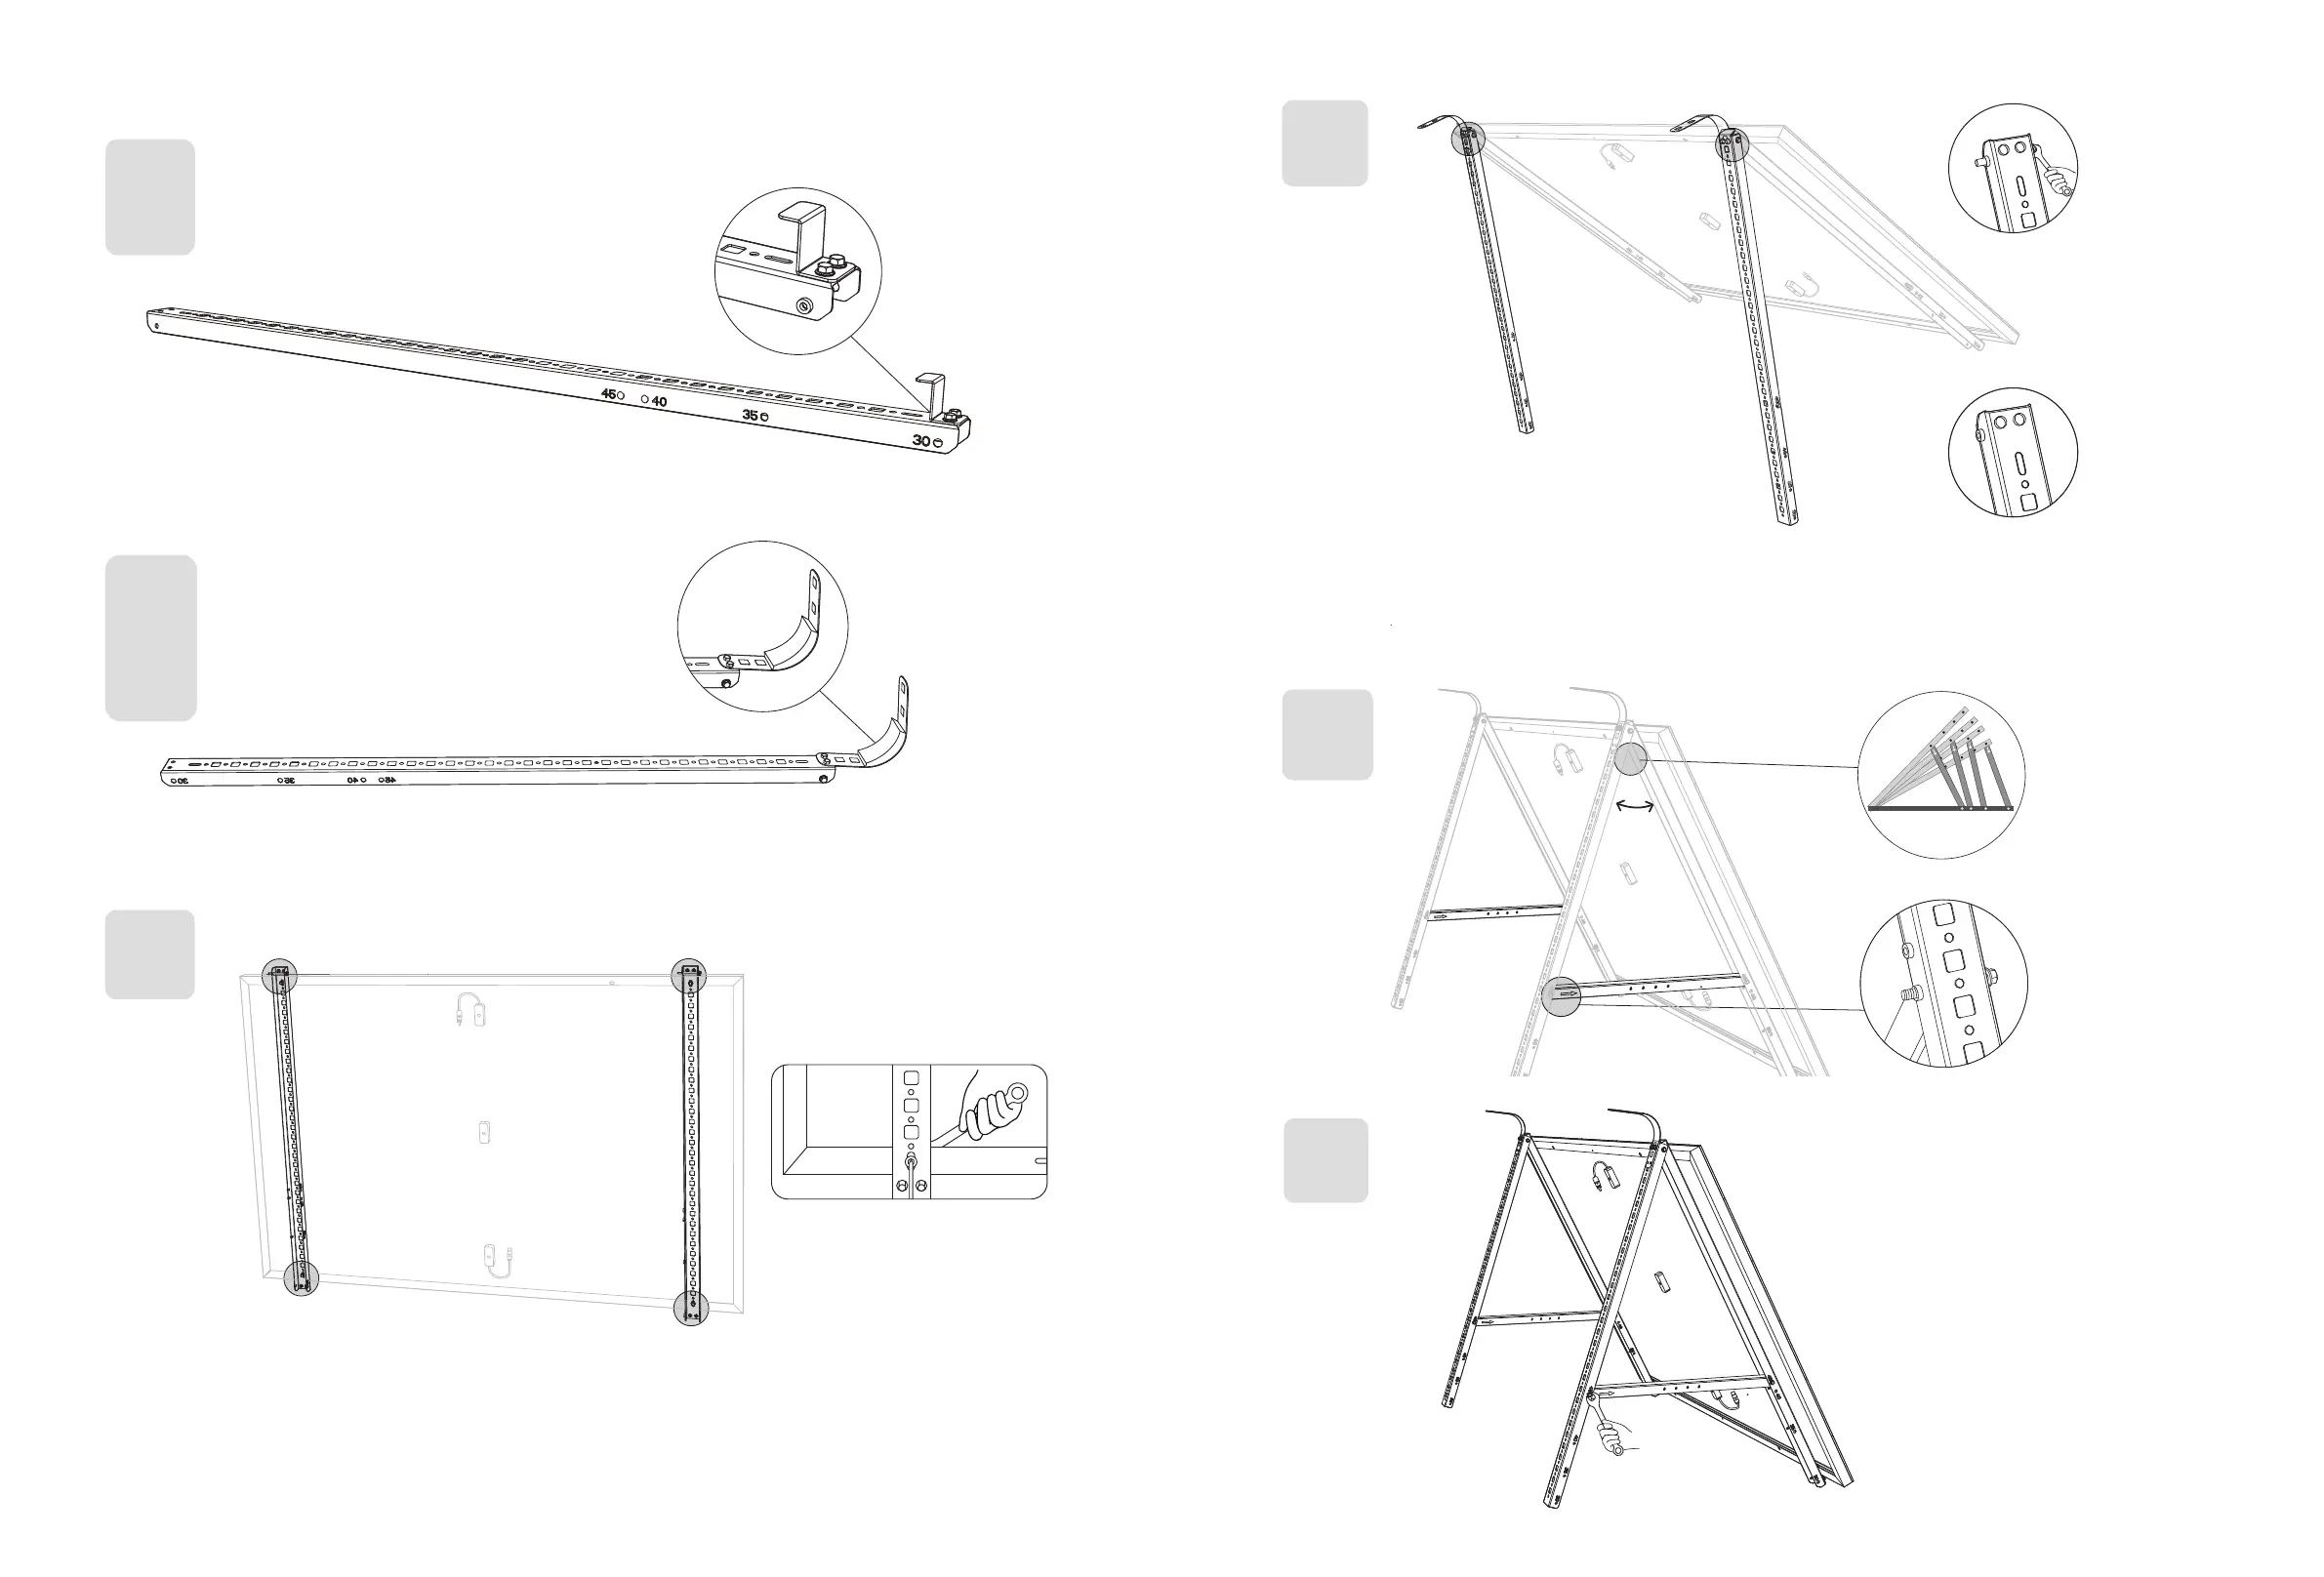
1. Attach the limit supports to the numbered end of the solar panel's support beams.
Note: Make sure that the direction of the limit support is up, as shown in the figure.
A x2
F x2
I x4
2. Place the silicone buer pads onto the U-shaped racks, then mount the U-shaped racks to the vertical support scaoldings.
B x2
D x2
L x2
I x4
3. Mount the solar panel support beams on the solar panel.
I x4
J x4
4. Install the vertical scaolding and solar panel support beams without tightening the screws.
B x2
H x2
5. Mount the lower support beams and adjust the angle for maximum sunlight exposure.
Note: Make sure that both ends of the lower support beams are aligned with the same number.
C x2
H x4
°~°
45
40
35
30
45
40
35
30
A
C
B
45
40
35
30
45
40
35
30
45 40 35 30
6. Tighten all the screws with 5N.m torque.
N x1
5N.m