EN 6665 EN
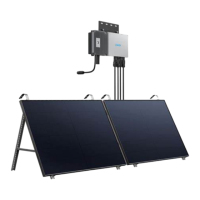
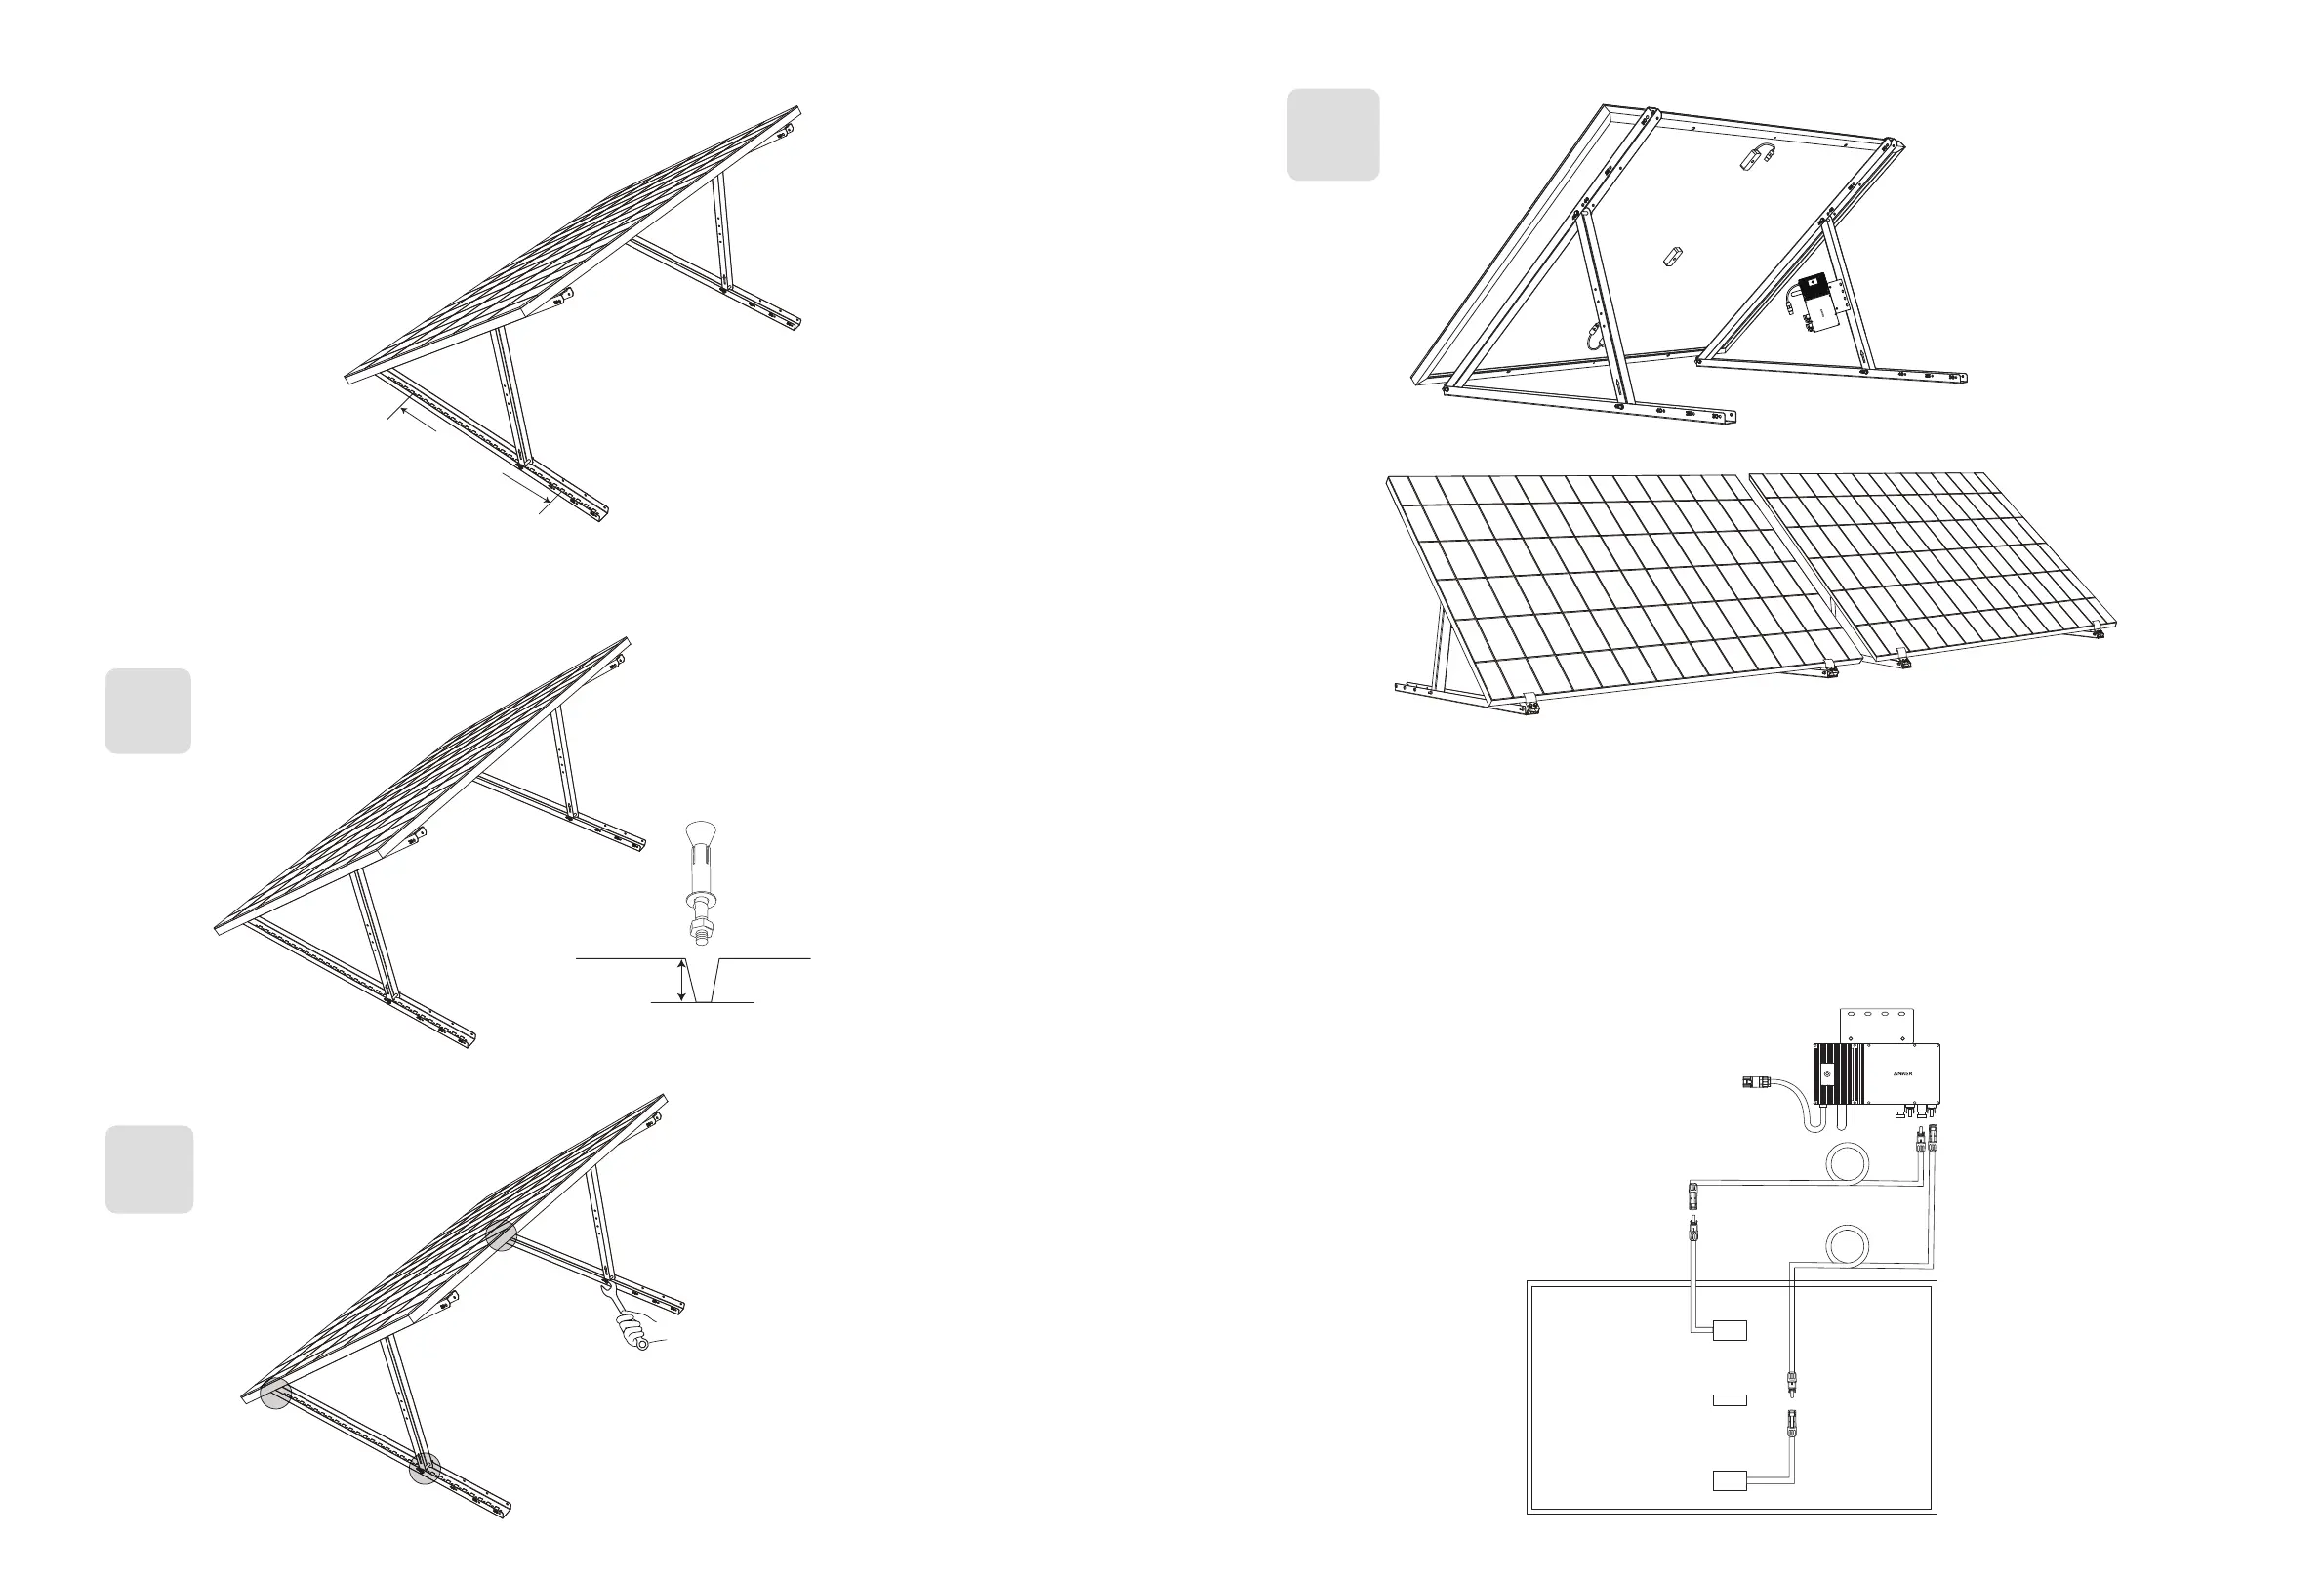
5. Align the solar panel with the holes on the vertical support scaoldings to mark four mounting points. Mounting points on the
same vertical support scaolding should be 800mm (31.4in) apart.
6. Remove the solar panel, mark the mounting points, and drill the holes 63mm (2.4in) deep with an electric drill. Then, secure
the scaolding with nuts.
Note: The vertical scaolding should be secured with anchors to prevent them from falling.
H x4
J x4
7. Tighten all the screws with 5N.m torque.
N x1
5N.m
8. Install the microinverter to the lower support beams.
I x2
J x4
9. Repeat the steps above to install another solar panel.
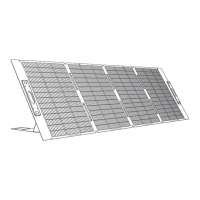
10. Connect the solar panel and the microinverter with the solar panel extension cables. When the LED indicator starts flashing,
wait for 90 seconds.
Note:
1. Ensure that two solar panels have been installed before this step.
2. This step must be done while there is enough sunlight for the solar panel to provide power to the microinverter.
Status Check:
I. The LED light on the microinverter should flash red slowly (on for 2 seconds, then o for 2 seconds), which indicates that the
microinverter is ready. If not, you will need to unplug and replug the solar panel's extension cable.
II. You can find the microinverter's SSID on your device's Wi-Fi pairing page (named MI-XXXXXXXXX) (Do not pair this SSID with your
device at this time). Unplug the extension cable from the solar panel and reinstall it if you cannot locate it. After the LED light has
flashed for 90 seconds, check again.
1.5m