Installation 6 (16)
2.3 Mechanical Installation
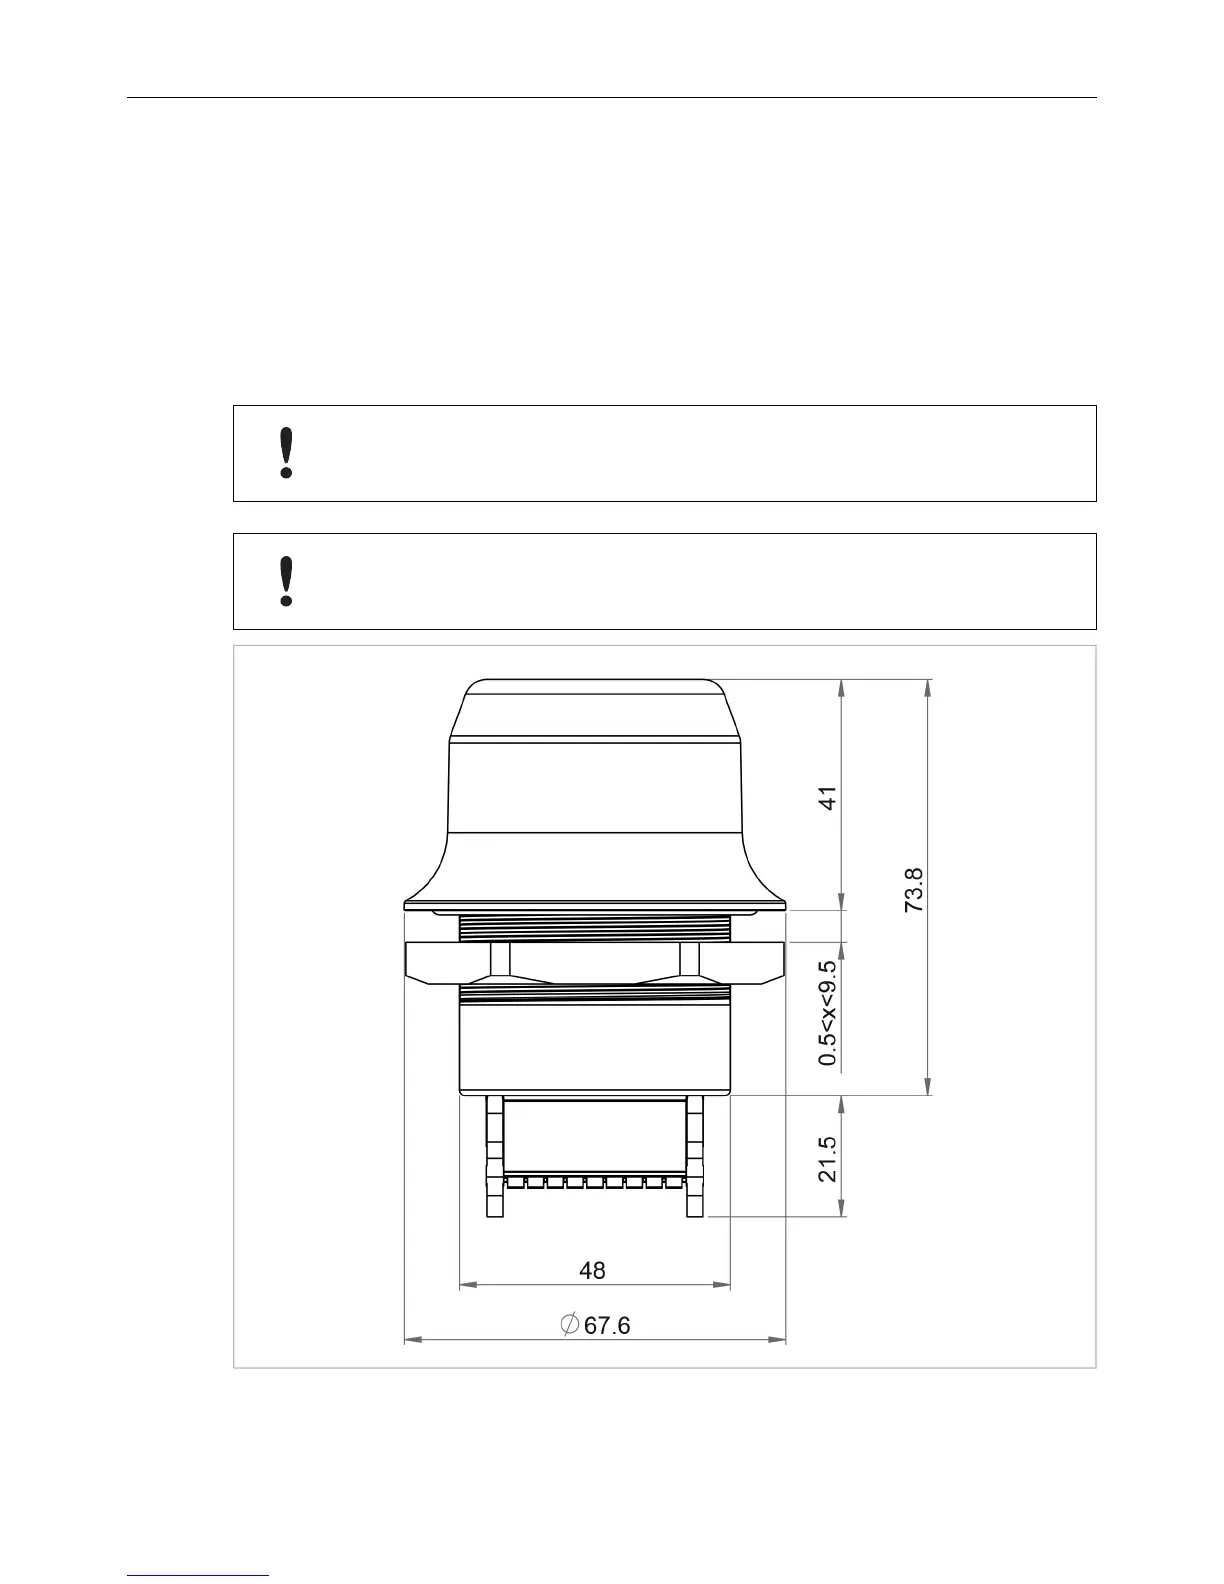
The device is intended to be mounted on top of a machine or cabinet through an
M50 (50.5 mm) hole using the included sealing ring and nut.
The top mounting surface (in contact with the sealing) must be flat with a finish
equivalent to Ra 3.2 or finer and cleaned and free from oils and greases.
Tightening torque: 5 Nm ±10 %
Make sure that the sealing ring is correctly placed in the circular groove in
the top part of the housing before tightening the nut.
Always hold the BOTTOM part of the unit when untightening the nut, not
the top part (the cap).
All measurements are in mm.

 Loading...
