11
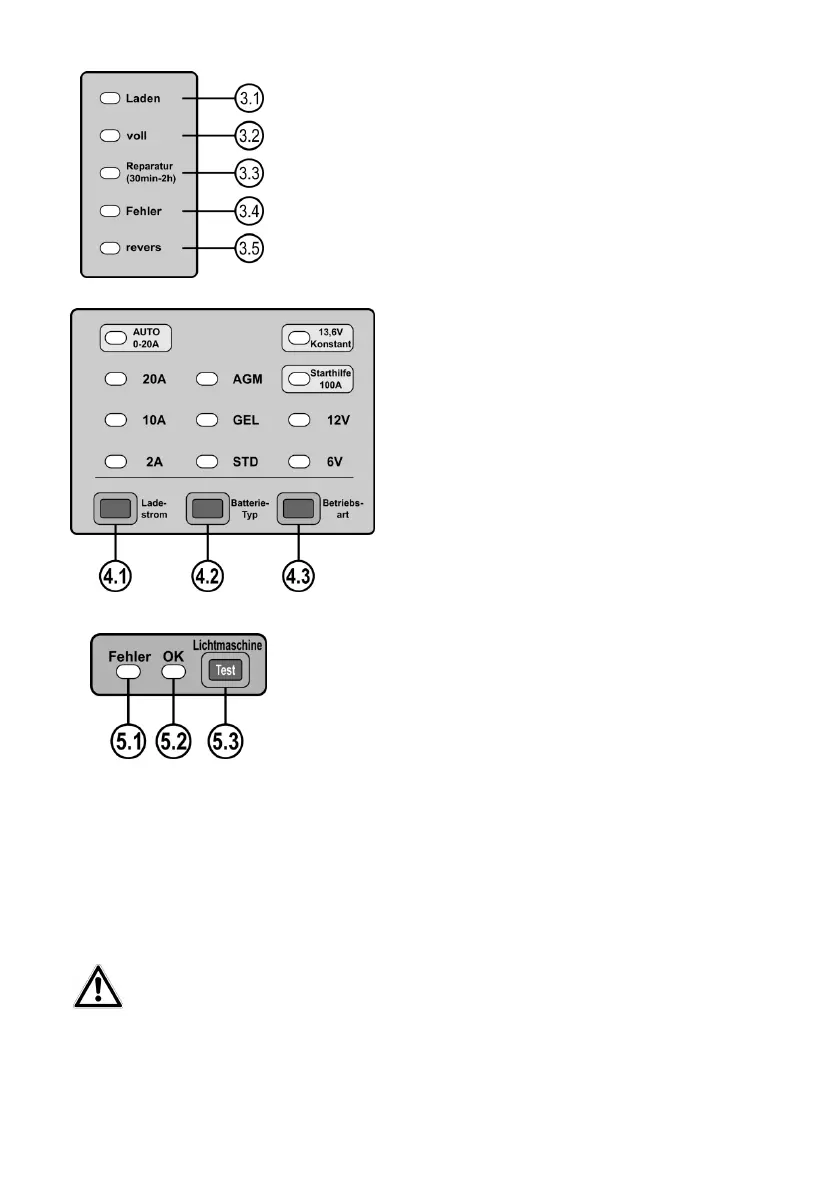
3.1 Charge, the battery is being charged
3.2 Full, the charging procedure is complete
3.3 Repair (program for desulphation)
3.4 Error, no battery, defective battery, incorrect voltage selected
3.5 Inverse, battery terminals connected incorrectly
Figure 3: Control lamps for operating status
4.1 Selection switch for charge current 2, 10, 20, Auto (0-20) [A]
4.2 Selection switch for battery type Standard, GEL, AGM
4.3Selection switch for operating mode, 6V charge, 12V
charge, jump-start 12V, constant-current source 13.6V
Figure 4: Operating panel function selection
5.1 Control lamp for generator error
5.2 Control lamp for generator OK
5.3 Switch generator test ON
Figure 5: Operating panel for generator test
6.2 Charging a battery
6.2.1Preparation
Clean the battery terminals to remove dust and corrosion residue.
Only for open batteries: Remove the plugs of the battery cells. Replenish distilled water up to the minimum ll
level. Leave the cells of the battery open until the end of the charging process.
With maintenance-free batteries, follow the instructions of the battery manufacturer precisely.
6.2.2 Connecting the battery charger
Caution: Make sure that the charger is not connected to the power socket. Always rst connect the red
plus cable (+) of the charger to the plus pole of the battery. Subsequently, connect the black minus cable
(-) to the negative pole of the battery. If you charge the battery in situ, connect the black negative cable
(-) to the car body (exposed part), far away from the battery, the carburettor and fuel lines. Always maintain this
sequence.