12
Now, connect the power plug of the charger to the mains socket.
Caution: When the red control lamp „inverse“ (Position 3.5 in the overview) lights up, the charge cables
have been connected incorrectly. Remove the pole callipers from the battery terminals and connect them correctly.
Caution: When the red control lamp „Error“ (Position 3.4 in the overview) lights up, check whether the
set charge program and the connected battery correspond. Check the battery for defects.
6.2.3 Setting the battery charger
First, in the function selection control panel (Position 4 in the overview) use the selection switch for the operating
mode (Position 4.3 in the overview) to set the voltage for the battery, 6V or 12V. Then, using the switch for battery
type (Position 4.2 in the overview), select the appropriate type for your battery. Using the selection switch for the
charge current (Position 4.1 in the overview), set the appropriate charge current.
6.2.4 Charging procedure
Start the charging procedure by pressing the Start/Stop button (Position 6 in the overview). In the control eld for
the operating status (Position 3 in the overview), the control lamp „Charge“ (Position 3.1 in the overview) lights
up. If the control lamp „Repair“ (Position 3.3 in the overview) lights up, the charger carries out a program for desul-
phation.
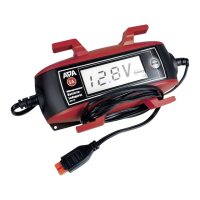
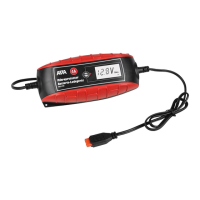
With the selection button for the display (Position 2.4 in the overview) you can set the display to charge voltage,
charge current and charge progress.
The control lamp „full“ (Position 3.2 in the overview) shows that the battery is fully charged and that the battery
charger has switched over to maintenance mode.
6.2.5 Removing the charger
Press the Start/Stop button to end the charging procedure.
Caution: First pull the plug out of the socket and observe the sequence for disconnection. This prevents
sparks from forming. Since charging generates a detonating gas, this is particularly important for the sake
of your safety.
Disconnect the charger from the mains power supply.
Then disconnect the black callipers (minus). Then remove the battery callipers from the plus pole of the battery
(red callipers).
Allow the battery to cool and ll the cells with distilled water to the lling level named by the battery manufacturer.
Close the battery cells using the caps.
6.3 Using as jump-start assistance for 12 V vehicles
6.3.1 Connecting the battery charger
Caution: Make sure that the charger is not connected to the power socket. Always rst connect the red
plus cable (+) of the charger to the plus pole of the battery. Then connect the black negative cable (-) to
the car body (exposed part), far away from the battery, the carburettor and fuel lines. Always maintain
this sequence.
Now, connect the charger to the mains socket.
6.3.2 Setting the battery charger
First, in the function selection control panel (Position 4 in the overview) use the selection switch for the operating
mode (Position 4.3 in the overview) to set the jump-start 100 A function.
6.3.3 Jump-start procedure
Press the Start/Stop button. Start the motor. Do not operate the starter for longer than 6 seconds. If the start
attempt is not successful, wait for at least three minutes before starting the next attempt. After the third failed
 Loading...