Apeks ATX Second Stage Service Manual
5
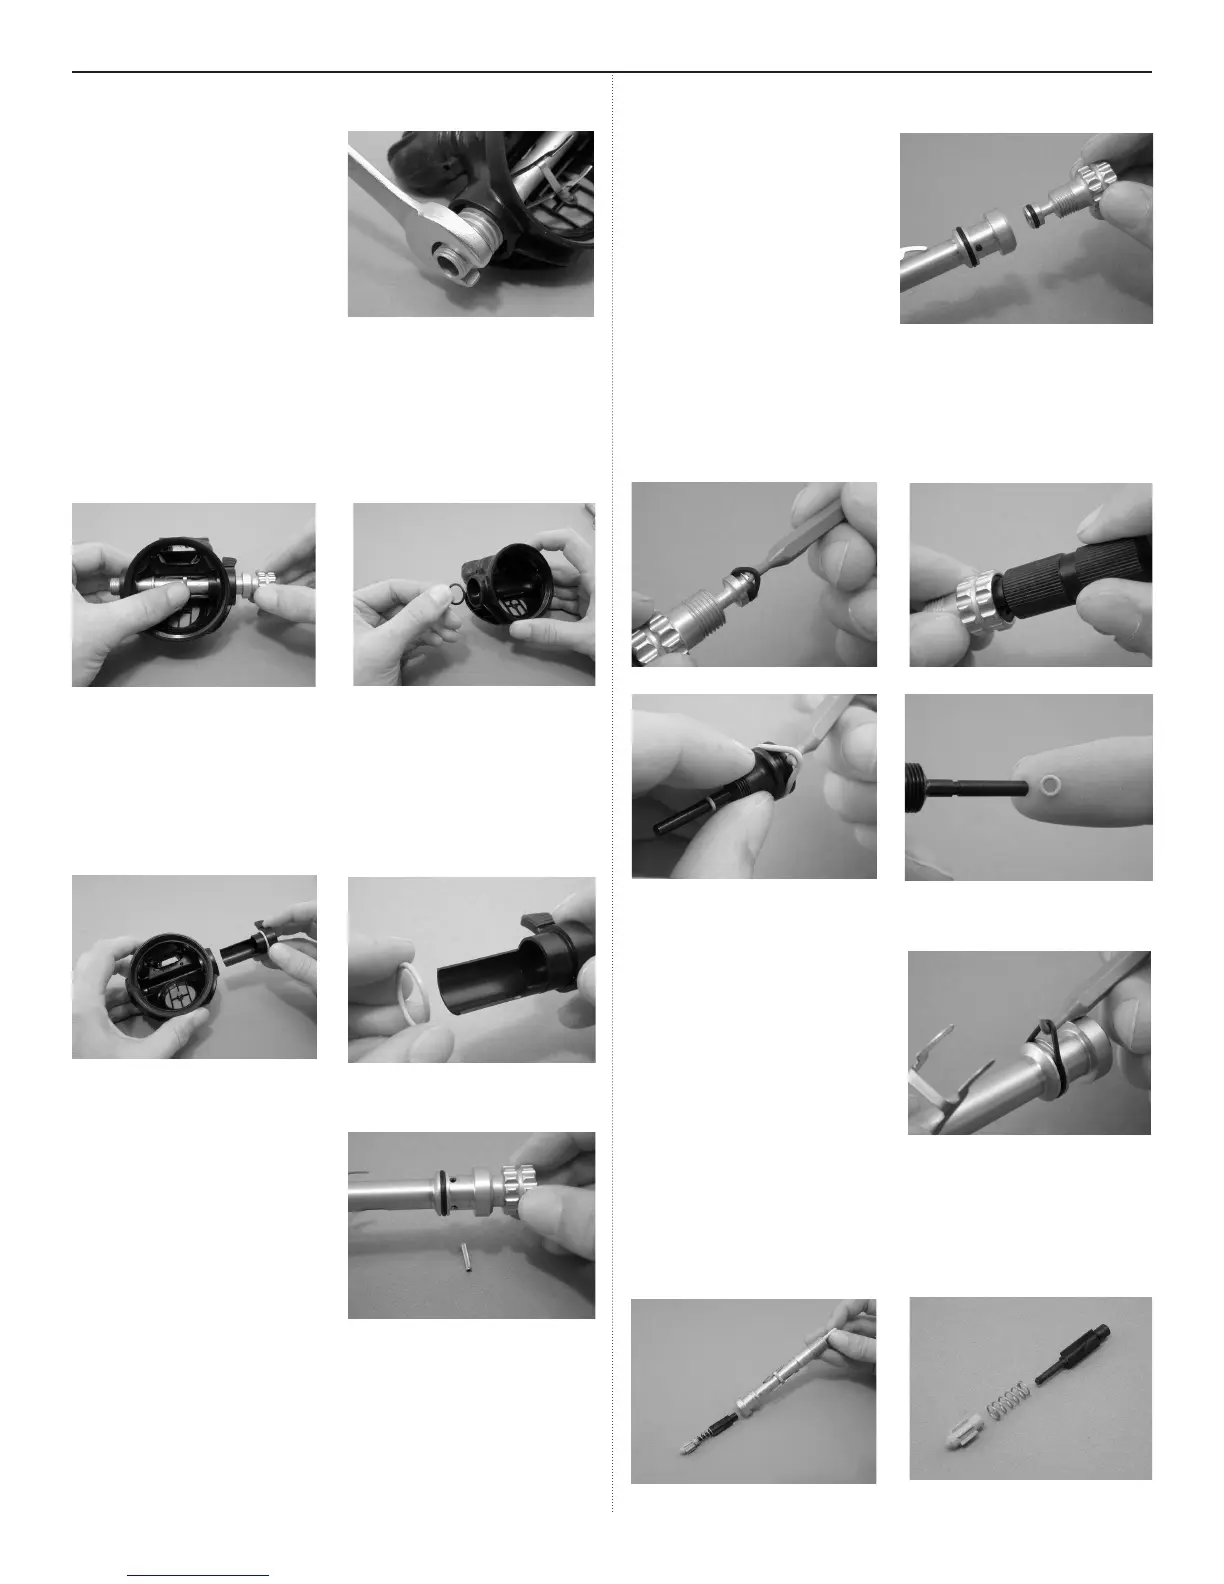
5. Using an ¹¹₁₆” wrench, re-
move the heat exchanger
(11).
9. Unscrew the adjustment
knob (18) and completely
remove it from the valve
body.
6. Turn the adjustment knob counterclockwise until it stops.
Press the lever (28) against the valve body (25). While
keeping the lever depressed, grasp the knob and pull the
valve body assembly out of the case (7). Remove the valve
body o-ring (12) that will probably be left behind in the left
side of the box bottom as you look at it.
7. Grasp the venturi lever (14) and pull it out of the box bottom.
Remove the o-ring (13) from the venturi lever.
NOTE: The venturi lever may have come out with the
valve body in step 6. If this is the case, depress the lever
and slide the lever off from right to left.
8. Turn the knob clockwise
(inward) one turn. The
pin (29) should drop out.
If the pin remains in the
valve body, use a 1/16”
dowel or punch to push
it partially out, then use
needlenose pliers to
completely remove it from
the valve body.
10. Remove the o-ring (19) from the adjustment knob. Using
the Spring Adjuster Tool (p/n AT45), unscrew the spring
adjuster (15). Remove the two o-rings (16 & 17) from the
spring adjuster.
11. Remove the o-ring (12)
from the valve body.
13. Insert a small 1/8” wooden dowel into the threaded end of
the valve body and push out the shuttle valve assembly (20-
24). Separate the shuttle valve assembly by pulling on each
end.
 Loading...


