Apeks ATX Second Stage Service Manual
7
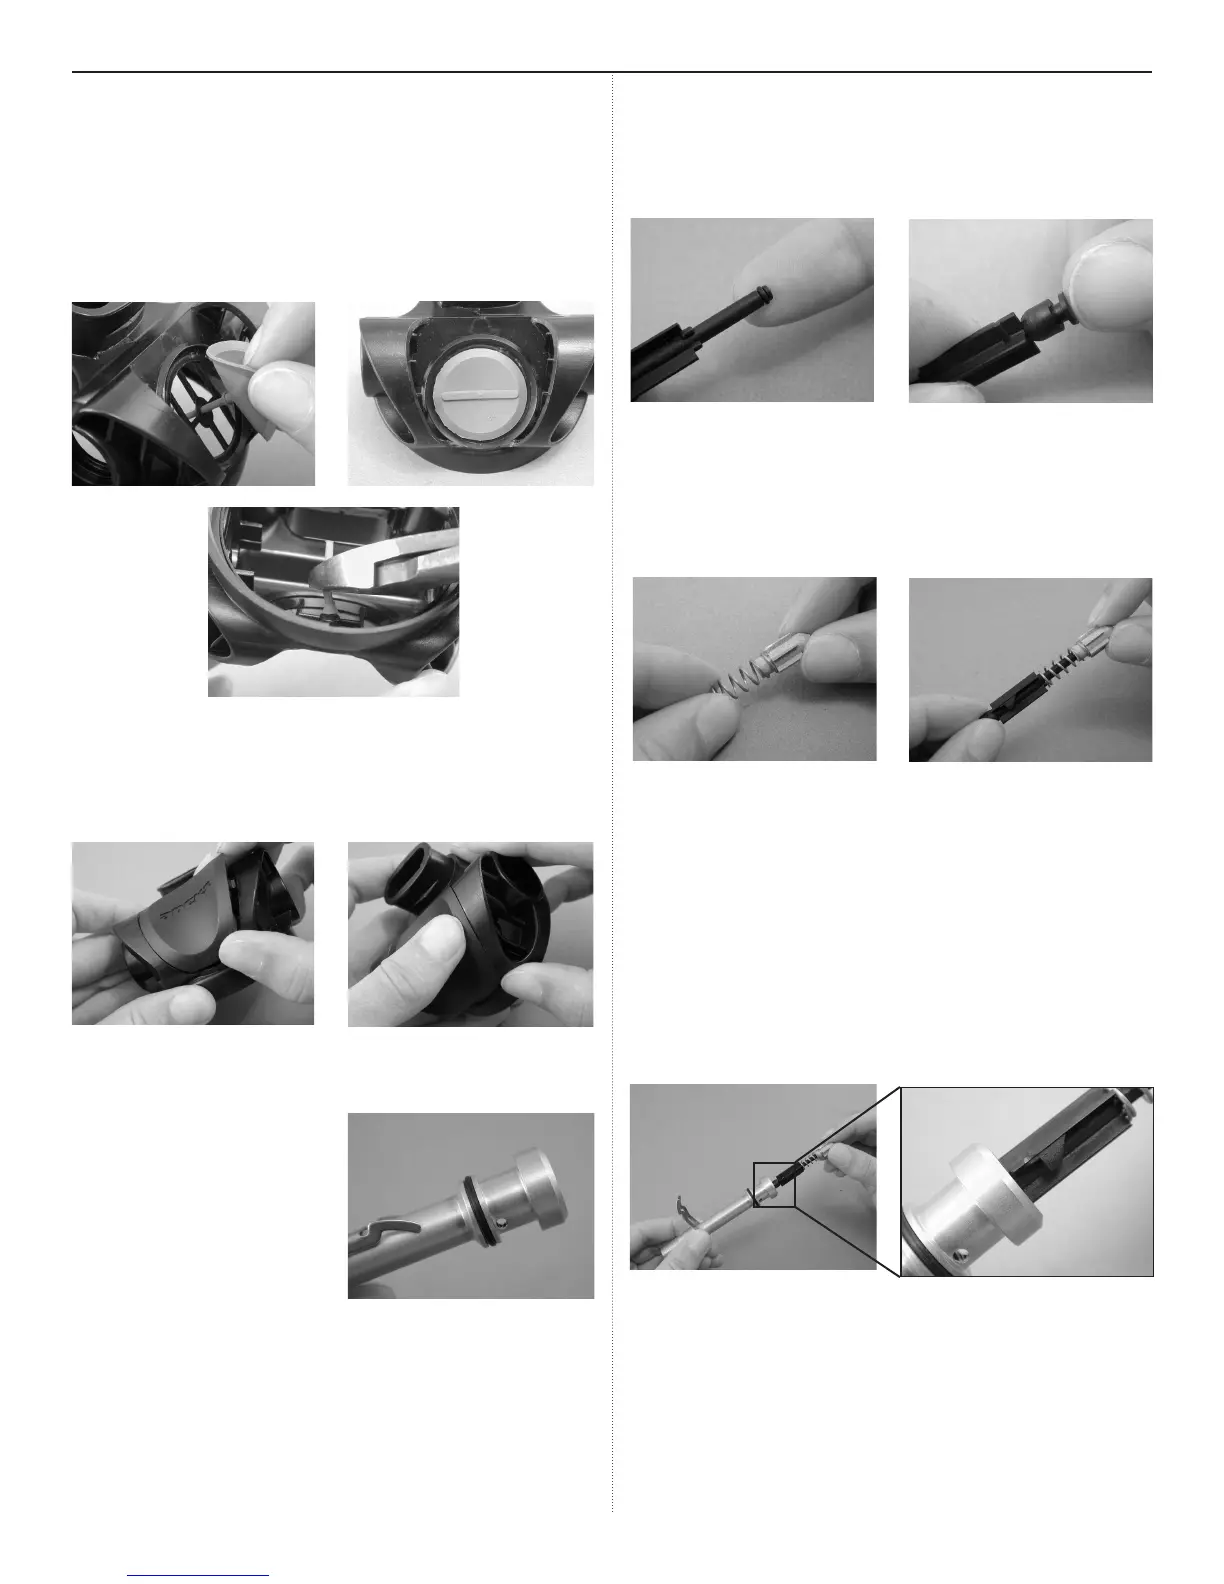
REASSEMBLY PROCEDURES
1. If the exhaust valve (30) was removed, thread the tail
through the retaining hole on the outside of the box bottom
until the barb engages on the inside. Align the rib so it is
horizontal. If it is a new valve, cut the excess stem with side
cutters leaving approximately 5mm of the tail behind.
2. Orient the exhaust cover (31) with the logo facing outward
(the side with two tabs pointing to the left). Slide the two
tabs into the exhaust port, then press down on the right
side of the exhaust cover to snap it into place.
3. Install a new, lubricated
o-ring (12) onto the valve
body (25).
4. Install a new, lubricated o-ring (22) onto the stem of the
shuttle valve (23). Press a new low pressure seat (24) into
the front of the shuttle valve.
5. Fit the valve spring (21) onto the leading edge of the coun-
terbalance cylinder (20). Carefully guide the stem of the
shuttle valve through the spring and into the counterbalance
cylinder.
6. If you removed the lever, replace it so that the lever is on
the side opposite the two pin holes. (The air outlet hole
should point to the left with the threaded end facing you.)
7. With the “feet” of the shuttle valve pointing downward (away
from the lever) and the lever pointing straight up (perpen-
dicular to the valve body), insert the valve assembly into
the valve body. Using your nger, press the shuttle valve
assembly all the way into the valve body.
 Loading...


