6
Apeks ATX Second Stage Service Manual
7
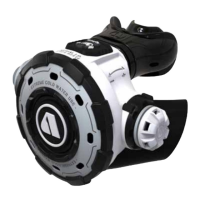
14. Using a ngernail, remove the LP seat (24) and small o-ring
(22) from the shuttle valve.
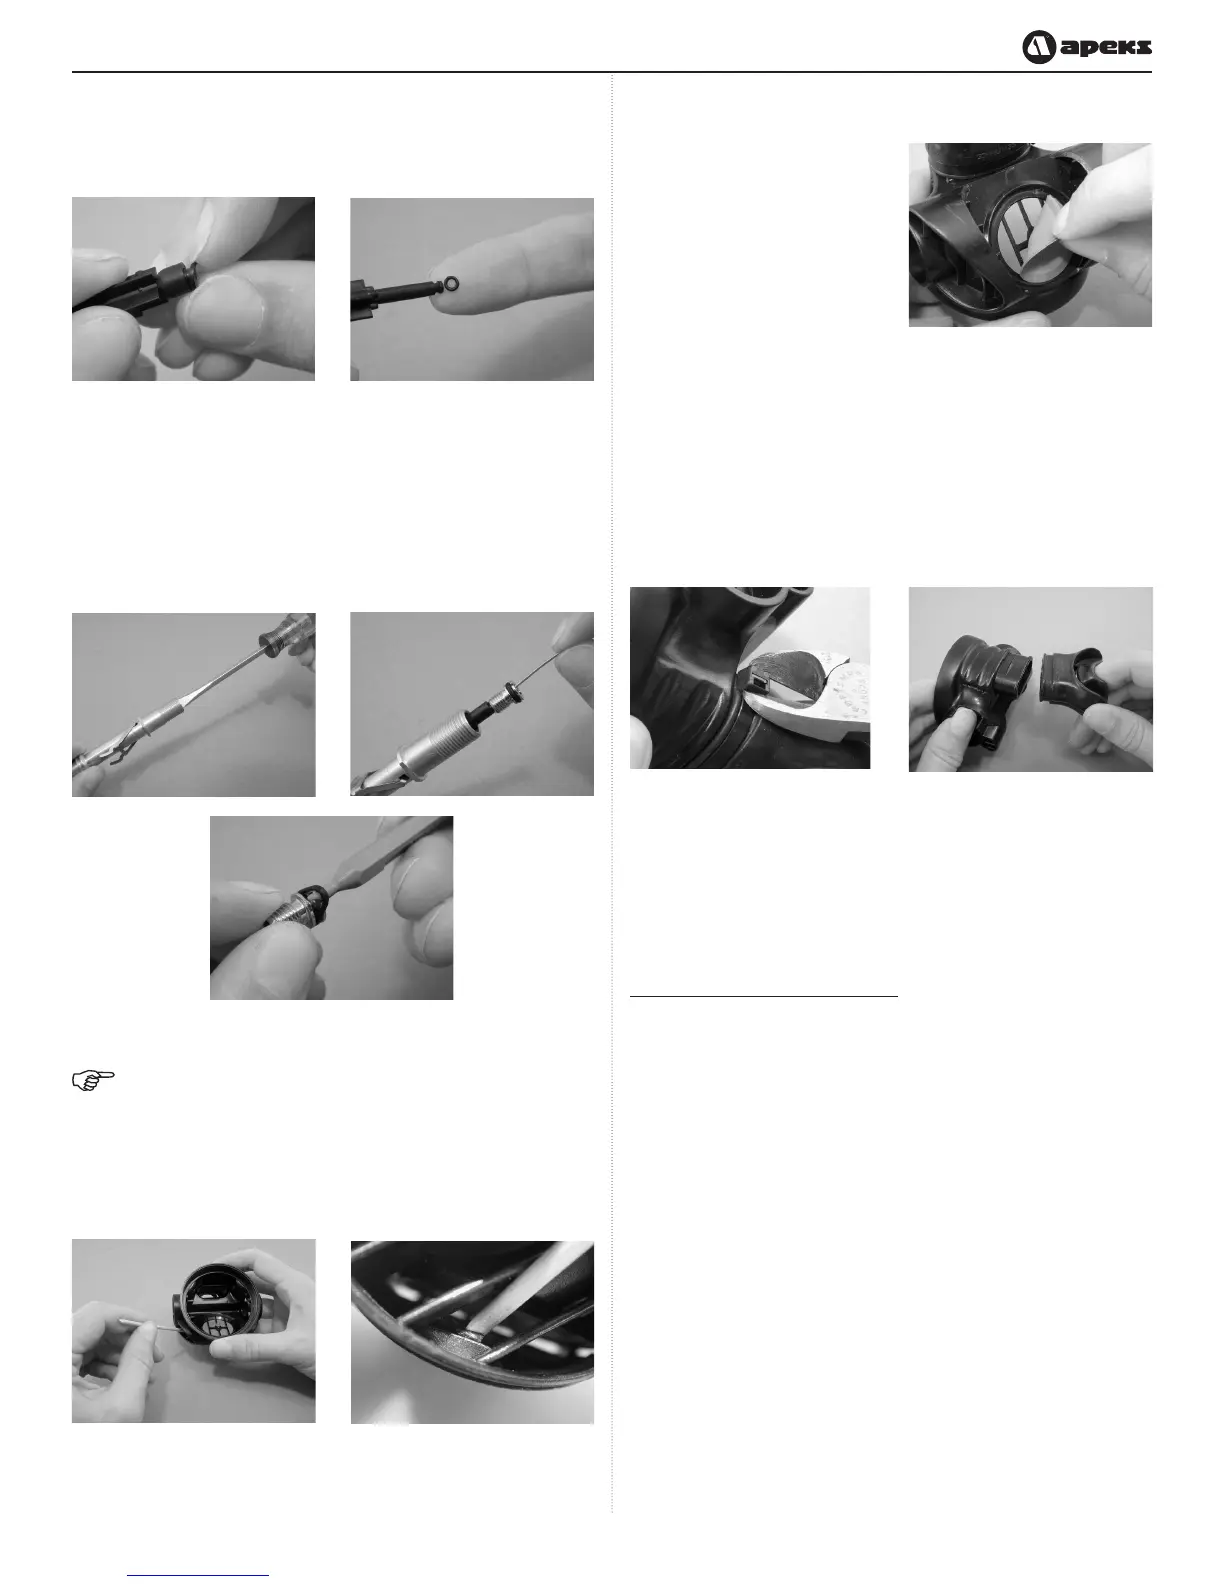
17. Fold back the edges of
the exhaust valve (30)
and inspect underneath.
The seating surface
should be clean and free
of damage. Inspect the
exhaust valve. It should
be supple and have well
dened edges. If it looks
good, there is no need
to remove it and it may
be reused. If there is any
sign of deterioration, it
should be replaced.
15. Using a medium blade screwdriver, turn the crown (27)
six to seven full turns counterclockwise. Since the crown
is o-ring sealed, it will not completely unscrew from the
valve body. Insert the pin end of the seat extractor tool
(p/n 109436) into the valve body, grasp the pin and pull the
crown completely out of the valve body. Remove the o-ring
(26) from the crown.
Note: The exhaust tee is a molded part of the case and
cannot be removed. Only the exhaust cover can be re-
moved (see next step)
16. To remove the exhaust cover (31), locate the retaining
tab located inside the exhaust port (see picture). Using a
wooden dowel, press in on the upper ledge of the tab at an
angle and pop out the exhaust cover.
18. Using side cutters, snip the mouthpiece clamp (8). Remove
the mouthpiece (9).
This Ends Disassembly
Before starting reassembly, perform parts
cleaning and lubrication according to the
procedures outlined in Procedure A, titled
Cleaning & Lubrication, on page 15.

 Loading...