CAUTION: Never remove the diaphragm by prying or digging
around the edges. This will cause irreversible damage to the
rst stage body.
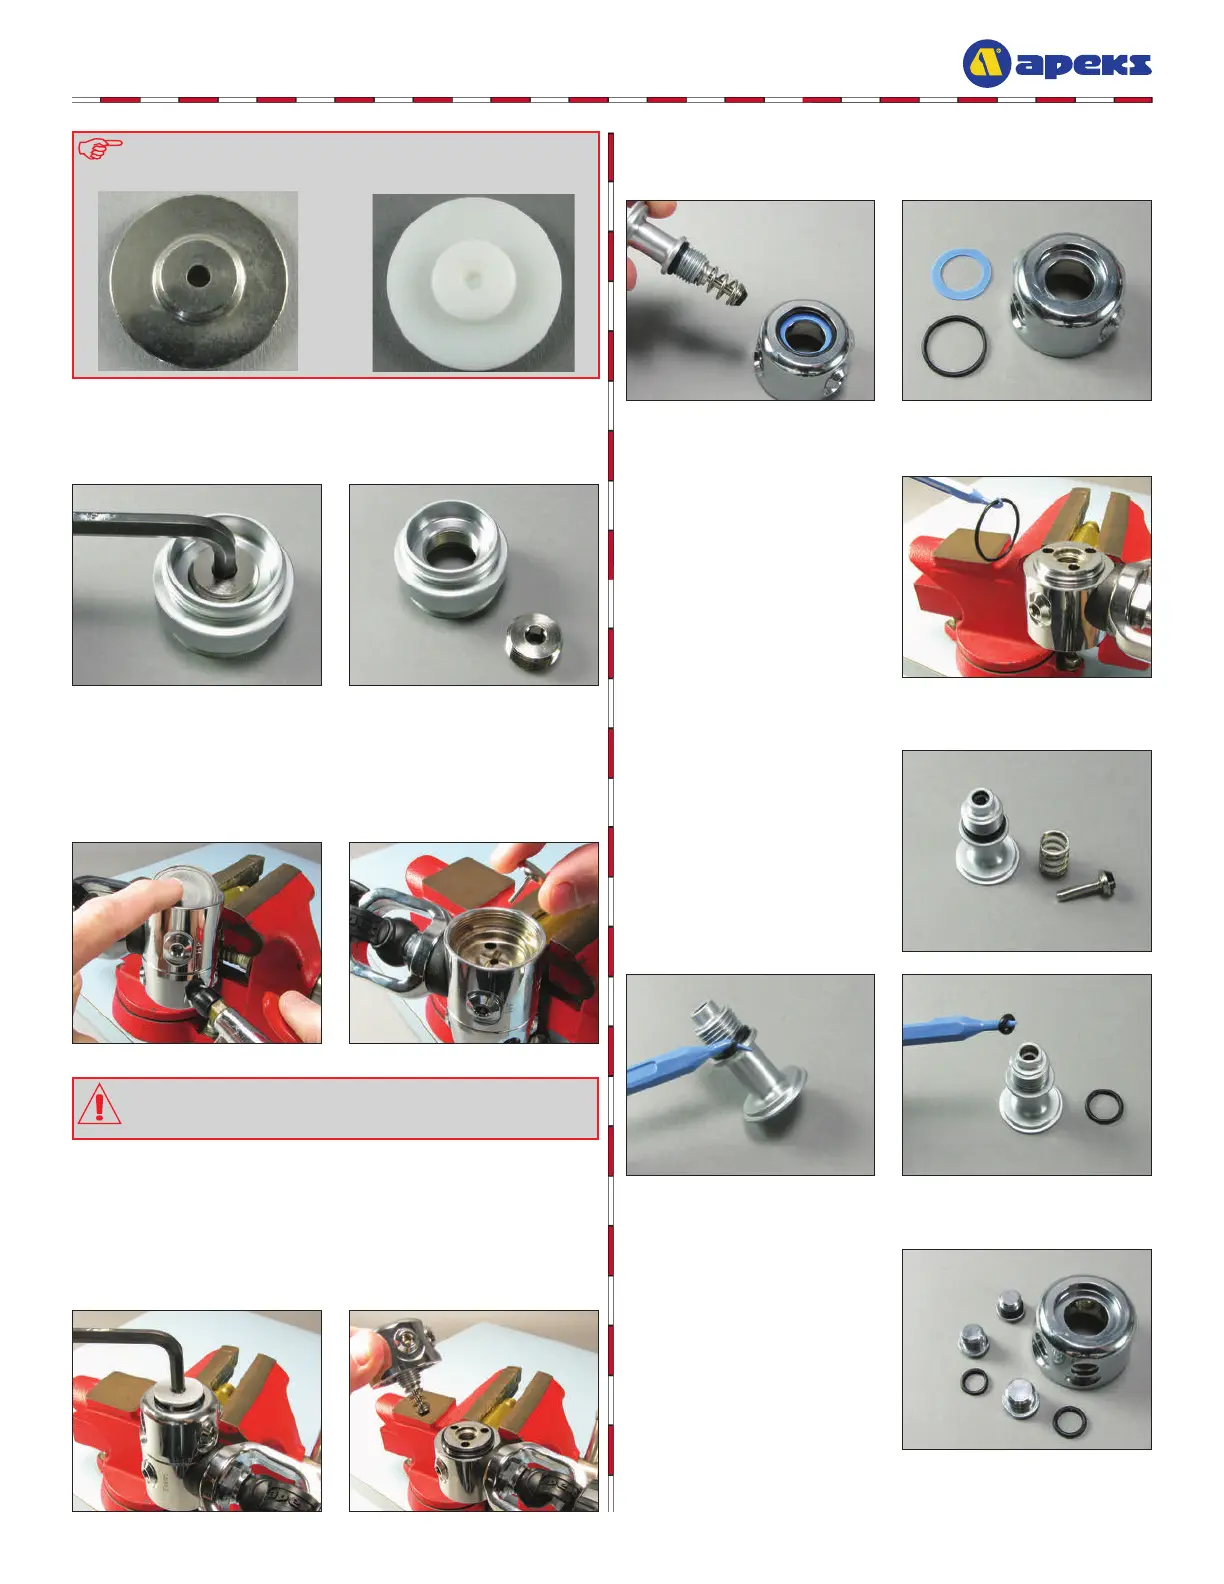
NOTE: You may encounter a new revision spring carrier. This
was an inline change. Either version of the spring carrier is ac-
ceptable to use.
6
8
Using a 6mm hex key, turn the spring adjuster (22) counter-
clockwise and remove it from the diaphragm clamp (21).
10
Rotate the body so that the turret (8) is facing upward. Insert
a 6mm hex key into the end of the turret retaining bolt (15)
and turn counter-clockwise to loosen. Lift the turret off of the body
(5). The spring (12) and HP valve (11) should come away with the
turret bolt.
14
Using a 5mm hex key,
remove the MP blanking
plugs (9,18). Remove the o-rings
(10,13) from the blanking plugs.
9
While keeping your nger over the diaphragm to prevent it from
ejecting, insert a LP air nozzle into a MP port and blast a small
amount of air into the rst stage. This will eject the diaphragm (3).
Pull the valve lifter (4) out of the rst stage body (5).
12
Remove the turret o-ring
(7) from the body (5). If
you do not see the o-ring, check
the inside of the turret (8).
11
Remove the turret retaining bolt (15) from the turret (8). Lift
out the o-ring (16) and blue thrust washer (14) from the top of
the turret.
13
Remove the spring(12)
and the HP valve (11)
from the turret (8). Remove the
o-ring (13) from the outside of
the turret retaining bolt (15) and
carefully remove the o-ring (17)
from the inside.
Original Spring Carrier
Revised Spring Carrier