CAUTION: The spring and spring carrier will come out once
the diaphragm clamp is completely removed. Ensure the rst
stage is over a workbench when removing the diaphragm
clamp to avoid losing or damaging parts.
CAUTION: Use only a plastic or brass o-ring removal tool
when removing o-rings to prevent damage to the sealing
surface. Even a small scratch across an o-ring sealing surface
could result in leakage. Once an o-ring sealing surface has
been damaged, the part must be replaced with new. DO NOT
use a dental pick or any other steel instrument.
NOTE: Before performing any disassembly, refer to the exploded
parts drawing, which references all mandatory replacement parts.
These parts should be replaced with new, and must not be reused
under any circumstances – regardless of the age of the regulator or
how much use it has received since it was last serviced.
NOTE: If during the removal of the enviromental end cap; the dia-
phragm clamp remains attached, you will need to use a second pin
spanner in the opposite direction to hold the clamp steady.
DST First Stage Technical Maintenance Manual
5
DISASSEMBLY PROCEDURES
1
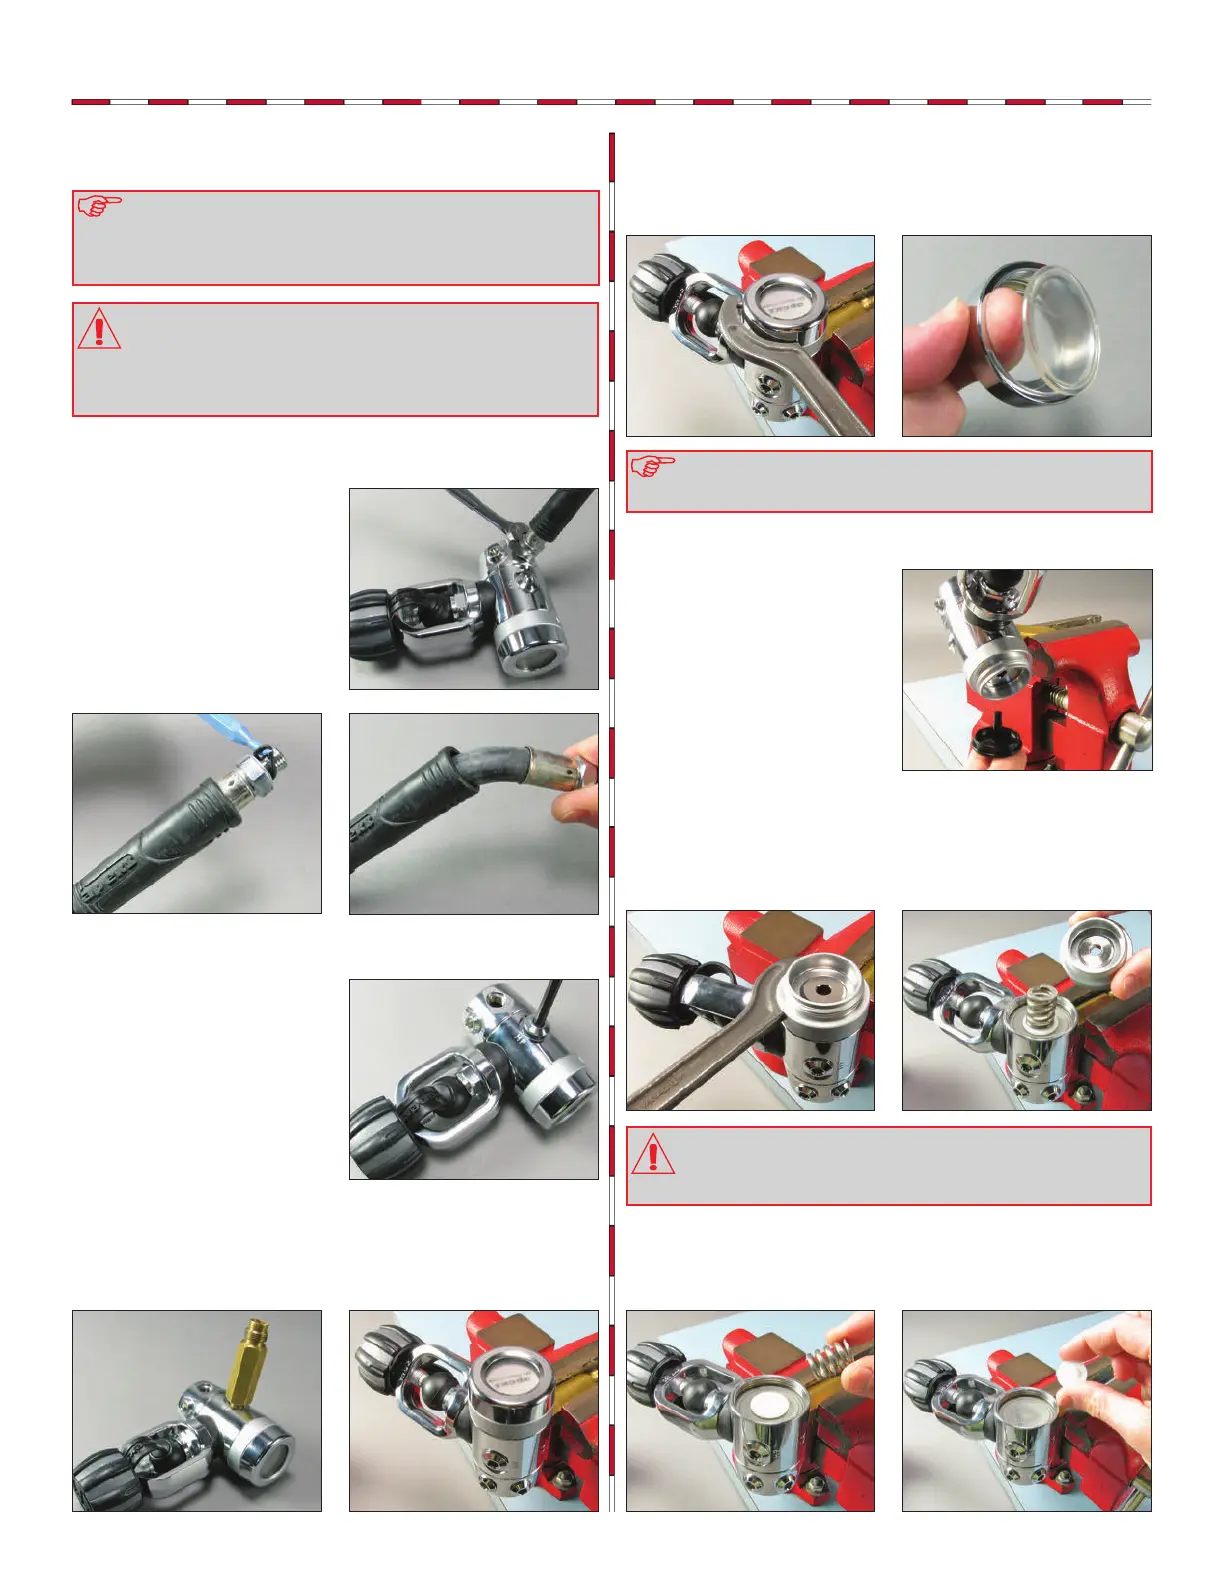
Remove the MP hose with
a 9/16” wrench, remove
all remaining hoses from the
rst stage body. Use an o-ring
removal tool to remove the o-
ring from the male end of the
hose and discard. Check hose
crimps for any signs of dam-
age. Replace hose if needed.
3
Thread the vice mounting tool (pn 100395) clockwise into the open
HP port. Secure the vise mounting tool and rst stage into a bench
vise with the enviromental end cap (26) facing upward.
4
Insert the Apeks pin spanner (pn AT30) into the hole of the
environmental end cap (26). Ensure that the pin spanner is sitting
ush to avoid damage to the end cap. Turn the environmental end
cap counter-clockwise to remove it from the diaphragm clamp (21).
Remove and discard the hydrostatic diaphragm (25).
5
Ro t a t e t h e fi r s t s t age
and allow the hydrostatic
transmitter (23) to fall out of the
diaphragm clamp (21).
6
Rotate the rst stage so that the diaphragm clamp (21) is facing
upward. Use the pin spanner to turn the diaphragm clamp
counter-clockwise to loosen. Continue to unscrew the diaphragm
clamp by hand.
2
Using a 5mm hex key,
remove a single HP blanking
plug (19) by turning it counter-
clockwise.
7
Remove the spring (1) and spring carrier (2).