4
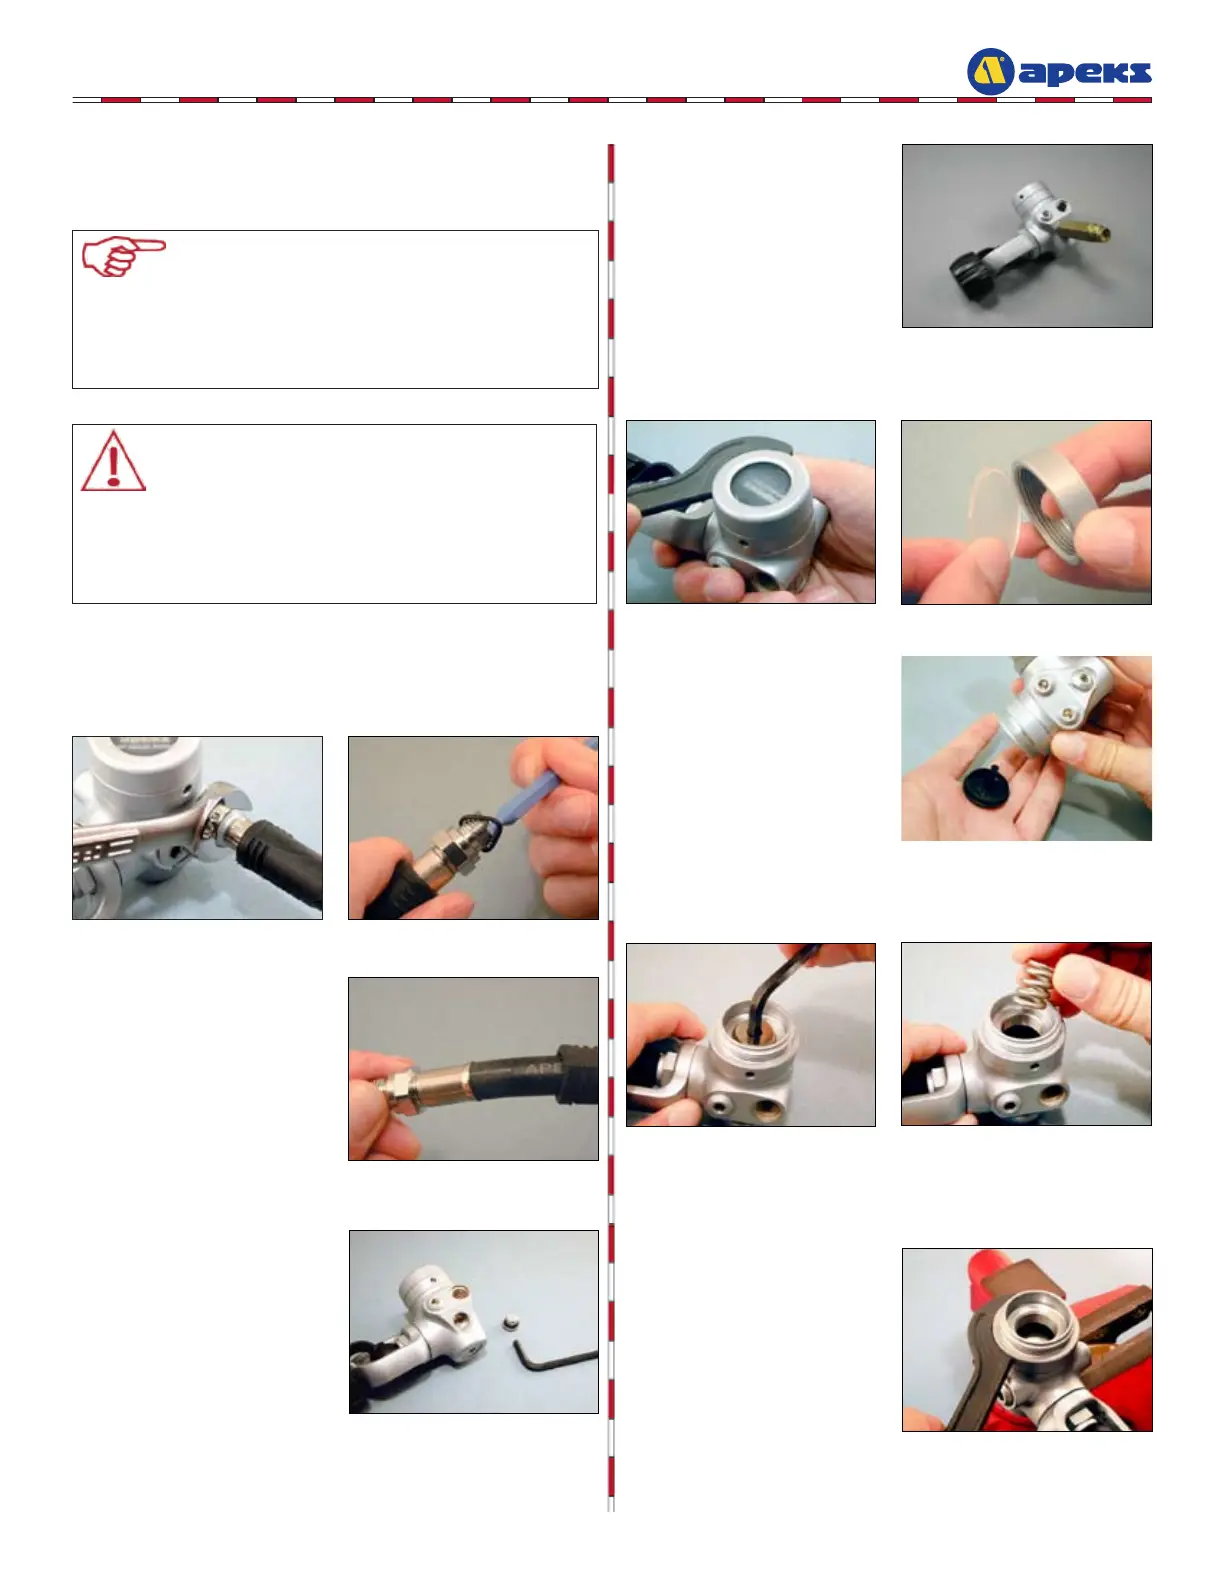
CAUTION: Use only a plastic or brass o-ring
removal tool (pn 944022) when removing o-rings
to prevent damage to the sealing surface. Even
a small scratch across an o-ring sealing surface
could result in leakage. Once an o-ring sealing
surface has been damaged, the part must be
replaced with new. DO NOT use a dental pick or
any other steel instrument.
NOTE: Before performing any disassembly, refer
to the exploded parts drawing, which references all
mandatory replacement parts. These parts should
be replaced with new, and must not be reused
under any circumstances – regardless of the age of
the regulator or how much use it has received since
it was last serviced.
DISASSEMBLY PROCEDURE
1. Use an 11/16 open end wrench to remove the MP hose from
the rst stage body (12). Using the o-ring removal tool (pn
944022), remove the o-ring from the male end of the hose
.
5. Using the pin spanner (AT30), remove the end cap (1). With
your nger, push out the hydrostatic diaphragm (2).
6.
Tip the body over and
remove the hydrostatic
transmitter (4).
4. Install vice mounting tool (pn
100395) into the open HP port.
2. Pull back the hose
protectors and inspect the
hose crimps. If the crimp
is damaged or the hose is
pulling out of the crimp, the
hose must be replaced.
3. Using a 5mm hex key,
remove a single HP
blanking plug (27).
7. Using a 6mm hex key, remove the spring adjuster (5). Lift out
the main spring (8).
8. Secure the vice mounting
tool into a bench vise.
Using the pin spanner
(AT30), remove the
diaphragm clamp (7).
Removal of Diaphragm Clamp (TX & ATX series)
 Loading...


