6
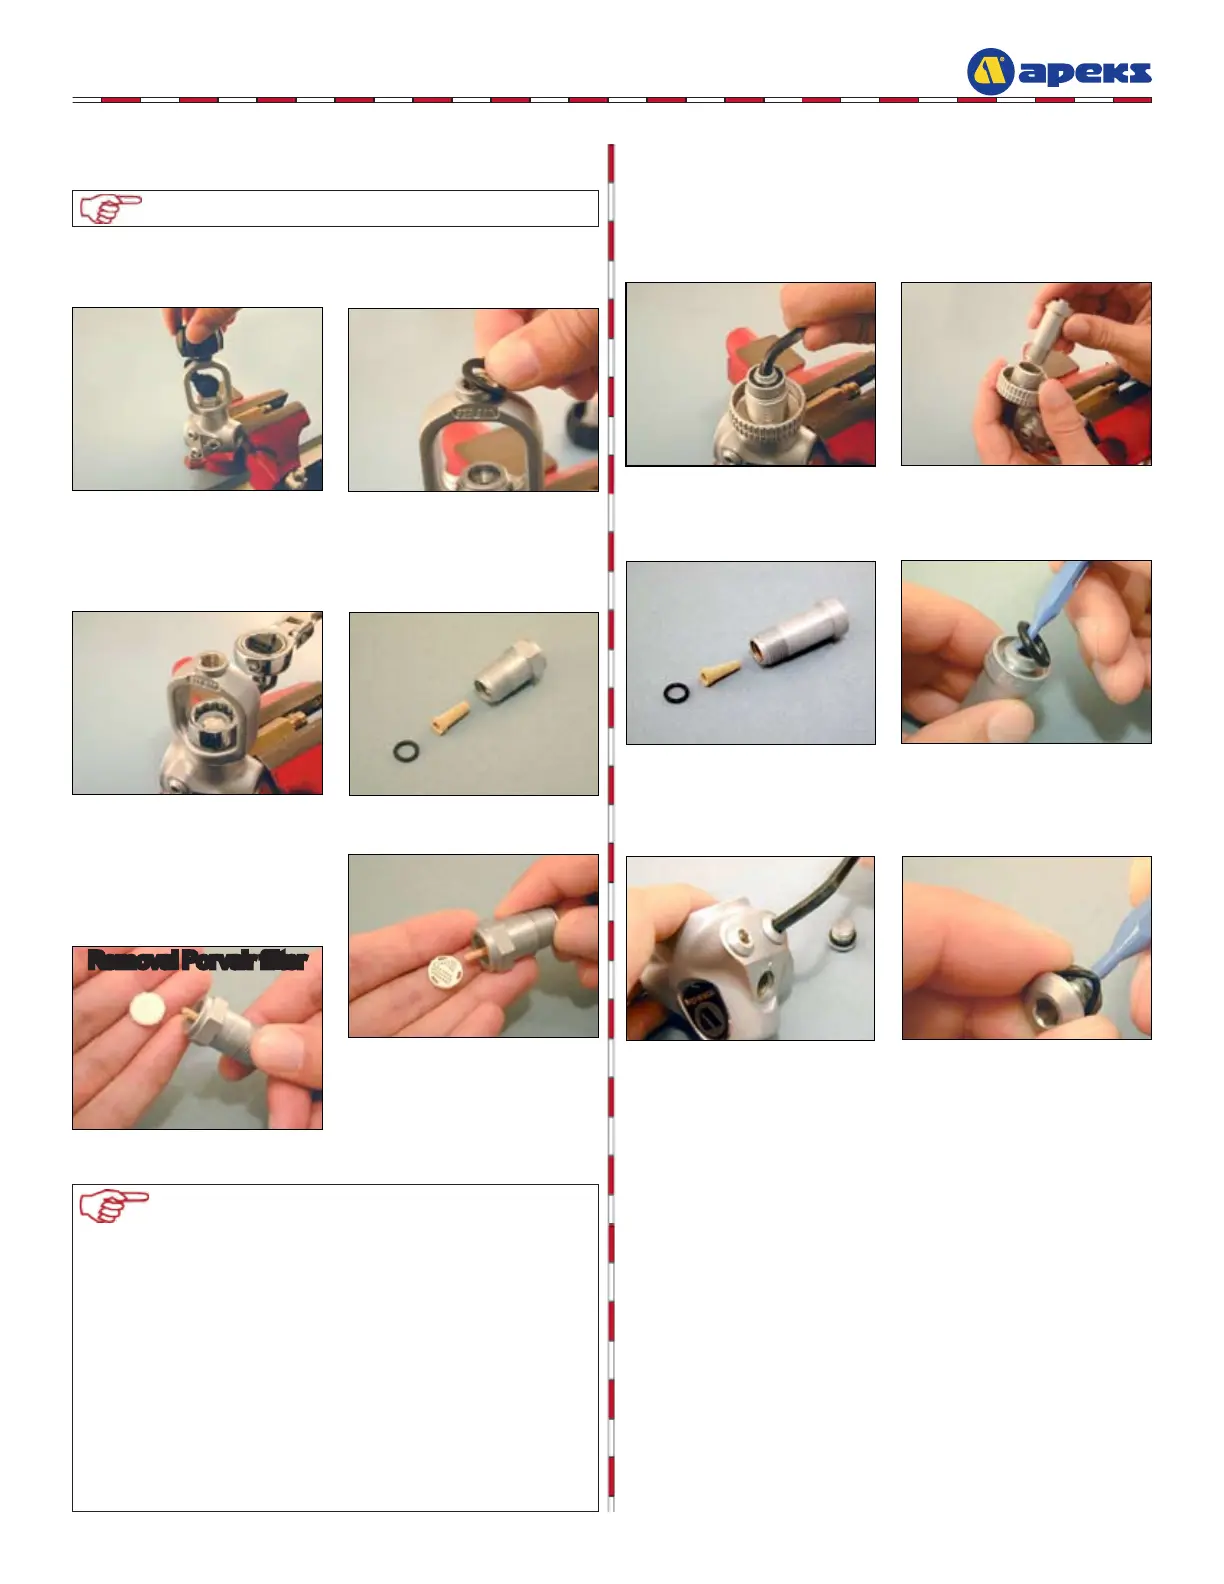
15. Install body in bench vise, remove the yoke clamp screw (25).
Peel the protective cap (23) off the yoke clamp (20).
16. Using a 3/4” box end wrench, remove the yoke clamp
connector (21) and lift off the yoke clamp (20). Remove the
body from the vise and unthread the vise mounting tool.
17. Insert a dowel through the
open end of the yoke clamp
connector (21) and push
out the lter guard (22).
18. Install body in bench vise. After removing the protective cap
(32) from top of DIN handwheel (34), use a 6mm hex key to
loosen and remove the handwheel connector (33). Lift the
handwheel (34) off the body.
19. Remove the o-ring (13) and lter (35) from the backside of
the handwheel connector (33). Remove the face o-ring (24).
20. Using a 5mm hex key, remove the remaining blanking plugs
(27,31) from the body (12). Remove all o-rings (13,28) from
the blanking plugs.
NOTE: Up until September 2002, Apeks used a white
disc lter known as the Porvair lter in it’s yoke model
rst stages. While Porvair was an excellent lter for
air, it was determined to not be acceptable for use
with enriched air nitrox (EAN). Since Apeks preferred
all of it’s models to be EAN40 compatible new, out of
the box, the Porvair lter was discontinued. Apek’s
standard conical lter (pn AP1472 as used with the DIN
connection) was substituted. Please note that where
the Porvair lter was loaded into the front of the yoke
connector, the conical lter gets loaded from the back of
the connector. To enhance the cosmetics of a regulator
inlet with a conical lter installed, a new lter guard
(AP1406/1) was designed to install into the front of the
connector. DO NOT mistake the lter guard as a lter. It
is to be used only in conjunction with the conical lter.
Before starting reassembly, perform parts clean-
ing and lubrication in accordance with Procedure
A: Cleaning and Lubricating
(p. 16).
THIS ENDS DISASSEMBLY
Removal of Yoke Connection
NOTE: For removal of DIN connection, go directly to step 18
Removal of DIN Connection
Removal Porvair lter
 Loading...


