6
MTX-R 2nd Stage Maintenance Manual
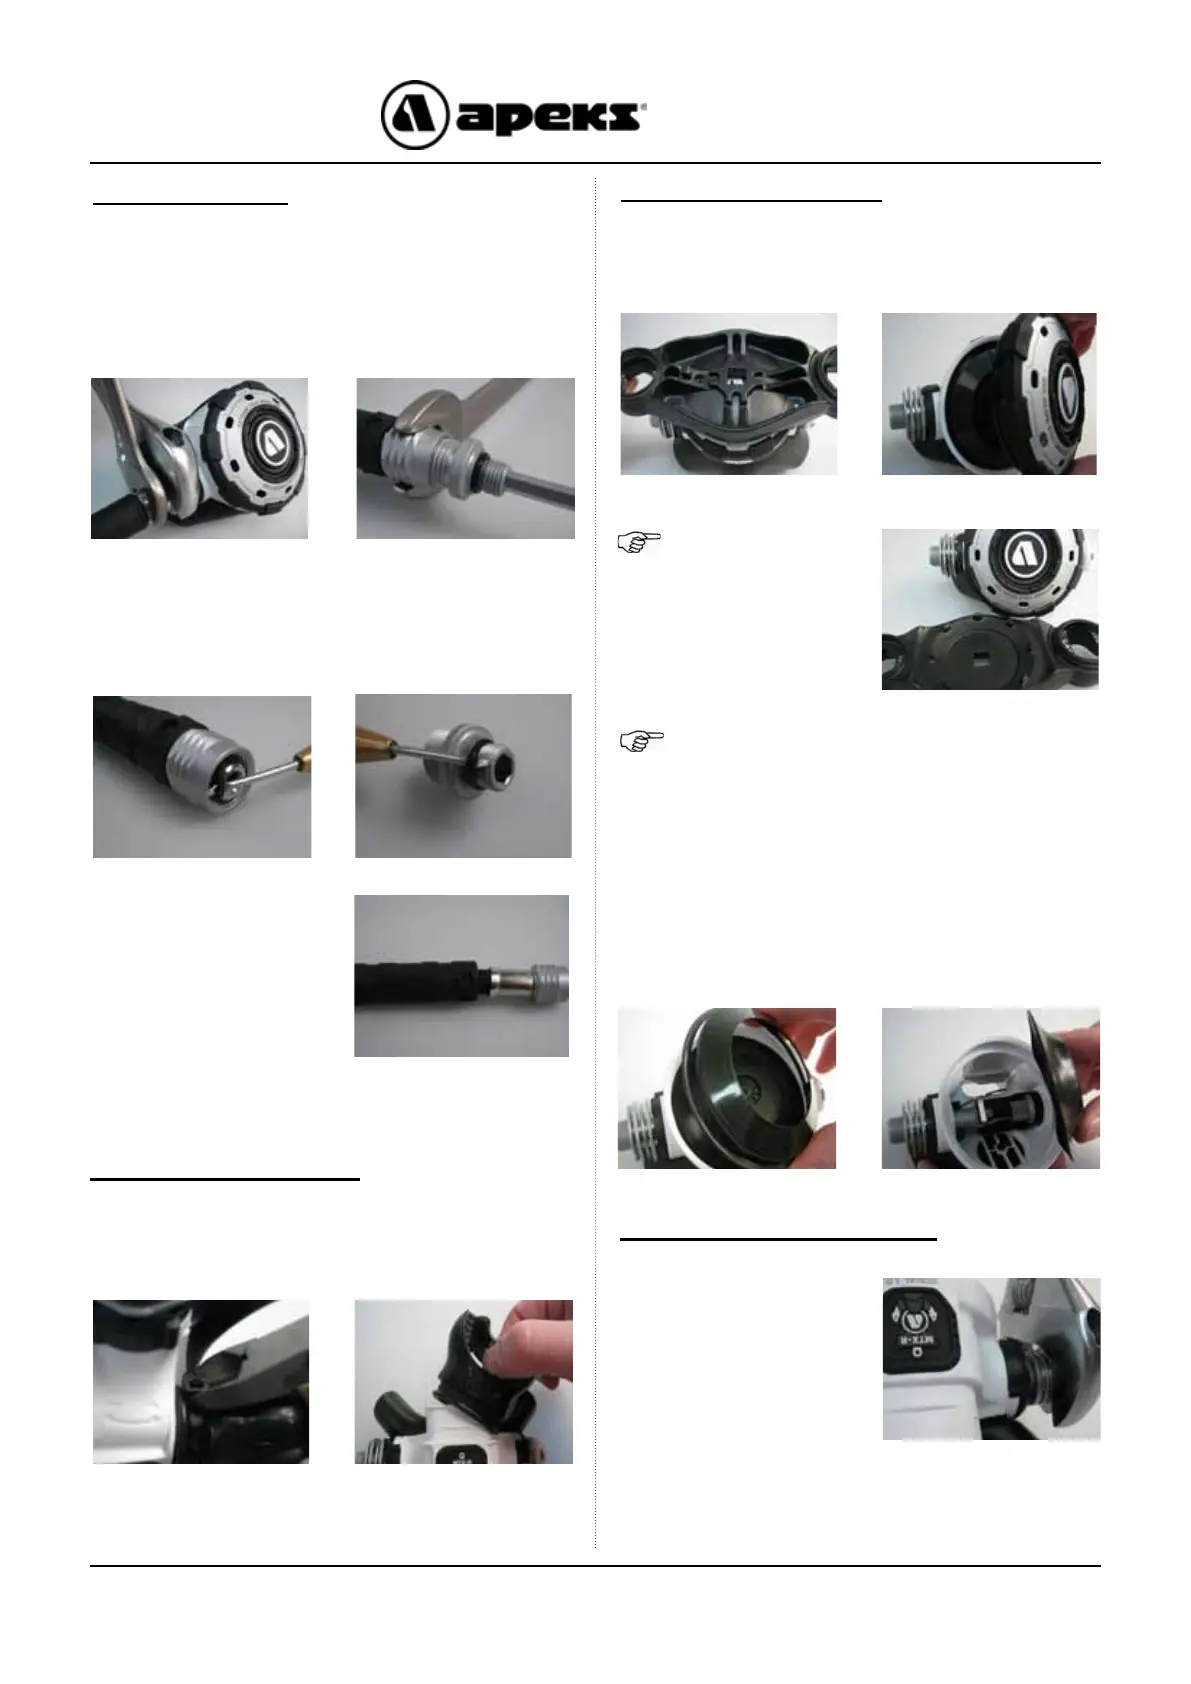
NOTE: Ensure that
the pegs on the tool
fully engage on the
case cover whilst
unscrewing.
Removal of Hose
Removal of Diaphragm
1. Using a 28mm spanner hold the Heat Exchanger
(9) stationary while turning the Hose Swivel
anticlockwise with a 11/16” spanner. Then using a
5mm Hex key and holding the hose swivel with the
11/16” spanner remove the Adapter Hose (33).
3. Pull back the two
Hose Protectors (31)
and inspect the Hose
Crimps. If either Crimp
is damaged or the
Hose is pulling out
of the crimp then the
Hose must be replaced.
5. Using the MTX-R Front Cover Tool (PN AT94),
unscrew the Case Cover (2).
NOTE: The Front Cover (2) and Purge Button
(1) should be cleaned complete. It is not
necessary to remove the purge button when
servicing.
Removal of Valve Assembly
6. Lift out the Diaphragm Cover (3) and Diaphragm
(4). Inspect the Diaphragm. It should be supple and
be free from damage. If it looks good, there is no
need to replace it and it may be reused. If there is any
sign of deterioration, it should be replaced.
7. Using an 28mm
spanner, remove the
Heat Exchanger (9).
2. Remove the ‘O’ Rings (15) from inside the Hose
Swivels on each end. Exercise caution not to scratch
the ‘O’ Ring groove. Remove the ‘O’ Ring (26) from
the Adapter Hose (33).
Removal of Mouthpiece
4. Using side cutters, snip the Tie Wrap (7) taking
care not to damage the Mouthpiece (8). Remove the
Mouthpiece.

 Loading...


