7
MTX-R 2nd Stage Maintenance Manual
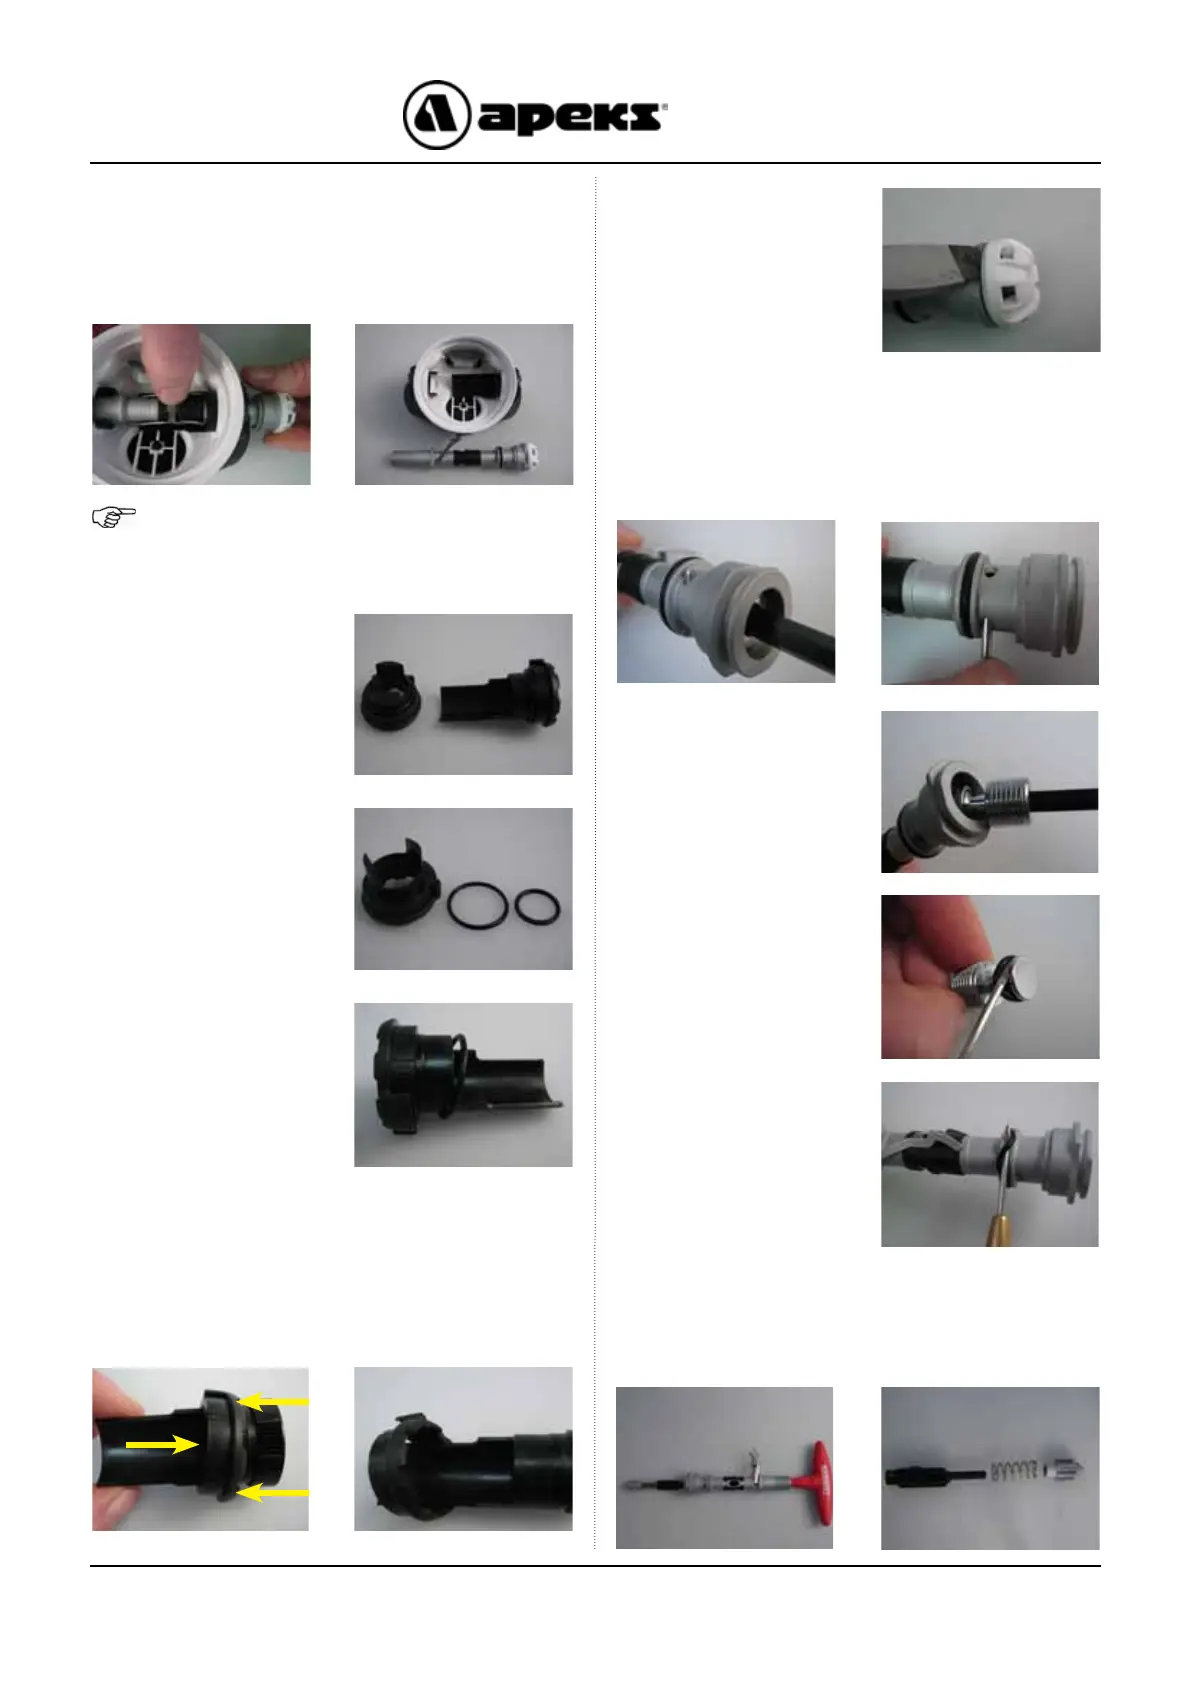
8. Press the Lever (19) against the Valve Spindle
(17). While keeping the Lever depressed, grasp the
Bumper (28) and pull the Valve Spindle assembly out
of the Case (6) or remove the Spindle by pushing on
the threaded end.
9. Remove the Blanking
Piece (11) and Venturi
assembly (13 & 14)
from the Case.
NOTE: The Venturi assembly may come out with
the valve Spindle in step 8. If this is the case,
depress the Lever and slide the Venturi Lever off.
11. Remove O ring (12)
from the Venturi Lever
assembly.
12. It is NOT necessary to separate the Venturi
assembly into its two separate parts unless the
regulator is being converted to a different hand
conguration. To separate them grasp the Venturi
assembly (13 & 14) and push the Venturi Blank (13)
off the Venturi Lever Body (14).
13. Remove the
Bumper (28) with a at
screwdriver.
15. Unscrew the
Adjusting Screw (27)
and completely remove
it from the Valve
Spindle (17).
16. Remove the ‘O’
Ring (26) from the
Adjusting Screw.
17. Remove the ‘O’
ring (10) from the Valve
Spindle (17).
10. Remove O rings (10
& 12) from the Blanking
Piece (11).
14. Turn the Adjusting Screw (27) clockwise (inward)
one turn using a 5mm Hex Key. The Spring Pin
(20) should drop out. If the Pin remains in the
Valve Spindle, use a 1/16” dowel or punch to push
it partially out, then use needle nose pliers to
completely remove it from the Valve Body.
18. Insert a small 1/8” wooden dowel or small Hex
key into the threaded end of the Valve Spindle (17)
and push out the Shuttle Valve assembly (21-25).
Separate the Shuttle Valve assembly by pulling on
each end.

 Loading...


