8
MTX-R 2nd Stage Maintenance Manual
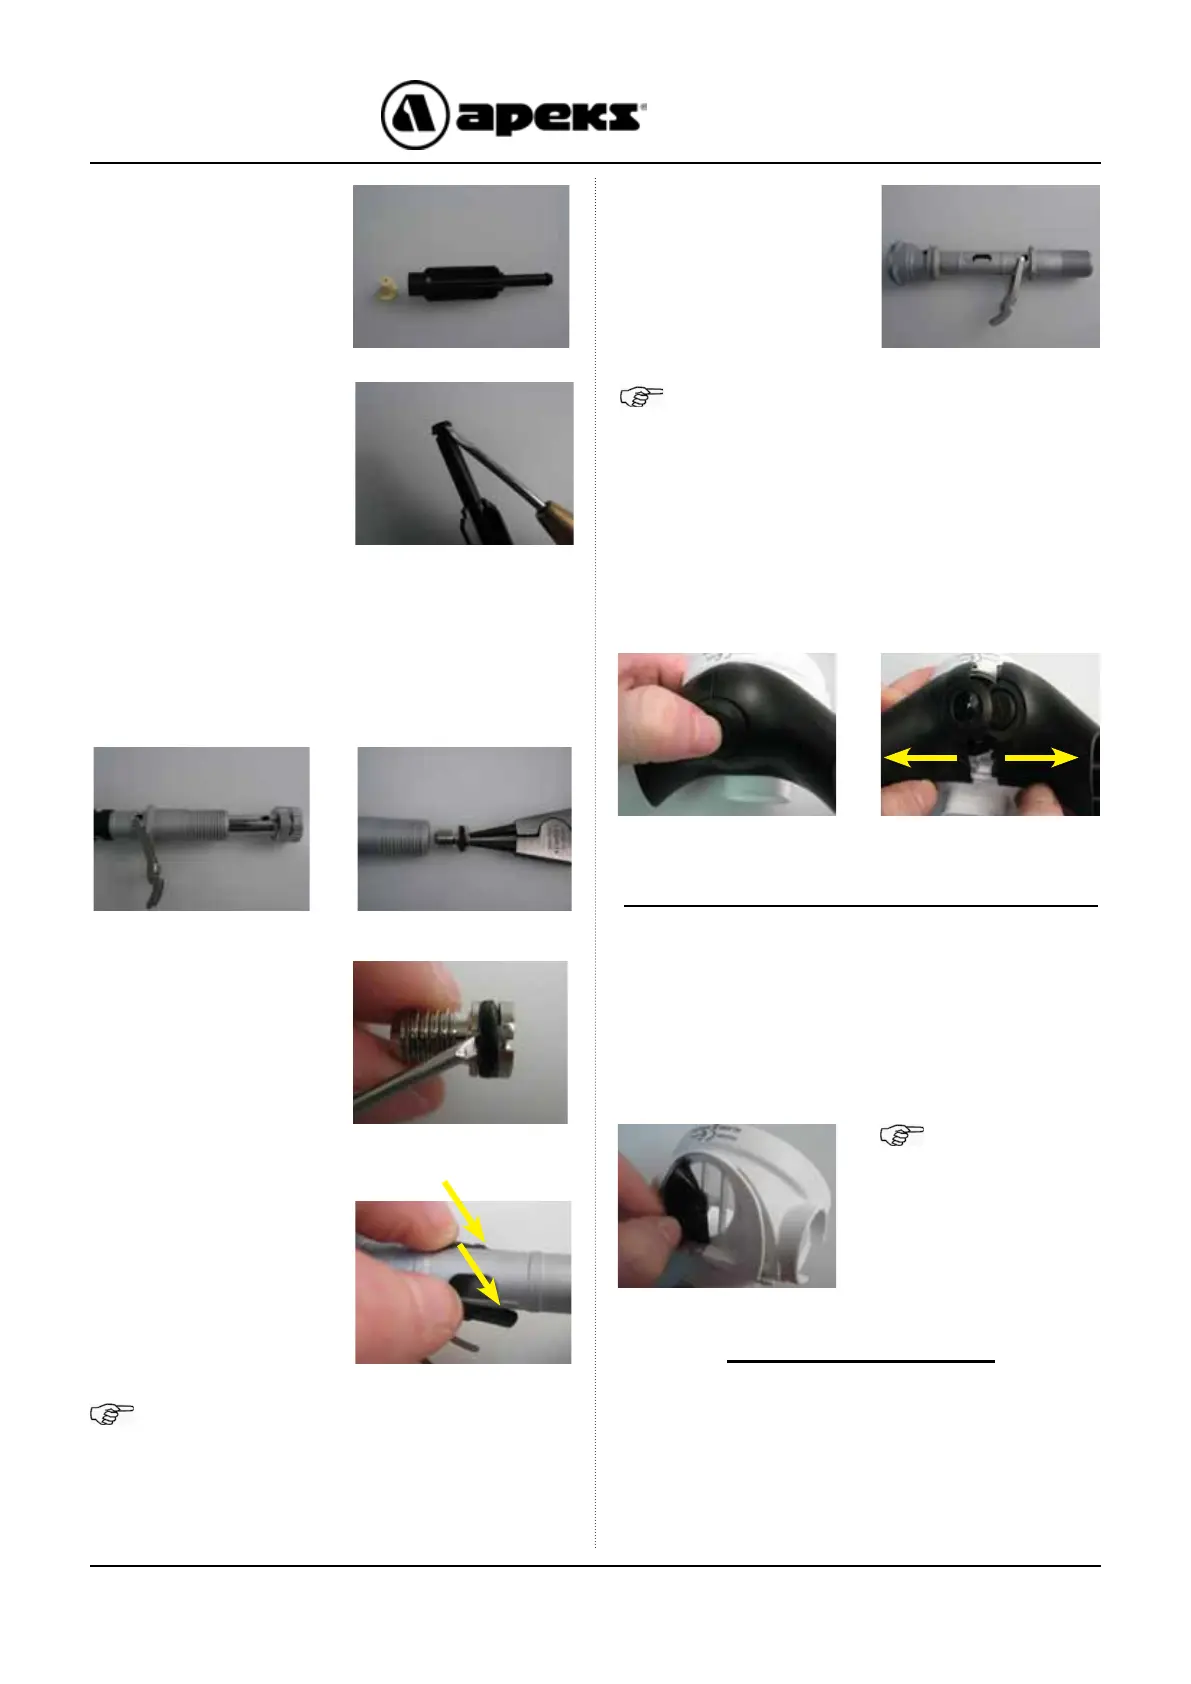
21. Using a Slotted Seat Adjuster (PN AT51/L), turn
the Seat (16) six to seven full turns anti-clockwise.
As the Seat is ‘O’ Ring sealed, it will not completely
unscrew from the Valve Spindle (17). Insert a pair of
external circlip pliers into the Valve Spindle (17), and
pull the Seat (16) completely out.
23. To remove the
Spindle Collar (18),
push both edges of the
collar as shown.
NOTE: It is not necessary to remove the Spindle
Collar (18) under normal servicing circumstances,
unless it is deemed relevant by the service
technician, for example if it is damaged or dirty.
This Ends Disassembly
Before starting reassembly, perform parts
cleaning and lubrication according to the
procedures outlined in ‘Cleaning & Lubrication’
on page 23.
NOTE: If the
Exhaust Valve (29)
is to be removed,
pinch the edge of
the Valve and pull
the tail through the
hole in the Case (6).
Inspection and Removal of Exhaust Valve
25. To remove the Exhaust Tees (30), depress the
retaining button located in the centre (see picture)
and slide the Left Hand Exhaust Tee off the Case (6).
Then slide the Right Hand Exhaust Tee off the case.
26. Fold back the edges of the Exhaust Valve (29)
and inspect underneath. The seating surface should
be clean and free of damage. Inspect the Exhaust
Valve. It should be supple and have well dened
edges. If it looks good, there is no need to remove
it and it may be reused. If there is any sign of
deterioration, it should be replaced.
22. Remove the ‘O’
Ring (15) from the Seat
(16).
NOTE: The Lever (19) should be inspected for
deterioration, it is NOT necessary to remove it
from the Valve Spindle (17), unless it is deemed
relevant by the service technician, for example if
it is damaged or mis-shaped.
24. To remove the
Lever (19) pull one
of the legs out of the
Valve Spindle (17) and
then ease the second
leg out.
19. Using a ngernail,
remove the Silicone
Seat (21) from the
shuttle valve (22).
20. Remove ‘O’ Ring
(23) from the shuttle
valve (22).

 Loading...


