CONNECT PROTOCOL ADAPTER TO THE DISTRIBUTION PANEL AND HOST COMPUTER
OR AUTOMATION SYSTEM
1. MAKE SURE THAT ALL SWITCHES ON THE DISTRIBUTION PANEL ARE OFF!
2. Use Category-5 wire to connect the main communication terminals on the Distribution Panel to the “Breakout Adapter” of the protocol adapter
(see FIGURE 8).
3. Connect the RS-232 cable from the protocol adapter to the computer or automation system. A 3 ft. RS-232 cable is provided.
Some computers use 25-pin connectors on serial ports, which requires a DB25 connector. A DB9 connector fits a 9-pin port. DB9 to DB25
transitions are available at most computer retail stores.
4. Power up the Protocol Adapter with the plug-in transformer provided. The “Power” LED on the Protocol Adapter should light up when power is
applied.
RS-232
POWER
RXD
TXD
RS-485/422
DC +9V
A-
A+
B+
B-
A+
A-
B+
B-
REF
REF
B-
B+
A+
A-
BLU/WHT
BLUE
ORANGE
ORG/WHT
RS-485/422
DC +9V
PIN #1
DO NOT
CONNECT
PIN #123456789
RS-485/422
A-
Tx -
A+
Tx +
B-
Rx-
B+
Rx+
GNDNC+9V NC NC
DB9 RS-485/422 CONNECTOR PIN- OUT
9VDC 500mA
AC PLUG-IN
TRANSFORMER
(PROVIDED)
CAT-5 NETWORK CABLE (NOT PROVIDED)
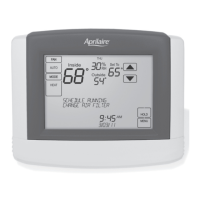
APRILAIRE MODEL 8819
DISTRIBUTION PANEL
OR MODEL 8800
COMMUNICATING
THERMOSTAT
RS-485/422 BREAKOUT
ADAPTER (PROVIDED)
RS-232 3FT CABLE
(PROVIDED)
STRAIGHT THROUGH
COMPUTER OR AUTOMATION
SYSTEM WITH RS232 SERIAL
COMMUNICATION PORT
(NOT PROVIDED)
FIGURE 8 – Protocol Adapter Wiring
10

 Loading...


