Service Manual Core 1
st
stage
Service Manual Core 1
st
stage
Rev. 05/2015 10
REASSEMBLY PROCEDURE
COMMOM TO ALL MODELS
1. Screw the wet chamber body
(129904) or the dry chamber body
(129903) onto the body (129254)
WITHOUT ITS DIAPHRAGM, then
place it standing on a table, the
chamber down.
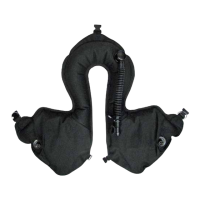
2. Place the body protector (128124) on the body
(129254) and then engage the polyurethane collar
over the two HP ports.
3. Completely engage the body protector by pressing
the top of it.
4. Unscrew the wet chamber body (129904) or the dry
chamber body (129903).
Finish positioning the body protector collar.
5. Fit a new lubricated O-ring (124704) on the crown
(127585).
Slide the seat onto the tool (116236), positioning the
seat lip against the tool plastic part. Move the system
into the body (129254), plug side, and position the
seat by pushing with the tool.
6. Screw the holding tool (116320) into a free MP port.
Securely clamp holding tool into vice with plug facing
up.
Lubricate the new HP seat tail (124624). Insert it in
the body (129254), blue face facing the body interior.
Check that the seat stay upright inside the body.
Place the spring (122244) around the seat.
7. Fit a new anti-extrusion washer
(119129) then a new lubricated O-
ring (124612) in the plug (129120).
Using a 4mm Allen key, press the
anti-extrusion washer and the O-ring
against the plug bottom.
8. Fit a new lubricated O-ring (213714) onto the plug
(129120).
NOTE: Before continuing, closely examine the anti-
extrusion washer (119129). You will note that it has
a flat side and a concave side. For correct
assembly the concave side should be against the
O-ring, as shown in the picture below.
Anti extrusion washer