Service Manual Core 1
st
stage
Service Manual Core 1
st
stage
Rev. 05/2015 12
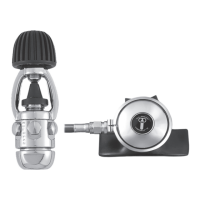
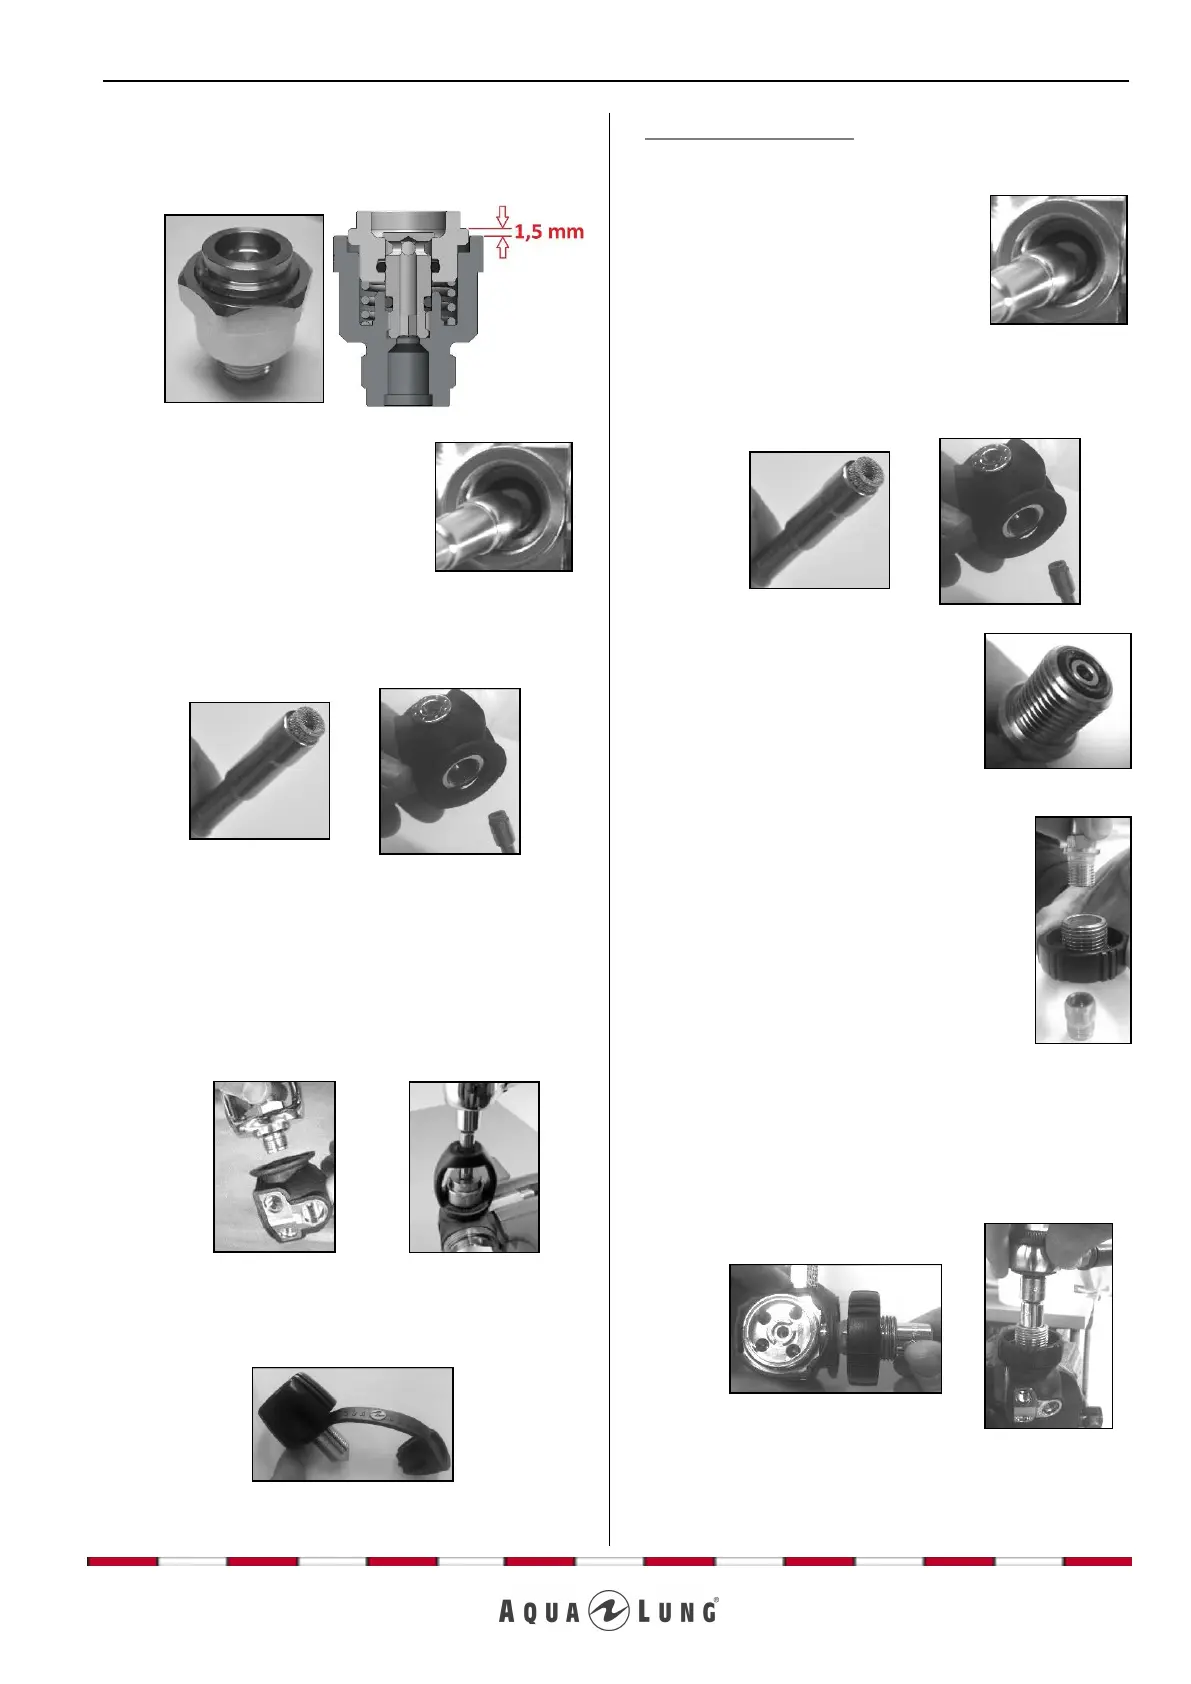
20. Check that the yoke shutter crown (129205) shoulder
is about 1.5mm (0.4 inches) above the yoke retainer
(129242). Push down with your finger against the
crown shutter to confirm the ACD system works.
21. Using a 1/4’’ socket wrench
(116239), fit a new O-ring not
lubricated (124703) in the body
counterbore (129254) DIN
connection side.
22. Insert a new filter (129209) in the socket wrench
(116239) and then turn over the body (129254) and
put the filter inside the O-ring (124703) thanks to the
socket wrench.
23. Place the sub-assembly shutter/retainer in the yoke
(124611). Screw it manually into the body (129254)
until it blocks.
Securely clamp holding tool (116230) into vice with
yoke connection facing up.
Using a torque wrench (122154) with the socket
(A11001), tighten the yoke retainer to 2.5 m.kg
(18.08 ft.lb). Remove the regulator from the vice.
24. Thread the dust cap (124555) into the yoke screw
(128631), with the Aqua Lung logo outside. Screw
the yoke screw into the yoke (124611).
DIN CONNECTION
Start after point 9
25. Using a 1/4’’ socket wrench
(116239), fit a new O-ring not
lubricated (124703) in the body
counterbore (129254) DIN
connection side.
26. Insert a new filter (129209) in the socket wrench
(116239) and then turn over the body (129254) and
put the filter inside the O-ring (124703) thanks to the
socket wrench.
27. Fit in a new and lubricated O-
ring (444243) on the DIN screw
(129213).
28. Take the DIN union (129241), install the
DIN hand wheel (129929) on it, and
place on top the DIN screw (129213).
Screw by hand the DIN screw into the
DIN union.
29. Using a 7/16'' socket, screw the sub-assembly into
the body (129254).
Securely clamp holding tool (116230) into vice with
DIN connection facing up.
Using a socket and a torque wrench (122154),
tighten the DIN screw to 2.5 m.kg (18.08 ft.lb).