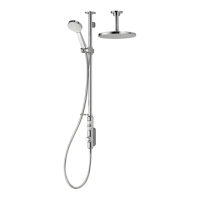
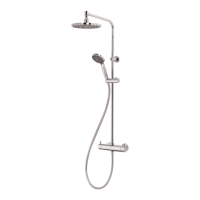
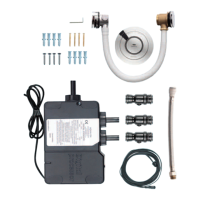
Shower head systems installation instructions Page 8
Slide the 15mm gripper ring down the projecting pipe flush with
the wall spacer fitting.
2
Ensure the pipe is clean and free of dust and slide the fixing bush
onto the pipe flush with the finished wall surface.
3
Slide the fixed head arm over the fixing bush flush with the wall surface and mark the four fixing
points.
4
Carefully remove the fixed head arm and drill and prepare the fixings using the fixings provided,
if suitable, taking care to avoid pipework hidden in the wall.
5
Ensuring the fixing bush is clean and free of dust, fit the 15mm O-ring
against the end of the fixing bush. Lubricate the O-ring using a suitable
silicone based lubricant.
6
The O-ring must be positioned on the 15mm pipe flush to the fixing
bush, not onto the fixing bush shaft.
!