In a spa application the red and yellow wires should be jumped together and then connected to
the +12VDC output of the power source. In this set up the GP1 will always be on, with a very low
current draw when idle.
In a boat, ATV or other application requiring power from a battery, the yellow wire (constant
power) should be connected to the battery, and the red wire should be connected to the ignition
or a switch.
For detailed instructions you can check out our online video:
‘How to wire your Aquatic AV stereo system’
http://www.aquaticav.com/support/videos
Once all connections are made press the POWER/MUTE button and the stereo will turn ON. Press
and hold the POWER/MUTE button to turn the unit OFF.
1.5 Power On
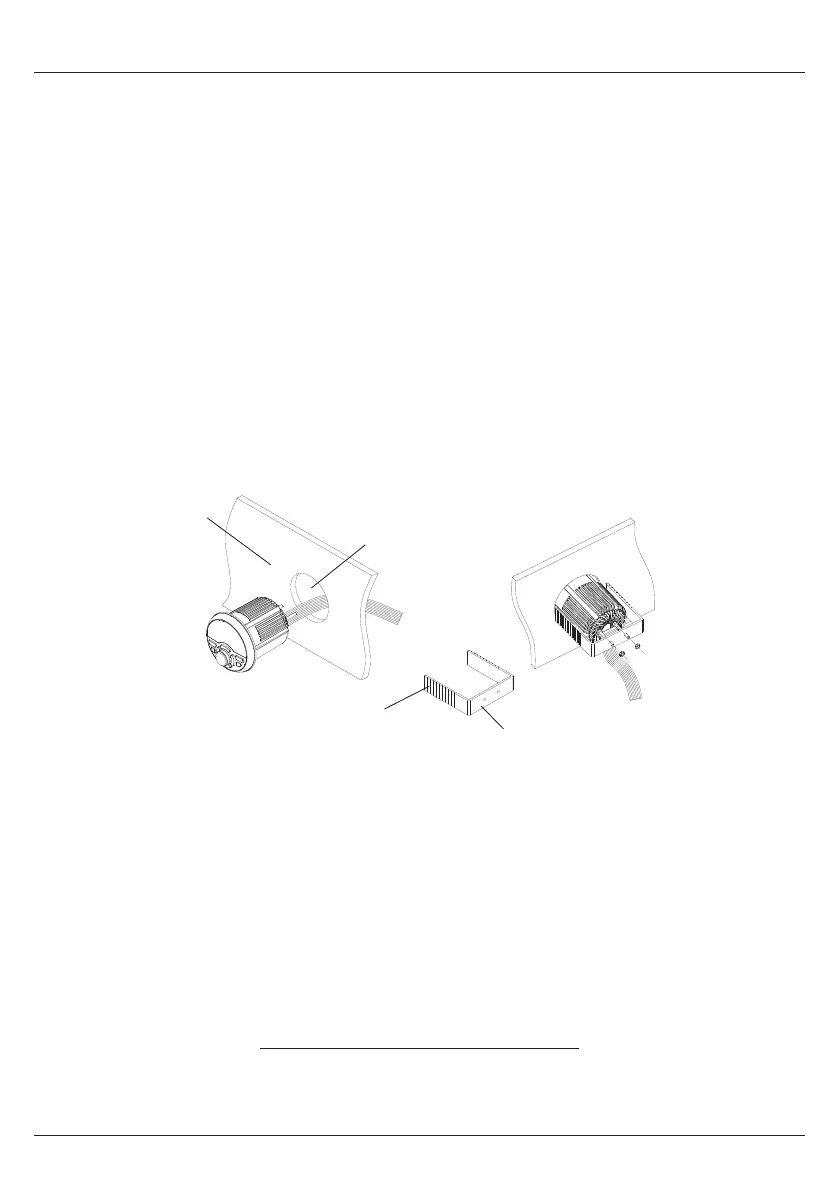
Mounting hole size
3” (76.2mm)
Mounting
Bracket
Dashboard
Break Lines
PLEASE READ THIS INSTRUCTION MANUAL BEFORE INSTALLATION AND OPERATION.
Aquatic AV recommends installation of this stereo by a professional technician.
Aquatic AV recommends using the ‘measure twice, cut once’ method!
1.4 Installation
1. Check clearances on both sides of a planned installation area before drilling any holes.
2. Drill a pilot hole at the center point and then use a circular saw to drill a hole with a 3”
(76.2mm) diameter.
3. Slide the GP1 stereo through the mounting hole and secure the stereo using the mounting
bracket, screws and washers. If the bracket needs to be shortened this can be done by
removing the appropriate number of breakaway segments using a pair of pliars.
4. Once complete make sure the outside surface is clean and clear of debris to ensure
a proper water/dust seal. The GP1 stereo has an external water/dust proof gasket which
requires a clean and flat surface for long-term environmental protection performance.
Getting Started GP1 WATERPROOF STEREO
5www.aquaticav.com