www.aquorwatersystems.com
1-800-458-1749
Aquor
®
Wall Hydrant V1+
ASSE 1019C / ASME A112.18.1 / CSA B125.1 APPROVED
11
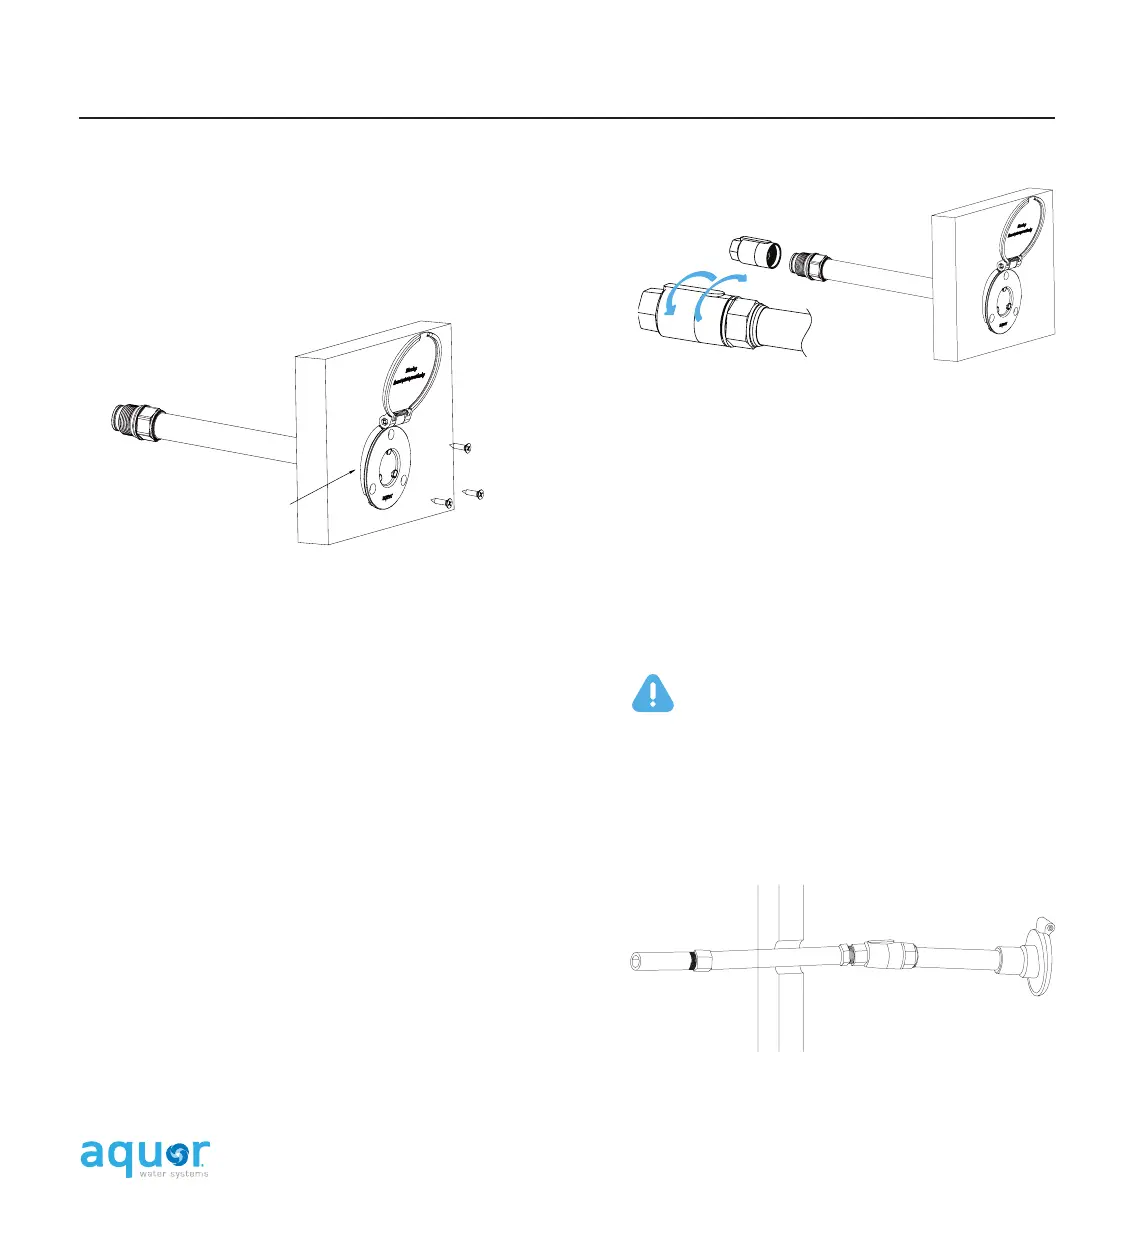
3. ATTACH FITTING
Proceed to the interior of the wall. Before attaching
a fitting, unscrew the hydrant’s rear inlet from the
main hydrant body.
The hydrant’s default inlet is ” NPT (f). Other
optional inlet styles are available.
Thread in the appropriate ” NPT fitting for your
plumbing type, wrapped in teflon tape then pipe-
joint compound. Firmly tighten with a wrench.
Tip: Drilling into brick or stone? Consider using
specialized fasteners and/or anchors. We also
manufacture optional stainless steel mounting plates
to space the mounting holes out further if needed.
With the cover wedge behind the faceplate flange
secure the hydrant to the wall. #10 flathead
stainless steel screws are provided.
After securing, test the cover to make sure it opens
and closes properly.
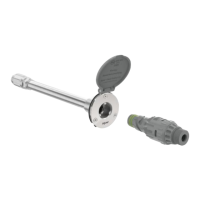
Tip: The inlet is on an O-ring seal. It’s designed to
rotate up to one turn while still keeping a watertight
seal. This is useful for alignment, especially for the
optional 90° elbow inlets. Tighten the inlet until it
stops, then rotate back to the desired spot. This seal
is rated to 250 PSI.
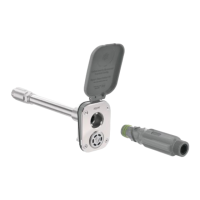
4. CONNECT TO PLUMBING
With the appropriate fitting threaded in, connect the
hydrant to your plumbing system.
Hand-tight is fine; do not over-torque the
hydrant’s body connection. Do NOT apply
teflon tape or any kind of sealant to the
hydrant’s body threads.
With the appropriate fitting installed, re-attach the
inlet to the hydrant body.
INSTALLATION
Cover wedge
behind faceplate