Do you have a question about the ARB 3414470 and is the answer not in the manual?
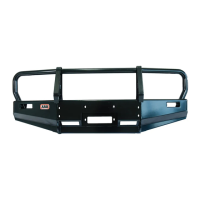
Front protection bar does not affect SRS airbag operation when installed correctly.
Product must be installed per instructions; contact ARB for damage repairs.
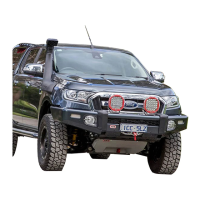
Use only for specified vehicles; recommended for trained personnel.
Treat with polish, inspect regularly for bolt torque, wiring, and component integrity.
List of tools needed for product fitment.
Protective eyewear and hearing protection are recommended.
Table detailing torque settings for M6, M8, M10, and M12 fasteners.
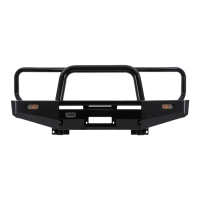
Detailed list of parts, part numbers, quantities, and descriptions for the bull bar and kits.
Clarifies which parts are only included in supplementary winch fitting kits.
Instructions for cutting bumper using templates, marking lines, and reference points.
Using masking tape for cutting edge and cutting the bumper facia with tools.
Disconnect fog lamps and check for wiring before cutting.
Deburring cut edges, removing braces, and applying pinch weld.
Drilling holes for flared vehicles and securing flares.
Cutting bumper templates, marking lines on RHS and LHS.
Marking reference points on air intake and number plate boss.
Applying masking tape for cut line and cutting bumper facia.
Disconnect fog lamps and check for wiring before cutting.
Deburring cut edges, removing braces, and applying pinch weld.
Drilling holes for flared vehicles and securing flares.
Reading wiring diagram, positioning relay loom, connecting to park lamp and left indicator.
Connecting relay loom to indicator loom and driver's side wiring.
Mounting relay, connecting main power and earth wires, securing loom.
Inserting M6 and M8 cage nuts into the bull bar top and lower pans.
Replacing screws for turn signal lamps and fitting them to the bull bar.
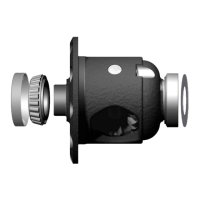
Rotating the winch gearbox 72° counter clockwise for fitting.
Removing cover, replacing power cables, and identifying colour codes.
Bolting control box bracket, threading cables, and securing them with cable ties.
Placing winch, aligning mounting holes, and fitting bolts for secure attachment.
Drilling holes for roller fairlead and fitting it into the cutout.
Connecting winch control box to winch and securing cables.
Loosely bolting impact absorbers to chassis and chassis tension bracket.
Bolting the bracket to the chassis using M12 bolts.
Positioning the bar, fastening to brackets, and adjusting gaps.
Drilling holes and securing the bull bar to the impact absorber.
Fitting the centre stone guard using specified bolts and washers.
Cable tying wheel liners and cutting lower part of plastic wheel liner.
Separate instructions for fitting wing under panels.
Fitting the number plate to the bull bar using bolts and washers.
Diagram showing wiring connections for lights and relays.
Ensuring all bolts are tensioned, wiring is secure, and components are functioning.
| Product Type | Awning |
|---|---|
| Waterproof | Yes |
| Awning Size | 2500mm Wide x 2500mm Extension |
| Material | Polyester |
| Includes | Poles, Pegs, Ropes |