51
5. Install the spark arrester assembly
and secure with the three cap screws.
Tighten to 60 in.-lb.
6. Install the muffler and secure it to the
exhaust pipe with the two springs.
Light Bulb Replacement
NOTE: The bulb portion of the
headlight is fragile. HANDLE WITH
CARE. When replacing the head-
light bulb, do not touch the glass
portion of the bulb. If the glass is
touched, it must be cleaned with a
dry cloth before installing. Skin oil
residue on the bulb will shorten the
life of the bulb.
To replace the headlight bulb, use the fol-
lowing procedure.
1. Rotate the back of the headlight bulb
counterclockwise, disconnect the wir-
ing harness, and discard the bulb.
XR065C
2. Connect the new headlight bulb to the
wiring harness and insert into head-
light assembly. Turn clockwise to
secure the bulb.
3. Adjust the headlight (see Checking/
Adjusting Headlight Aim in this sub-
section.
To replace the taillight/brakelight bulb,
use the following procedure.
1. Remove the mounting screws secur-
ing the taillight/brakelight assembly
to the rear ROPS tube.
2. Rotate the socket counterclockwise
and remove it from the housing.
3. To remove the bulb from the socket,
pull it straight out of the socket.
4. To install the bulb, push it straight
into the socket.
5. Insert the socket into the housing and
rotate it clockwise.
6. Position the taillight/brakelight assem-
bly on the rear ROPS tube; then
tighten the mounting screws securely.
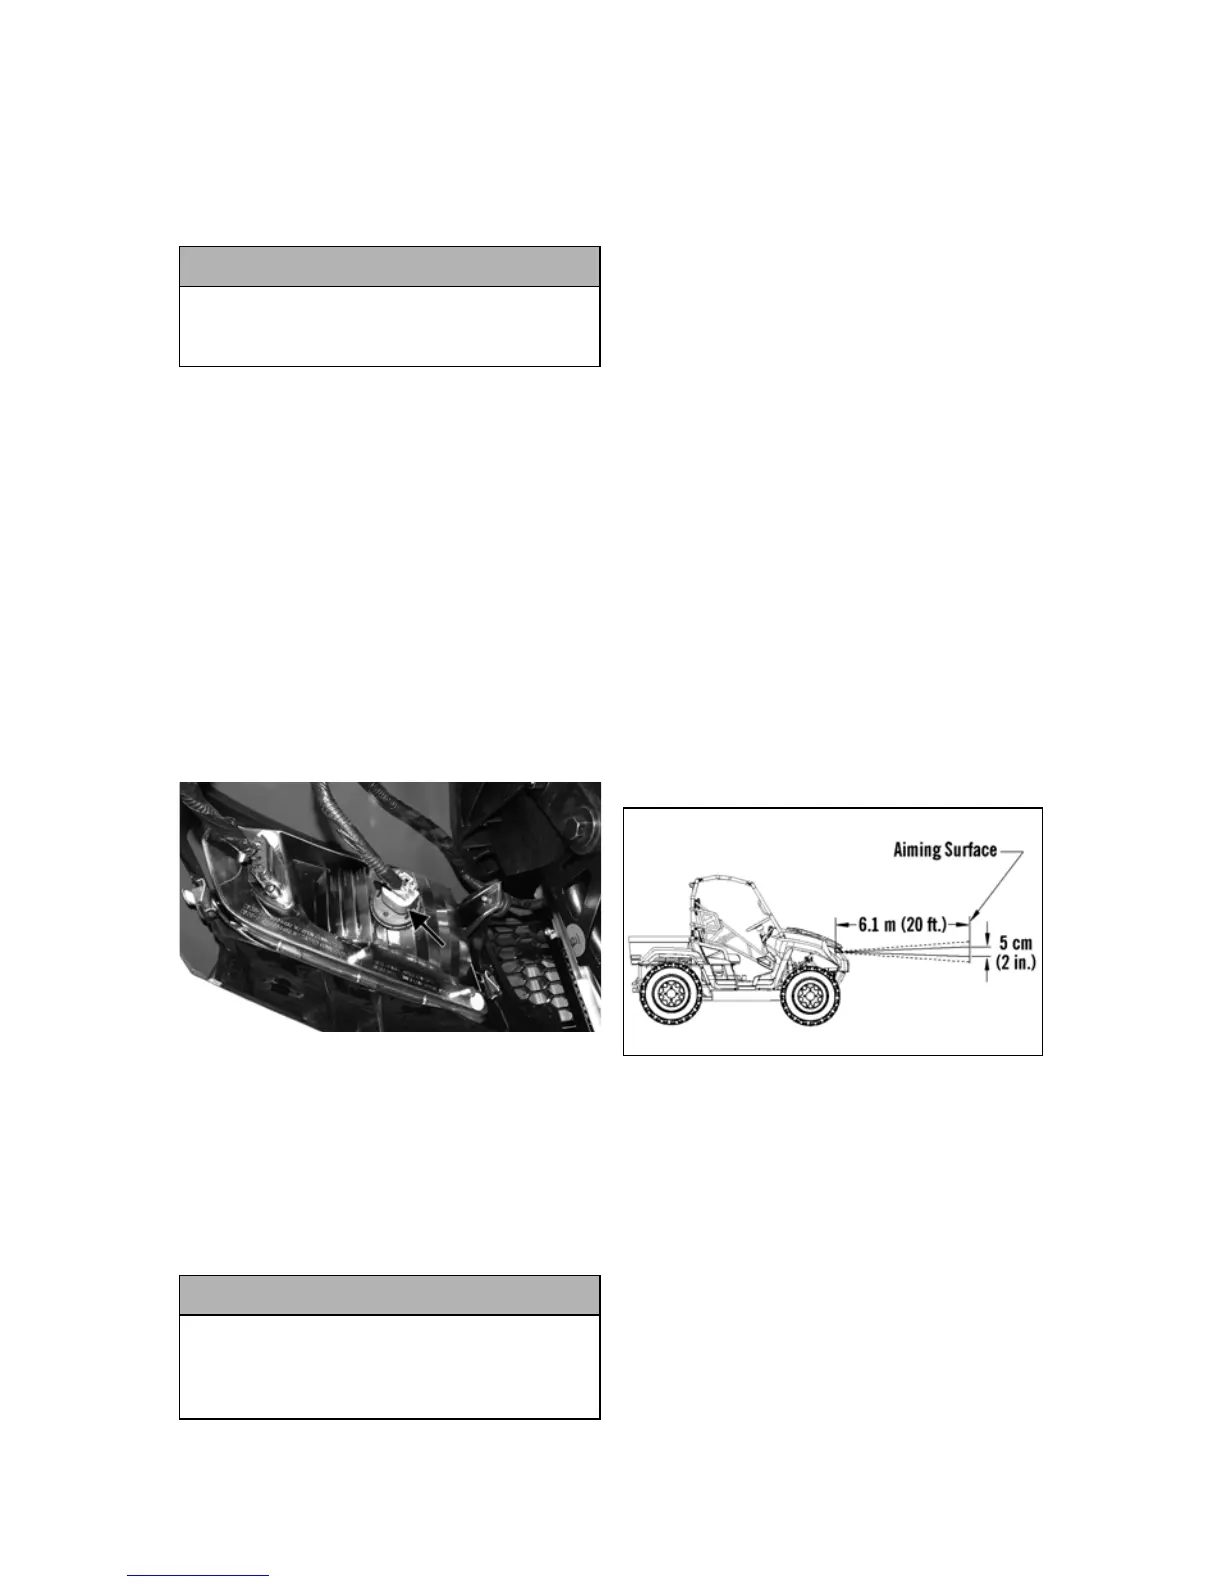
Checking/Adjusting
Headlight Aim
The headlights can be adjusted vertically
and horizontally. The geometric center of
the HIGH beam light zone is to be used
for vertical and horizontal aiming.
1. Position the vehicle on a level floor
so the headlights are approximately
6.1 m (20 ft) from an aiming surface
(wall or similar aiming surface).
0748-733
NOTE: There should be an aver-
age operating load on the vehicle
when adjusting the headlight aim.
2. Measure the distance from the floor
to the mid-point of each headlight.
3. Using the measurements obtained in
step 2, make horizontal marks on the
aiming surface.
4. Make vertical marks which intersect
the horizontal marks on the aiming
surface directly in front of the head-
lights.
CAUTION
Use only specified bulbs indicated in
the Specifications chart as replace-
ment bulbs.
CAUTION
When replacing the headlight bulb,
be careful not to touch the glass por-
tion of the bulb. Grasp the new bulb
with a clean cloth.

 Loading...