the way to the right, and lock spring loaded clamp handle (D).
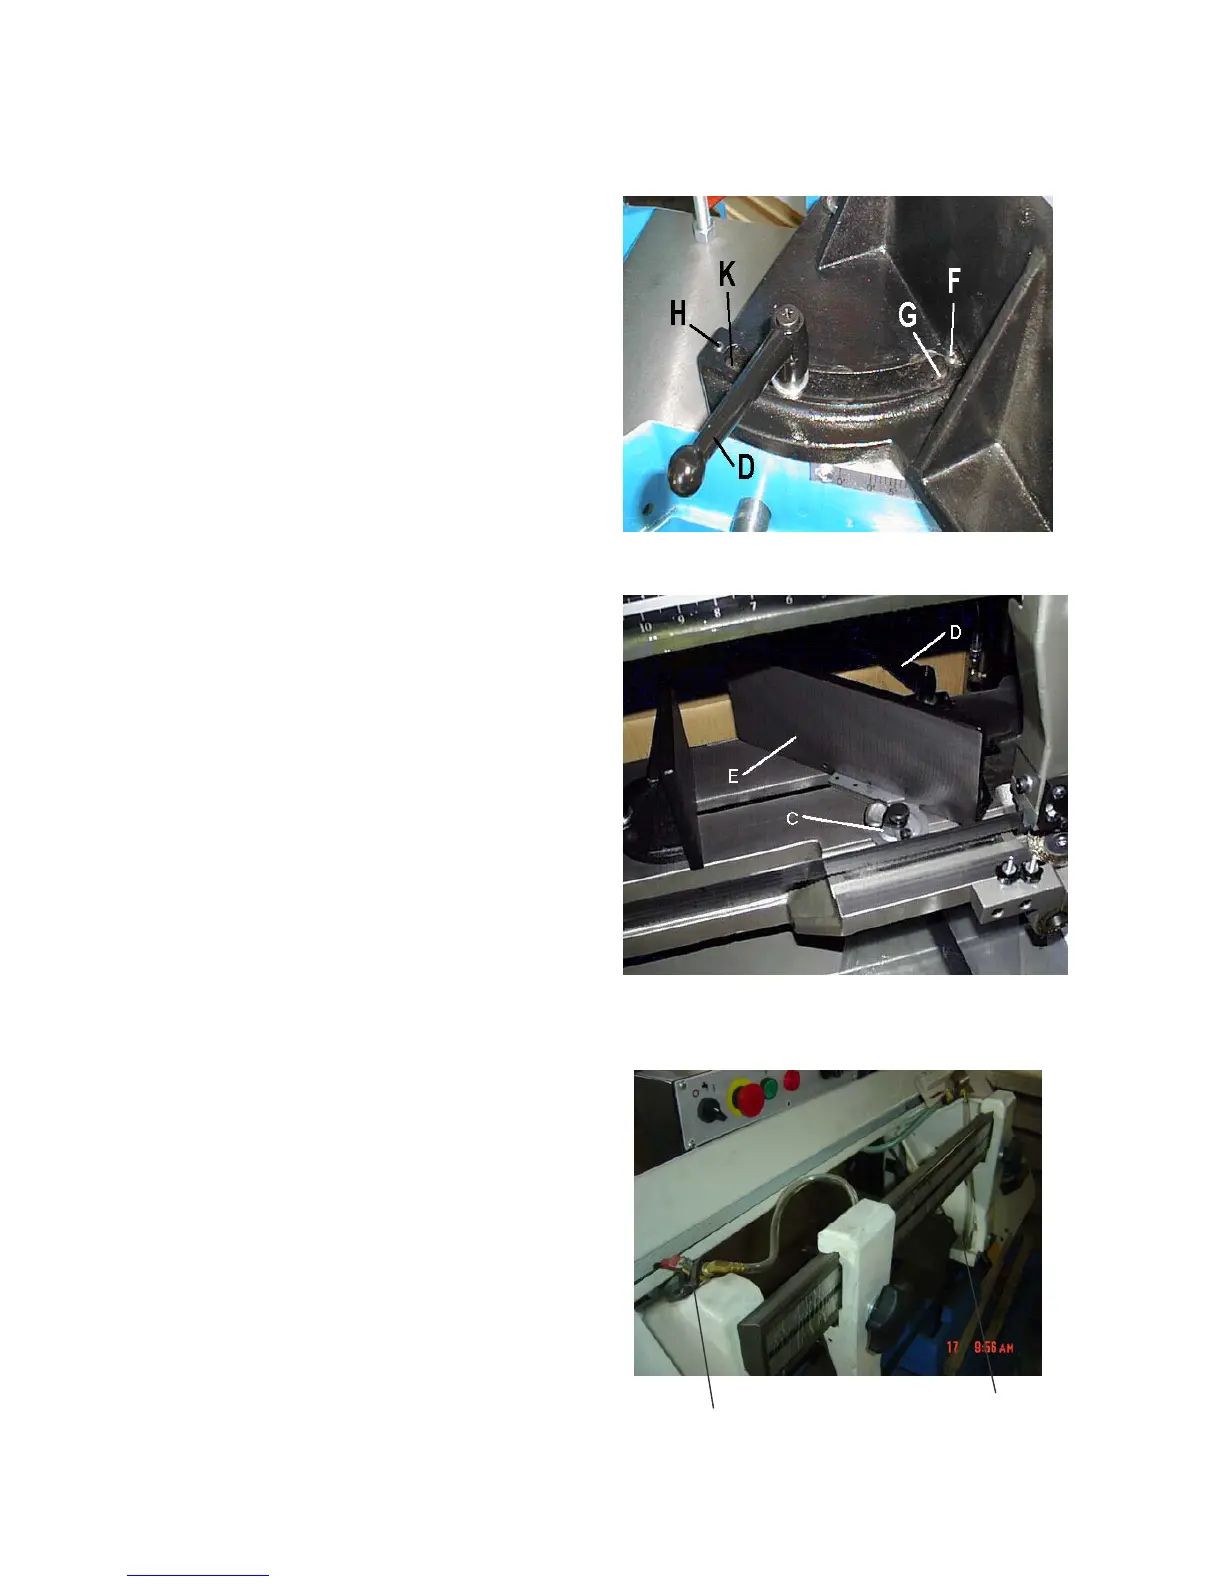
2. Using a combination square (E), place
one end of the square against the vise
jaw and the other end against the blade
as shown in Fig. 13. Check to see if the
vise jaw is 90 degrees to the blade.
Fig. 14
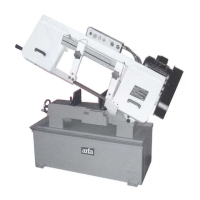
3. If an adjustment is necessary loosen
clamp handle (D) Pig. 14. Loosen set screw
(F) and turn adjusting screw (G) until the
vise jaw is 90 degrees to the blade.NOTE:
turn screw (G) from the opposite end,
through the face of the vise jaw. End of
screw (G) should contact stud of clamp
handle(D) when vise jaw is 90 degrees to
the blade. Then tighten set screw (F).
Fi
. 15
4. If an adjustment is necessary, loosen
clamp handle (D) Pig. 14. Loosen set screw
(H) and turn adjusting screw (K) until the
vise jaw is 45 degrees to the blade. NOTE:
end of screw (K) should contact stud of
clamp handle when vise jaw is 45 degrees
to the blade. Then tighten set screw (H).
5. Pivot the right vise jaw (C) all the way to
the left, as shown in Fig. 15, and lock
spring loaded clamp handle (D).
6. Using a combination square (E), place
one end of the square against the vise
jaw and the other end against the blade,
as shown in Fig. 15. And check to see if
the vise jaw is at 45 degrees to the blade.
B Fi
. 16 C
16 COOLANT
The use of proper cutting fluid is essential to
obtain max-imum efficiency from a band saw
blade. The main cause of tooth failure is
excessive heat build-up. This is the reason
that cutting fluid is necessary for long blade
life and high cutting rates. Cutting area and
blade wheels should be kept clean at all time.
- -
16