This document describes the Ariete 1450 automatic coffee machine.
Function Description
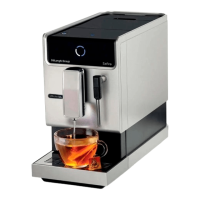
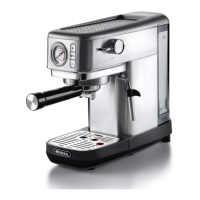
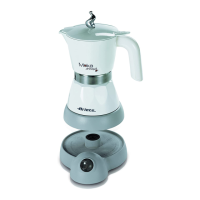
The Ariete 1450 is an automatic coffee machine designed to prepare coffees and cappuccinos. It also features a hot water dispensing function for teas or infusions. The appliance is intended for private, household use and is not suitable for industrial or commercial purposes.
The machine offers three operating modes: default, ECO, and fast mode. The ECO mode is designed to save energy, while the fast mode allows for quicker beverage preparation. It includes a pre-infusion feature that moistens coffee beans with a small amount of water before full extraction, increasing pressure inside the brewer for a fuller, more intense taste.
Users can select between strong or mild coffee and can program a favorite beverage setting to save a preferred coffee type and dispensed amount. The machine automatically performs internal circuit cleaning cycles upon startup (unless turned off for a short period) and after prolonged inactivity.
Important Technical Specifications
The identification data for the appliance, including manufacturer, CE marking, model (Mod.), serial number (SN), power supply voltage (V), frequency (Hz), and electrical power consumption (W), are located on a plate under the base of the appliance. This information is crucial for any service requests.
The appliance is equipped with an automatic shut-off system that activates after 10-30 minutes of inactivity, depending on the selected operating mode, to comply with energy consumption regulations.
Usage Features
Initial Setup:
- Install the cup-holder grid (J) on the drip tray (I).
- Insert the drip tray (I) at the base of the appliance.
- Remove the water tank (B) by lifting its lid (A).
- Open the water tank lid (A) and fill the tank with fresh still water up to the MAX level. Warning: Do not fill the water tank while it is installed in the appliance to avoid electric shock. Do not use sparkling, hot, warm water, or other liquids.
- Close the water tank lid (A) and insert the water tank (B) into its seat, ensuring it is properly and fully installed.
- Remove the coffee beans container lid (W) and insert coffee beans into the container (U). For increased capacity, the large coffee beans container (V) can be placed on top of (U). Warning: Only use coffee beans; ground coffee, instant coffee, roasted coffee, or other substances can damage the appliance. Do not use an excessive amount of coffee beans.
- Close the coffee beans container lid (W). The indicator light for the coffee beans container will turn on steady when it needs refilling.
First Use:
- Connect the power cord (C) to its seat at the base of the appliance and plug it into a power outlet.
- Place a cup on the cup-holder grid (J).
- Press the power button (S). The appliance will automatically start an internal circuit cleaning cycle.
- After the automatic cleaning cycle, the appliance enters stand-by mode. To disable this cycle, open the lateral door (E) and press the power button (S) until a sound signal is emitted.
- Before first use, perform a manual cleaning cycle of the hot water circuit by pressing the hot water button. Repeat until all water in the tank is dispensed. This should also be done if the appliance has been unused for several days.
Adjusting Dispensing Spout and Drip Tray:
The dispensing spout (P) can be slid upwards or downwards to accommodate different cup sizes (Fig. 15). For tall mugs, the drip tray (I) can also be removed (Fig. 16).
Making Coffee:
- Place a cup on the cup-holder grid (J). Adjust the spout height if necessary.
- Press the power button (S).
- Select desired coffee strength by pressing the strong coffee button (◉) or the mild coffee button (✔). The appliance will start grinding coffee, and the indicator light will flash during preparation.
- To stop brewing early, press the coffee button again.
- When brewing is complete, the indicator light turns steady, and the appliance returns to stand-by mode. The coffee grounds container indicator (国) will turn on steady when it needs emptying.
- To turn off the appliance, press the power button (S). Warning: Always empty the water tank after use to prevent limescale.
Adjusting Grinding Level:
The grinding level can be adjusted using the dial (T) inside the coffee beans container (Fig. 19). The dial has "+" (coarse) and "-" (fine) symbols. This adjustment should be done while the appliance is on and grinding coffee to facilitate rotation. Warning: Never adjust the grinding level when grinding is not ongoing, as this can damage the appliance. Only grind coffee beans. Note that the desired grinding level may not be immediate due to residual ground powder in the duct; brew a few times before adjusting again.
Making Milk Froth:
- Place a large cup on the cup-holder grid (J) and make coffee.
- Turn the steam/hot water wand (M) towards the drip tray (I).
- Press the steam button (小). The steam/hot water indicator light (O) will turn on, and steam will be delivered (Fig. 23).
- Once the indicator light (O) turns steady, place a milk jug with cold milk under the wand (M).
- Deeply introduce the wand (M) into the milk (Fig. 24).
- Press the steam button (小) again. Move and spin the jug until froth appears (Fig. 25).
- Press the steam button (小) to stop steam delivery.
- After each use, deliver steam for a few seconds to clear milk residues from the wand spout. Clean the wand joint (N) and steel tube (L) with a non-abrasive damp cloth.
- Pour the milk froth into the prepared coffee.
Dispensing Hot Water:
- Place a cup on the cup-holder grid (J).
- Press the hot water button ("). The indicator light will turn on, and hot water will dispense from the wand (M).
- To stop dispensing early, press the hot water button again. The light will turn off when ready.
Setting Favorite Beverage Function:
- Press and hold the favorite beverage button (*) for 2 seconds. The strong coffee (◉) and mild coffee (✔) indicator lights will flash.
- Press the desired coffee button to save the beverage type. The appliance will start dispensing.
- To save the dispensed quantity, press and hold the button until the desired amount is reached, then release. Two sound signals confirm the save.
- The next time, pressing the favorite beverage button (*) will automatically dispense the saved beverage type and amount.
Selecting Operating Mode:
- When the appliance is in stand-by mode, press and hold the power button (S) for 5 seconds.
- The buttons on the display will show different light patterns indicating the current mode:
- Hot water button (") for ECO mode.
- Strong coffee button (◉) for fast mode.
- Mild coffee button (✔) for default mode.
- Press the desired button to select the mode. Two sound signals confirm the selection.
- Press and hold the power button (S) again for 5 seconds to confirm.
Filling Water Tank During Use:
If the water tank is empty, the indicator light (✔) will flash.
- Remove the water tank (B) by lifting its lid (A).
- Open the water tank lid (A) and fill with fresh still water up to MAX level.
- Close the water tank lid (A) and insert the water tank (B) into its seat. The indicator light will turn off when sufficient water is detected.
Filling Coffee Beans Container During Use:
If the coffee beans container is empty, the indicator light (6) will flash.
- Remove the coffee beans container lid (W).
- Insert coffee beans into the container (U).
- Close the coffee beans container lid (W). The indicator light will turn off when sufficient beans are detected.
Maintenance Features
Regular and daily cleaning is essential for appliance efficiency and longevity. Warning: All cleaning and maintenance operations must be performed with the appliance off and unplugged, and hot parts must be cooled down. Never wash components in a dishwasher or use direct jets of water.
Cleaning the Drip Tray (I) and Cup-Holder Grid (J):
- Remove the drip tray (I) and cup-holder grid (J).
- Empty and wash them in fresh water.
- Dry with a cloth.
- Reinstall the cup-holder grid (J) on the drip tray (I) and insert the drip tray (I) at the base of the appliance.
Cleaning the Water Collection Tray (H) and Coffee Grounds Container (K):
- Remove the water collection tray (H) and the coffee grounds container (K) from the base of the appliance.
- Remove (K) from (H) and empty (K). The indicator light (国) turns on steady when (K) needs emptying.
- Wash (H) and (K) in fresh water and dry with a cloth.
- Place (K) back into (H).
- Insert and lock (H) at the base of the appliance. The indicator light (国) flashes if (K) is not installed.
Cleaning the Brewer (D) and its Seat:
- Open the lateral door (E).
- Press the release buttons on the sides of the brewer (D) to remove it.
- Remove the brewer (D) from its seat.
- Use the provided cleaning brush (F) to remove coffee residues from the outlet hole in the brewer seat.
- Wash the brewer (D) in fresh water and dry with a cloth.
- Insert and lock the brewer (D) into its seat.
- Close the lateral door (E). The indicator light ( ) turns on steady if the brewer is not installed correctly, and flashes if the lateral door is not closed properly.
Cleaning the Steam/Hot Water Wand:
Warning: Perform this when the wand is cool to avoid burns.
- Unscrew the steam/hot water wand joint (N) to the left. Pull down the wand (M) to remove it.
- Separate the steel tube (L) from the wand (M).
- Wash the wand spout (M) in warm water. Use the provided cleaning needle (G) or brush (F) to clean the hole.
- Wash the steel tube (L) in warm water. Use the provided cleaning needle (G) or brush (F) to clean the hole.
- Install the steel tube (L) on the wand (M).
- Push the wand (M) upwards into its seat. Screw the joint (N) to the right to lock it.
After each use, deliver steam for a few seconds to clear residues.
Cleaning the Tank:
Regularly clean the inside of the water tank with a sponge or damp cloth.
Cleaning the Appliance Body:
Warning: Do not use abrasive detergents. Clean fixed parts with a non-abrasive damp cloth and mild detergent.
Manual Cleaning Cycle of the Coffee Circuit:
Warning: Danger of burns from splashes.
To perform a manual cleaning cycle after use or inactivity:
- Press and hold the power button (S) and the hot water button ("). The indicator lights of the hot water, strong coffee, and mild coffee buttons will turn off.
- The appliance will automatically start a cleaning cycle, dispensing water from the adjustable dispensing spout (P).
- Once complete, the appliance enters stand-by mode.
Manual Cleaning Cycle of the Hot Water Circuit:
Warning: Danger of burns from splashes.
To perform a manual cleaning cycle after use or inactivity:
- Press the hot water button (").
- The appliance will automatically start a cleaning cycle, dispensing water from the steam/hot water wand (M).
- Repeat until all water in the tank is consumed.
Emptying the Internal Circuits:
Recommended after long periods of non-use or in case of malfunction (e.g., frost protection).
- When in stand-by, press and hold the power button (S) and the mild coffee button (✔) for 5 seconds. The indicator light (LJ) will flash.
- Remove the water tank (B). The indicator light (LJ) turns steady, indicating the emptying function is in progress.
- To stop, press the power button (S) before removing the water tank. The appliance turns off automatically when complete.
Note: After emptying, press the hot water button (") until water dispenses from the spout (P) before making coffee again.
Descaling:
Warning: Do not use vinegar or unauthorized descaling agents. Danger of burns from splashes.
Descaling is required when the indicator light (圈) turns on steady. Use a citric acid-based descaling product.
- Fill the water tank with fresh still water up to MAX level.
- Pour the descaling product into the water tank.
- Close the water tank lid (A) and insert the water tank (B) into its seat.
- Plug in the appliance.
- Place a container on the cup-holder grid (J) and turn the steam/hot water wand towards the container.
- Press and hold the power button (S) and the strong coffee button (◉) for 5 seconds. A sound signal will emit, and the strong coffee button (◉) indicator light will flash.
- Press the strong coffee button (◉) to confirm descaling. The indicator light (圈) will flash, indicating descaling is in progress.
- The descaling solution will run through the wand (M) to remove limescale. To stop, press the power button (S).
- When all water is dispensed, the indicator light (✔) and strong coffee button (◉) will flash. Empty and rinse the water tank, then refill with fresh water to MAX level. The indicator light (✔) will turn off when sufficient water is detected.
- The descaling process will restart. After several cycles and breaks, it will finish, and the appliance will turn off. If the indicator light (圈) remains steady, repeat the process.
Decommissioning:
Unplug the appliance, empty and clean the water tank, water collection tray, drip tray, and cup-holder grid. Dispose of materials according to local regulations.