EasyManua.ls Logo

Ariston GA3 124 IX A1 - User Manual

Ariston GA3 124 IX A1
16 pages
Print Icon
To Next Page IconTo Next Page
Loading...
EN
Quick guide
1. TIMER KNOB
Use to set the timer.
Does not start or stop cooking.
2. ADJUSTMENT KNOB
For switching the oven on, adjusting
the temperature and selecting the
“Grill” function.
Turn to the position to switch the
oven off.
3. GRILL LED
This lights up when the grill is in use.
4. LIGHT BUTTON
Press to switch the light on (1) or off (0).
FITTING THE COVER ON THE BURNER
To fit the cover on the burner correctly, place it on the
bottom of the cooking compartment.
Position it so that the words “AVANTI - FRONT” are facing the
outside and so that the cover cannot move sideways once
lowered into position.
TURNSPIT
Push the skewer through the center of the meat (bound with string if
poultry) and slide the meat onto the skewer until it is positioned rmly
on the fork and cannot move. Push the second fork onto the skewer
and slide it on until it holds the meat rmly in place.
Tighten the xing screw to secure it in position.
Insert the end into the recess provided in the oven's cooking
compartment and rest the rounded part on the support (placed on the
third level).
To use the roasting spit, start the oven by selecting the “Grill” function.
To collect the cooking juices, position a dripping pan below and add
200 ml of drinking water. To avoid burning yourself when the skewer
is hot, only handle it by the plastic handle (which must always be
removed before cooking).
FIRST TIME USE
HEAT THE OVEN
A new oven may release odours that have been left behind
during manufacturing: this is completely normal.
Before starting to cook food, we therefore recommend
heating the oven with it empty in order to remove any
possible odours.
Remove any protective cardboard or transparent film from
the oven and remove any accessories from inside it.
Heat the oven to 250° C for about one hour.
Notes: It is advisable to air the room after using the appliance for
the rst time.
CONTROL PANEL DESCRIPTION
1 2 3
4
THANK YOU FOR BUYING AN ARISTON
PRODUCT
In order to receive a more complete
assistance, please register your product on
www . aristonchannel . com
Before using the appliance carefully read the Safety
Instruction.
Question and Answer IconNeed help?

Do you have a question about the Ariston GA3 124 IX A1 and is the answer not in the manual?

Overview

This document describes the Ariston oven, providing a quick guide to its functions, usage, and maintenance.

Control Panel Description

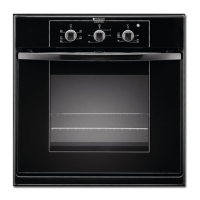
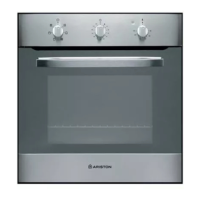
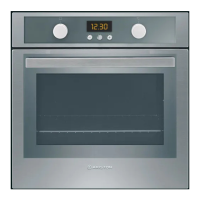
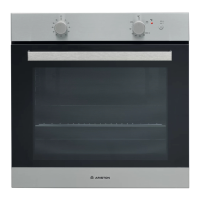
The oven features a straightforward control panel with four main components:

  • Timer Knob: Used to set a timer. This knob does not initiate or stop cooking.
  • Adjustment Knob: This multi-functional knob is used to switch the oven on, adjust the temperature, and select the "Grill" function. Turning it to the "0" position switches the oven off.
  • Grill LED: This indicator light illuminates when the grill function is active.
  • Light Button: A simple push-button to switch the oven's internal light on or off.

Important Technical Specifications

While specific power ratings or dimensions are not detailed in this quick guide, the temperature range for cooking is indicated on the adjustment knob, spanning from 150°C to 230°C, with a maximum setting (MAX) and a "Grill" function. The timer knob allows for setting durations up to 60 minutes.

Usage Features

First Time Use: Before initial use, it is recommended to heat the empty oven to 250°C for approximately one hour to eliminate any manufacturing odors. It's also advised to remove all protective cardboard, transparent film, and accessories from inside the oven before this process. Airing the room after the first use is recommended.

Daily Use:

  1. Starting the Oven: With the oven door closed, press and turn the adjustment knob to the maximum temperature (MAX). Hold the knob for a few seconds to ensure the oven switches on. The electronic switch-on knob should not be pressed and held for more than 15 seconds. To change the temperature, simply turn the adjustment knob to the desired setting. To stop cooking and switch off the oven, turn the adjustment knob to the "0" position. If the oven fails to switch on or switches off accidentally, return the adjustment knob to "0", open the door, wait at least one minute, and then attempt to switch it on again.
  2. Grill Function: This function is suitable for grilling steaks, kebabs, sausages, gratin vegetables, and toasting bread. Food should be placed on the 5th shelf. When grilling meat, a dripping pan (on the 4th shelf with approximately 200 ml of water) is recommended to collect juices. Preheat the oven for 3-5 minutes. The oven door must remain closed during grilling. The roasting spit (if provided) can be used with this function by turning the adjustment knob to the grill symbol. The Grill LED will light up when activated.
  3. Setting the Timer: The timer function does not interrupt or activate cooking. It serves as a display timer, usable both during active cooking and when the oven is off. To activate, turn the timer knob to the desired duration; an audible signal will sound when the countdown finishes.

Turnspit (Roasting Spit): The turnspit is designed for roasting meat. To use it:

  • Push the skewer through the center of the meat (bound with string if poultry) and slide the meat onto the skewer until it is firmly positioned on the fork.
  • Push the second fork onto the skewer until it holds the meat firmly in place.
  • Insert one end of the skewer into the recess in the oven's cooking compartment and rest the rounded part on the support (placed on the third level).
  • Tighten the fixing screw to secure it.
  • To operate, select the "Grill" function.
  • Position a dripping pan below the turnspit with 200 ml of water to collect cooking juices.
  • Always handle the hot skewer with the plastic handle (which must be removed before cooking) to avoid burns.

Fitting the Burner Cover: To correctly fit the burner cover, place it on the bottom of the cooking compartment. Position it so that the words "AVANTI - FRONT" face outwards and the cover cannot move sideways once lowered into position.

Cooking Table: The manual includes a comprehensive cooking table with recommended settings for various dishes, including:

  • Leavened cakes, biscuits/tartlets, pizza/bread, frozen pizza, salty cakes, vol-au-vents/puff pastry crackers, lasagna/pasta bake/cannelloni/flans.
  • Lamb/veal/beef/pork (1 kg), chicken/rabbit/duck (1 kg), turkey/goose (3 kg).
  • Baked fish/en papillote (0.5 kg fillet, whole), stuffed vegetables (tomatoes, courgettes, aubergines), roast potatoes.
  • Toasted bread, fish fillets/slices, sausages/kebabs/spare ribs/hamburgers.

For each recipe, the table specifies:

  • Function (often indicated as a symbol)
  • Preheat time (e.g., 10 minutes, 5 minutes)
  • Temperature (°C) range
  • Duration (minutes)
  • Recommended level and accessories (e.g., wire shelf, baking tray, dripping pan).
  • An asterisk (*) next to some durations indicates that food should be turned halfway through cooking.

Maintenance Features

Cleaning and Maintenance:

  • Always perform maintenance operations when the oven is cold and disconnected from the power supply.
  • Use protective gloves during all operations.
  • Do not use steam cleaning equipment.
  • Avoid using wire wool, abrasive scourers, or abrasive/corrosive cleaning agents, as these can damage the appliance surfaces.

Click & Clean - Cleaning the Glass:

  1. Remove the oven door and place it on a soft surface with the handle facing downwards.
  2. Simultaneously press the two retaining clips and pull the upper edge of the door towards you to remove it.
  3. Lift and firmly hold the inner glass with both hands, then remove it and place it on a soft surface for cleaning.
  4. To reposition the internal glass, ensure the "R" mark is visible in the left corner. First, insert the long side of the glass marked "R" into the support seats, then lower it into position.
  5. Refit the upper edge; a click will indicate correct positioning. Ensure the seal is secure before reattaching the door.

Troubleshooting: The manual provides a troubleshooting guide for common issues:

  • Problem: The oven or burner will not switch on.
    • Possible Cause: Power cut, disconnection from mains electricity, gas supply interrupted, incorrect switch-on procedure.
    • Solution: Check for mains electrical power and connection. Wait at least one minute, then try to switch the oven on again. Check if the gas tap is open or if the liquid gas cylinder is empty. Repeat the steps described in the "Daily use" section after waiting one minute.

In case of problems, always turn the adjustment knob back to the "0" position and open the oven door.

For more information, users are directed to download the complete Use and Care Guide from www.aristonchannel.com. Policies, standard documentation, and additional product information can also be found on the website or by contacting After-sales Service with the product's identification plate codes.

Ariston GA3 124 IX A1 Specifications

General IconGeneral
BrandAriston
ModelGA3 124 IX A1
CategoryOven
LanguageEnglish

Related product manuals