This document provides installation and maintenance instructions for the Ariston wall-hung combination boiler, specifically Type C Boilers. It is intended for competent installers and should be left with the end-user for future reference.
Function Description:
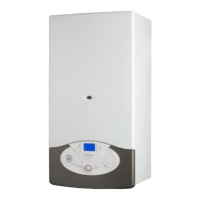
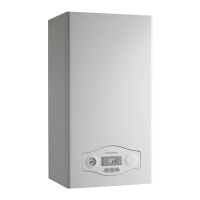
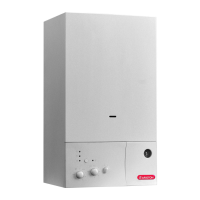
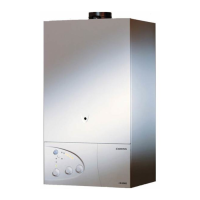
The Ariston wall-hung combination boiler is designed for the production of both central heating (C.H.) and domestic hot water (D.H.W.). It is a room-sealed appliance, meaning its combustion circuit, air vent intake, and combustion chamber are air-tight with respect to the room in which it is installed. This design allows for installation in any type of room without specific ventilation requirements or limitations on room volume. The boiler incorporates an anti-frost device within its electronic regulation system.
Important Technical Specifications:
The boiler operates with alternating current, 230 V~ 50 Hz supply, and requires a 3 A fuse. The maximum absorbed power is indicated on the rating plate.
Key components include:
- Flue connector: For exhaust gas discharge.
- Air intake for twin pipe flue systems: For combustion air supply.
- Fan: Assists in flue gas discharge.
- Combustion chamber hood and insulation panel: Enclose the combustion process.
- Main heat exchanger and secondary heat exchanger: For heat transfer to central heating and domestic hot water, respectively.
- Main circuit temperature probes (flow and return sensors): Monitor central heating water temperatures.
- Burner: Where combustion occurs.
- Detection and ignition electrodes: For flame sensing and ignition.
- Motorised diverter valve: Switches between central heating and domestic hot water modes.
- Safety valve (3 bar): Protects against overpressure in the heating system.
- Gas valve: Controls gas flow to the burner.
- Domestic cold water inlet filter: Filters incoming cold water.
- Spark generator: Initiates ignition.
- Domestic hot water flow switch: Detects domestic hot water demand.
- Boiler drain valve: For draining the system.
- Circulation pump with automatic air release valve: Circulates water in the heating system and removes air.
- Expansion vessel: Accommodates water expansion in the sealed heating system.
- Air pressure switch: Monitors air pressure in the flue system.
- Combustion analysis intakes: For measuring combustion by-products.
Dimensions and Clearances:
The boiler has overall dimensions of 400 mm width, 700 mm height, and 250 mm depth. Minimum clearances for maintenance are 20 mm on each side.
Connections are:
- Central Heating Flow (A): 3/4"
- Domestic Hot Water Outlet (B): 1/2"
- Gas Inlet (C): 3/4"
- Domestic Cold Water Inlet (D): 1/2"
- Central Heating Return (E): 3/4"
Flue Systems:
The boiler is designed for coaxial flue discharge systems (Ø 60/100 mm) but can also use split (twin pipe) systems (Ø 80/80 mm) with a special adaptor. Restrictors may be required depending on the flue pipe length.
Maximum flue lengths vary by type:
- Coaxial (C12, C32, C42): L max = 3 m (with restrictor)
- Twin Pipe (C12, C32, C42, C52, C82): L max = 11 m to 43 m (with restrictor)
The total length "L" includes end terminals and 90° elbows. For C52 types, exhaust/air intake pipes must be Ø 80 mm, and the exhaust pipe must protrude at least 0.5 m above the roof if located on the opposite side of the building to the air intake.
Usage Features:
The control panel features:
- Central heating selection and temperature adjustment knob (A): For setting heating temperature.
- Domestic hot water temperature adjustment knob (E): For setting DHW temperature.
- On/Off/Reset knob (C): To power on/off and reset the boiler.
- Ignition failure (lockout) L.E.D. (red) (B): Indicates ignition failure.
- Fume sensor L.E.D. (yellow) (D): Indicates fume sensor activity.
- On/Off L.E.D. (green) (F): Indicates boiler power status.
- Heating system pressure gauge (G): Displays system pressure.
The boiler will signal a shutdown due to ignition failure if air is not bled from the lines during initial start-up.
Operational Adjustments:
- Slow Ignition Adjustment and Maximum Heating Adjustment: Controlled by Jumper "P". Moving it to position "A" allows adjustment of slow ignition (using knob "E") and maximum heating (using knob "A").
- Ignition Delay: Controlled by Jumper "N". Position "B" sets a 2-minute delay, while "A" cancels it.
- Room Thermostat Connection: The boiler supports a two-wire type room thermostat. Connection involves removing the front panel, rotating the control panel and PCB, and wiring to the terminal block. An external time clock can also be connected.
Maintenance Features:
Annual checks are recommended:
- Water connections: Check and replace faulty seals.
- Gas seals: Check and replace faulty seals.
- Visual inspection: Of the entire unit.
- Combustion process: Visual check or analysis of combustion by-products; clean burner jets if needed.
- Combustion chamber: Dismantle and clean if necessary.
- Primary heat exchanger: Visual check for overheating, clean exhaust fan if needed.
- Gas pressures: Adjust ignition, partial, and full load pressures.
- Heating safety systems: Check maximum temperature and pressure safety devices.
- Gas safety systems: Check for lack of gas or flame ionisation, and gas cock.
- Electrical connection: Ensure compliance with instructions.
- Domestic hot water production: Check efficiency (flow rate and temperature).
- Discharge/ventilation system: General check of combustion by-products.
- General performance: Check overall unit performance.
Installation and Commissioning:
Installation must be carried out by a CORGI Approved Installer in accordance with current Gas Safety (installation & use) Regulations, Local Building Regulations, I.E.E. Wiring Regulations, and local water authority byelaws.
Initial Preparation:
- Complete the benchmark Log Book with the customer.
- Perform preliminary electrical system checks (polarity, earth continuity, resistance to earth, short circuit).
- Filling the Heating System: Remove panels, open heating flow/return cocks, loosen automatic air release valve cap, close all air release valves, gradually open filling point valve, purge air from the pump (by unscrewing plug and manually rotating shaft), close pump plug, fill to 0.7 bar, and check for leaks.
- Filling the D.H.W. System: Close hot water taps, open cold water inlet cock, slowly open and close draw-off taps until clear water flows.
- Gas Supply: Inspect and purge installation, open gas cock, check for leaks.
- Flushing: After installation, run the heating system to operating temperature, then flush with a central heating flushing detergent (e.g., Fernox Superfloc). Use of an inhibitor (e.g., Fernox MB-1) is recommended to prevent corrosion. Failure to follow this procedure may invalidate the warranty.