Planning and Installation manual VV600/VV602Plus 17
1. Define the exact location of the VV600Plus.Using the felt pen, mark the
location of the 3 threaded mounting holes. Use the mounting plate VM600P as
a template and use a centre punch for exact location of the drill holes.
2. Drill three holes, using a 3.3 mm diam. drill, as deep as the steel surface will
allow.
3. Thread the holes with a M4 tap.
4. Remove burrs with a 10 mm drill bit.
5. Mount the detector to the steel surface using the three M4 screws supplied.
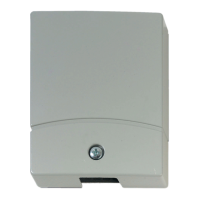
6. If a VT705P test transmitter is used, it can be mounted in the detector’s right-
hand bottom corner, see illustration on previous page.
5.3. Mounting on steel and concrete using a mounting
plate
In the following cases you should use the VM600P or VM604P mounting plates:
• Always use the VM600P mounting plate for surface mounting on concrete.
• Use the VM604P welding mounting plate when drilling in the protected steel
surface is impractical or impossible.
• Use the VM600P mounting plate when replacing Securitas SSD70/SSD
2000/SSD 4000 or Cerberus GM 31/35/36/550/560
5.4. The mounting plate VM600P
A = Mounting holes for VV600Plus & VV602Plus
B = Mounting holes for Securitas SSD70.
C = Mounting holes for Cerberus GM 31,35, 550, 560
D = Mounting hole for expansion plug or recess mounting box.
E = Mounting holes for Securitas 2000.
F = Mounting hole for expansion plug to the test transmitter, VT705P.
G = Mounting holes for accessories