22
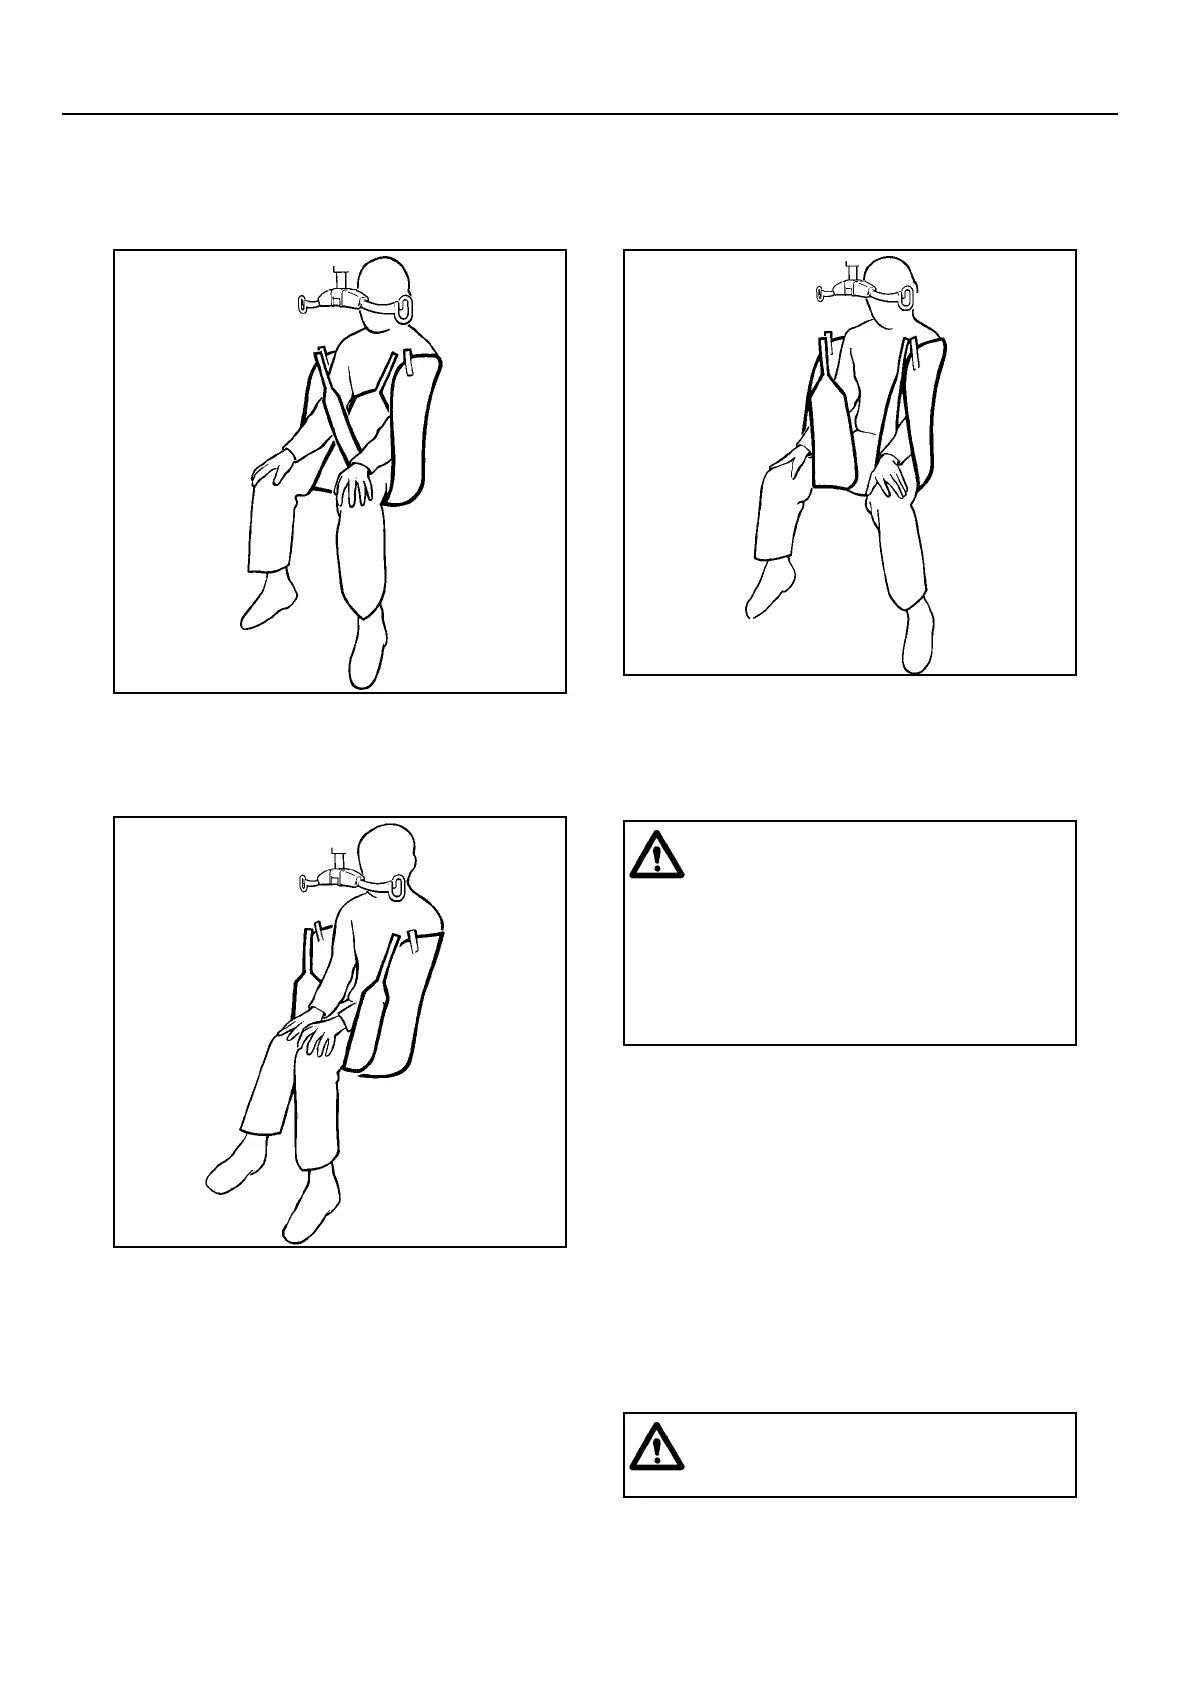
Method 2 - As method 1 above, but pass each tail
portion of the sling under both thighs, and then out
the other side before attaching points “B” to the
outer hooks on the spreader bar (see fig. 35).
Method 3 - As method 1 above, but loop a tail
portion of the sling under each thigh and attach to
the same side hook as the shoulder attachment (left
straps to left hook and right straps to right hook).
This method holds the legs in abduction, and is
useful for toiletting (see fig. 36).
Once the sling has been positioned and attached
securely to the spreader bar then lifting can be
carried out using the control handset. For general
patient manoeuvring and transportation see also
section “using 4 point spreader bar”.
Apart from the methods listed above, the 2 point
spreader bar with loop slings is also extremely
useful for lifting patients who have contracted legs,
where the patient leg position prohibits the use of
the 4 point spreader bar. Attach the sling in the
normal manner as described in “lifting from the
bed”.
To Lift from a Bed
Place the sling under the patient as if it were a
drawsheet. Flex the patient’s legs, and bring the
sling leg pieces under the thighs, attach the sling to
the spreader bar using any of the methods 1-3
above.
Fig. 34
mP1183a/2
METHOD 1
Fig. 35
P1395e, mP1138c/2
METHOD 2
Fig. 36
P1395e, mP1138b/2
METHOD 3
Warning: Always check that all the
sling attachment loops are fully in
position before and during the
commencement of the lifting cycle, and in
tension as the patient’s weight is
gradually taken up.
When lowering the Lifter ensure that the
patient’s or attendant’s legs and feet are
well clear of the moving mast.
Warning: IMPORTANT: Check that all
four points of the sling are securely
connected before lifting.
Using your Opera