6
6 INSTALLATION: PLUMBING
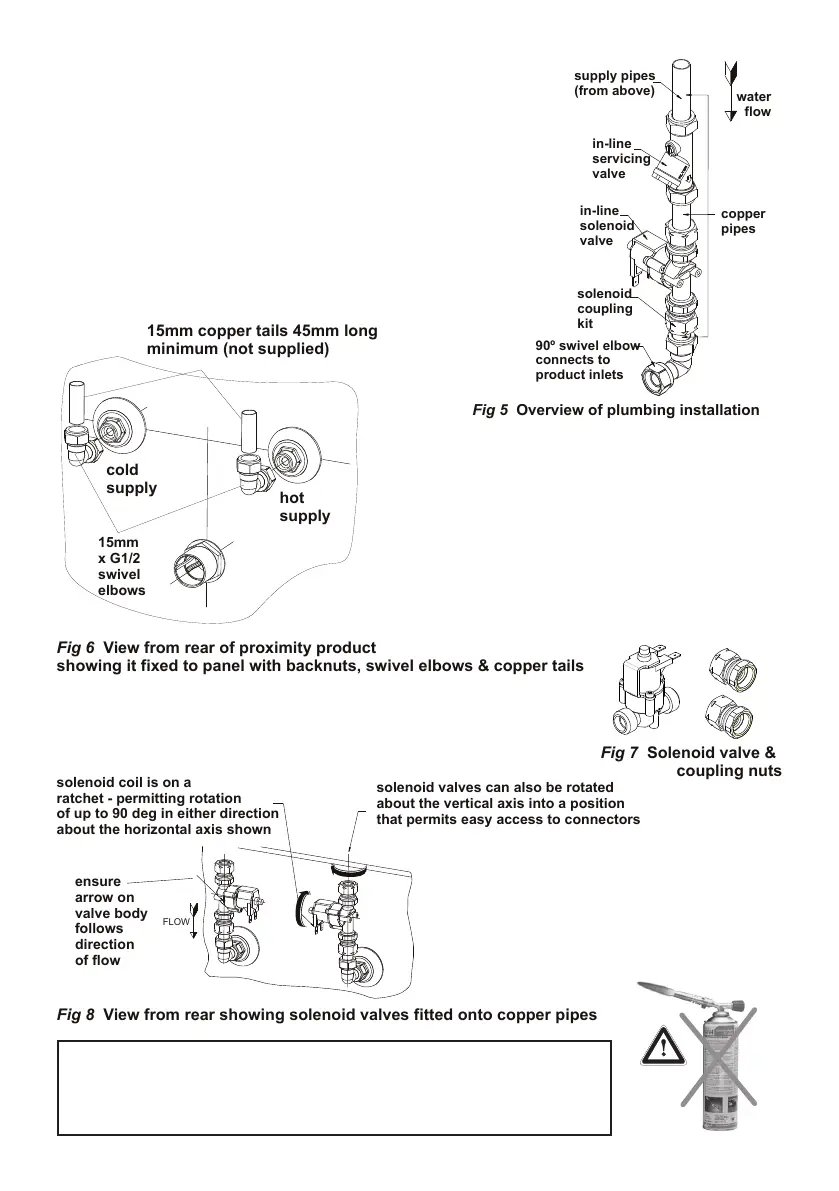
Fig 5 Overview of plumbing installation
Fig 6 View from rear of proximity product
showing it fixed to panel with backnuts, swivel elbows & copper tails
Fig 8 View from rear showing solenoid valves fitted onto copper pipes
15mm copper tails 45mm long
ratchet - permitting rotation
of up to 90 deg in either direction
about the horizontal axis shown
solenoid valves can also be rotated
about the vertical axis into a position
that permits easy access to connectors
First refer to section 4. Supply conditions.
A typical example of an installation of a proximity mixer is shown
here as a guide. In this example, the water supply pipes are pro-
vided from above (this usually permits better drain down of pipes).
Supplies can be from any direction.
This diagram shows the preferred method of assembling the plumb-
ing components. Two of these assemblies are required per product.
OBSERVE ARROWS ON VALVE BODIES.
IMPORTANT: Avoid using heat for soldering near the product
inlets to prevent damage to internal components
Mount mixer to the panel and secure the backnuts.
Fit swivel elbows (15mm x G1/2, not supplied) to the inlet tails
as shown and ensure the seals supplied with them are tted
between the inlet tails & the elbows. Make good the joints.
Prepare two short lengths of 15mm copper pipe (minimum
of 45mm long) and assemble to the compression side of
elbows. Make good the joints
IMPORTANT: When viewed from the REAR, the HOT
supply should be connected to the RIGHT hand side.
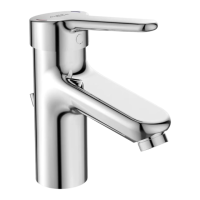
The coupling nuts (supplied) can now be screwed onto both sides of
both in-line solenoid valves. Ensure the seals provided are tted be-
tween the solenoids and the coupling nuts. Make good the joints, taking
care not to use excessive force.
The solenoid valve assemblies can now
be loosely tted onto the copper pipes.
IMPORTANT: Ensure directional ar-
row onvalve body follows the direc-
tion of the water ow.
Position solenoid valves as required and
then make good the joints
DO NOT apply heat near this product. Heat generated by soldering
could damage plastic parts and seals.
Check that all joints are securely tightened, test for leaks.