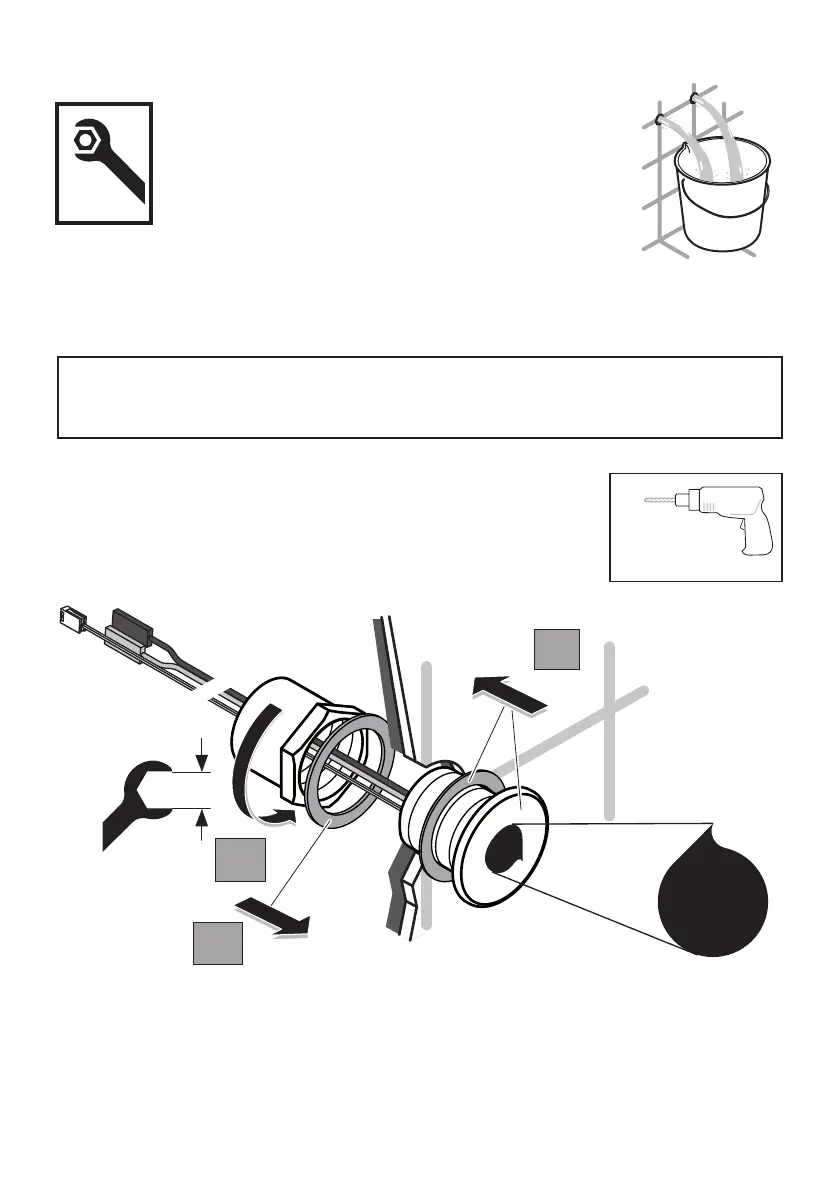
DRILL PANEL
HOLE Ø35 MIN,
Ø40 MAX
Ø37 FOR REVERSIBLE NUT
8
5 INSTALLATION GUIDE
Important: Ensure the sensor is positioned such that it will detect the presence of the
user in front of the urinal.
SENSOR SHOULD NOT BE LOCATED DIRECTLY OPPOSITE A WALL MIRROR.
5.1 Mounting sensors
Before connection, ush water through pipe-work to remove
all debris etc. to prevent damage to the valve mechanism.
THEN ENSURE WATER SUPPLIES HAVE BEEN ISOLATED.
2. Fit the brass washer & back-nut onto the sensor housing tail as shown from behind the panel.
3. Hand tighten the nut against the brass washer until it makes contact with the rear of the panel. En-
sure the sensor housing is positioned correctly, & then tighten the back-nut securely with an adjustable
spanner - 38mm A/F
NOTE: for very thick panels, the nut can be reversed to increase clamping distance.
DO NOT REMOVE SENSOR PROTECTIVE STICKER.
1
3
2
38
Don´t
remove, read
instruction 1st
PANEL MOUNT (PM) SENSORS
1. Remove the sensor mounting kit if already assembled to the sensor
housing tail. Ensure the rubber washer is in place behind the ange.
Oer the sensor housing towards the panel hole.
Feed the cables & tail through panel hole. Push the sensor housing
against the panel & ensure the rubber washer makes contact.
SENSOR POSITIONING: we recommend the sensor be mounted approximately as illustrated on the
previous page. Where exposed pipe work has been installed, position the sensor alongside & above
the urinal. For concealed pipe work installations, the sensor can be mounted centrally above the urinal.

 Loading...