Installation and Overview
VAP3400/3402 802.11ac Wireless Video Access Point • User Guide 6
Installing Your VAP3400/3402 (Dual Units)
Step 1: Install the Access Point
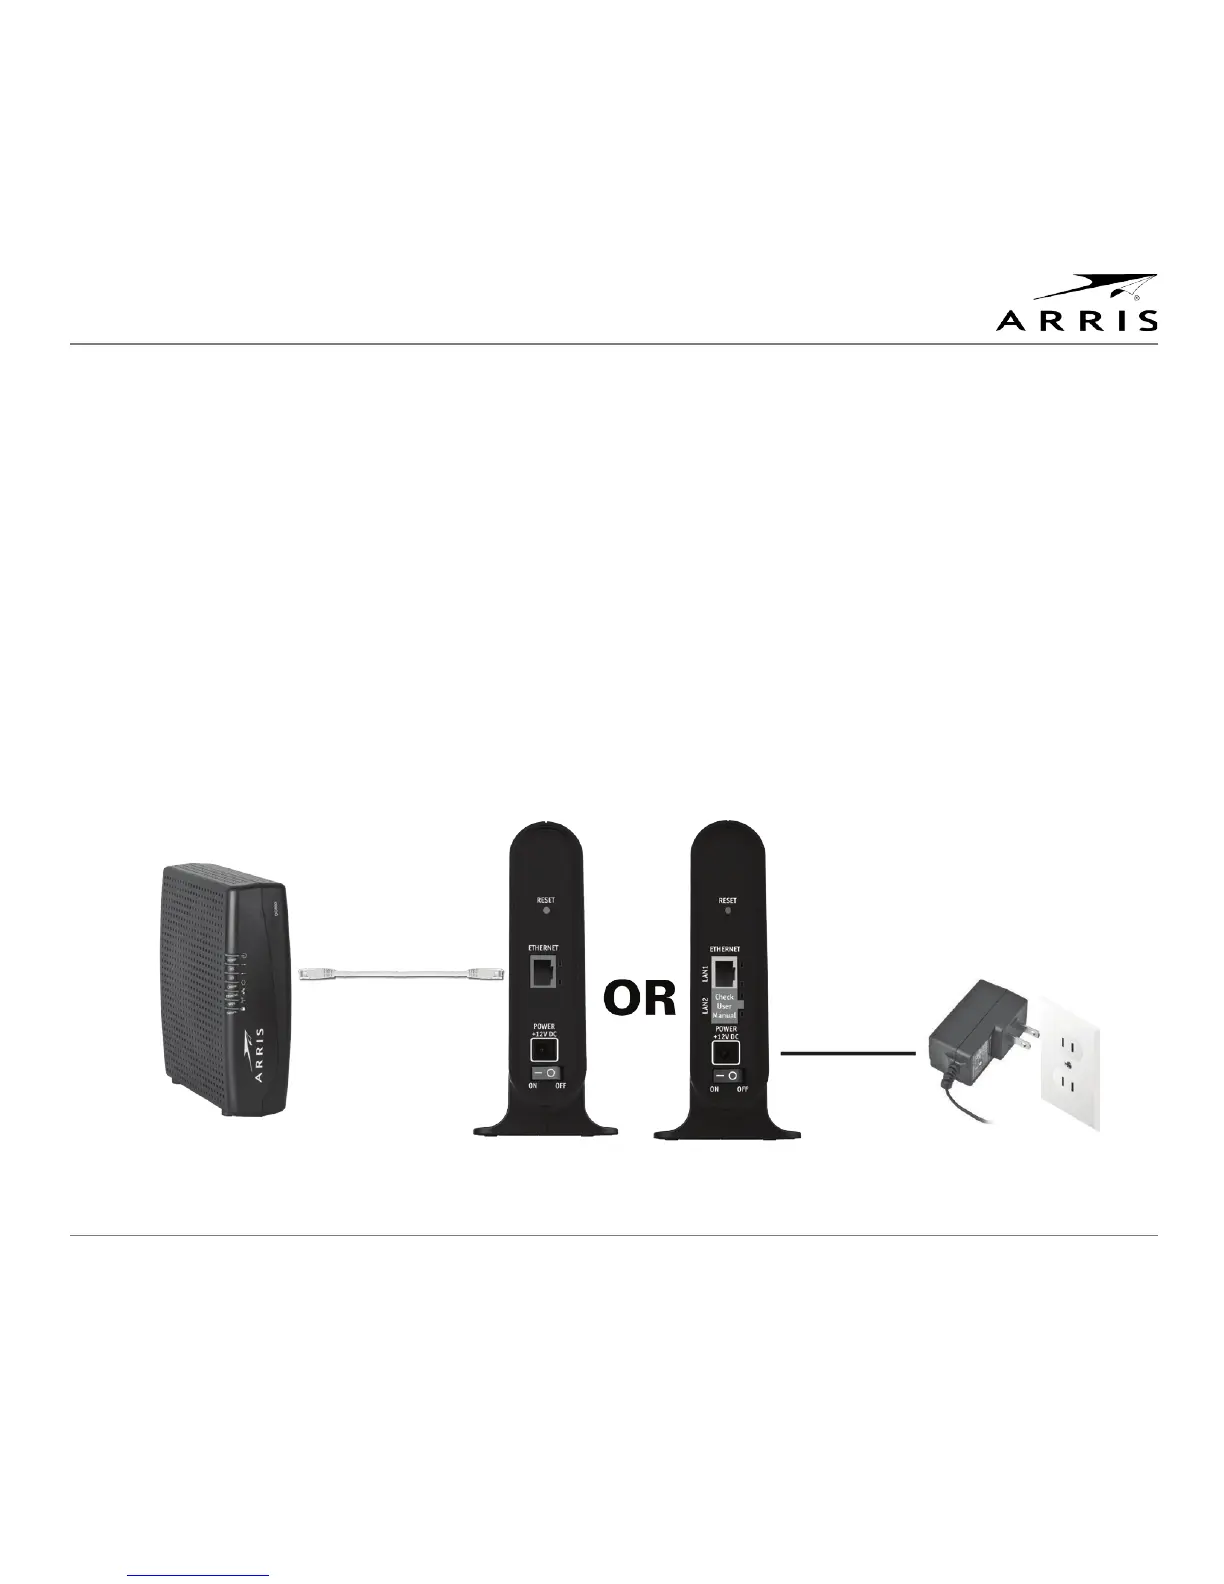
1. Connect one VAP unit to your home gateway using the provided Ethernet cable. Before you connect the
VAP, ensure the gateway is powered on.
2. Connect the power adapter to the VAP, plug the adapter into a wall outlet and set the Power switch to the
ON position. You’ll see the Power LED on the unit’s front panel light green, indicating the unit is powered.
3. After connecting the Ethernet cable, check that the 2 Ethernet port LEDs are (1) solid green and (2) blinking
yellow.
Note: While you are required to connect your VAP to a gateway to ensure the Access Point properly
streams video to the Client, the VAP’s extra Ethernet port (VAP3402 only) provides you with the option of
connecting another device to the unit, such as a computer or gaming console.
Do not connect both Ethernet ports to your gateway.
4. Wait until the Operational Mode/WPS Status LED is solid green (approximately 1-2 minutes).
Only one connection
between gateway and
VAP allowed