EasyManua.ls Logo

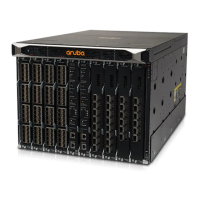
Aruba 8400 Series User Manual

Aruba 8400 Series
121 pages
To Next Page IconTo Next Page
Page #1 background imageLoading...
Page #1 background image
Aruba 8400 Switch Series Installation
and Getting Started Guide
Part Number: 5200-3356
Published: September 2017
Edition: 1

Table of Contents

Other manuals for Aruba 8400 Series

Questions and Answers:

Aruba 8400 Series Specifications

General IconGeneral
Switching Capacity19.2 Tbps
ManagementArubaOS-CX
StackingVirtual Switching Framework (VSF)
Input Voltage100-240 VAC
Operating Temperature0°C to 45°C (32°F to 113°F)
Heat DissipationVaries by configuration
WarrantyLimited Lifetime Warranty
Power SupplyDual, Hot-swappable
Layer SupportLayer 2/3
PoENot supported
Operating Relative Humidity5% to 95% non-condensing
Memory and Processor16GB RAM
Power Supply OptionsAC and DC power supplies available
RedundancyPower supply and fan redundancy
Virtualization SupportYes (VSX)
Security FeaturesMACsec, Role-based access control
Quality of Service (QoS)8 queues per port
LatencySub-microsecond
PortsUp to 384x 10/25GbE, 96x 40GbE, or 48x 100GbE

Summary

Chapter 2 Installation precautions and guidelines

ESD protection and handling

Protecting components from ESD and proper handling techniques.

Rack and power installation guidelines

Guidelines for rack mounting, power circuits, and AC outlets.

Chapter 3 Site preparation

Safety recommendations

Lists essential publications and recommendations before installation.

Electricity safety

Precautions related to electrical hazards during installation.

Handling safety

Guidelines for safely handling the switch and its components.

Preventing electrostatic discharge damage

Procedures to prevent ESD damage to components.

Laser safety

Safety precautions regarding laser light emitted from fiber ports.

Examining the installation site

Requirements for the installation environment, including weight and temperature.

Grounding

Importance and procedure for grounding the switch.

Power

Tasks to meet power requirements, including consumption calculation.

Cooling

Planning the installation site for adequate ventilation and airflow.

Chapter 4 Introducing the Aruba 8400 switch series

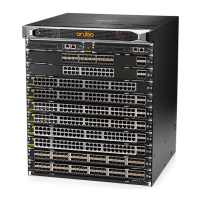
Overview of the Aruba 8400 switch

High-level description of the Aruba 8400 switch and its key features.

Management module (MM) slots

Identifies the two management module slots on the switch.

Management module LEDs

Explains the LEDs on the management module.

Line module (LM) slots

Identifies the eight line module slots on the switch.

Fan tray and fan modules

Describes the three fan trays and their fan modules.

Fabric module (FM) slot

Identifies the slots for fabric modules on the rear of the chassis.

Chapter 5 Unpacking, lifting, and moving the chassis

Unpacking the switch components

Steps and prerequisites for unpacking the switch and its accessories.

Move the chassis to the mounting location

Instructions for manually moving the switch chassis to its installation site.

Manually moving the chassis

Detailed steps for manually lifting and moving the switch using handles.

Using a mechanical lift to move the chassis

Procedure for moving the switch chassis using a mechanical lift.

Chapter 6 Mounting the chassis

Mounting the chassis in a rack

General considerations for mounting the switch in an equipment rack.

Grounding the chassis

Procedure for grounding the switch chassis for safety.

Chapter 7 Installing components

Installing a new power supply unit in an empty slot

Steps to install a new power supply unit into an empty slot.

Install management modules in slots 5 and 6

Procedure to install management modules into slots 5 and 6.

Install up to eight line modules

Procedure to install line modules into available slots.

Chapter 8 Activating the switch

Power-on and NOS (Network Operating System) boot-up

Procedure for powering on the switch and completing the NOS boot-up.

Chapter 9 Adding or replacing switch components

Adding or replacing switch modules with controlled shutdown or hot swap methods

Recommended methods for adding or replacing switch modules.

Using controlled shut down to add or replace line modules

Procedure for adding/replacing line modules using controlled shutdown.

Replacing a line module with another of a different type

Procedure for replacing a line module with a different type.

Using controlled shutdown to add or replace fabric modules

Procedure for adding/replacing fabric modules using controlled shutdown.

Removing or replacing a standby management module

Procedure for removing or replacing the standby management module.

Removing or replacing an active management module

Procedure to remove or replace the active management module.

Removing or replacing a fabric module

Procedures for removing or replacing a fabric module.

Removing a fabric module

Steps to remove a fabric module from its slot.

Removing or replacing a line module

Procedure to remove or replace a line module.

Chapter 10 Troubleshooting

Protect the switch and components from damage caused by ESD (Electrostatic discharge)

Precautions to protect components from ESD damage during troubleshooting.

Basic troubleshooting tips

Common issues to check first when troubleshooting.

Diagnosing with LEDs

How to diagnose issues using the switch's LEDs.

Chapter 12 Support and other resources

Accessing Hewlett Packard Enterprise Support

Information on how to access HPE support and services.

Appendix A Specifications

System power consumption

How to calculate the total power consumption of the switch system.

Related product manuals