Aruba 9004 Gateway | Installation Guide Installation | 13
Chapter 2
Installation
Installation Recommendations
For proper air circulation, leave at least 10 cm (4 inches) clearance on the left, right, front, and rear
side of the gateway.
Leave additional space in front and rear side of the gateway to access power cords, network
cables, and indicator LEDs.
Avoid placing anything on top of the gateway because it can lead to overheating of the gateway.
Avoid placing this gateway on any other device because the heat dissipated from the other device
can over heat the gateway.
Installation Using the Integrated Wall-Mounting Slots
The keyhole-shaped slots on the bottom of the gateway can be used to attach the device upright
(back port facing downwards) to an indoor wall or shelf.
Make sure to mount the gateway in such a way that there is a clear path to the Ethernet port, such as
a predrilled hole in the mounting surface.
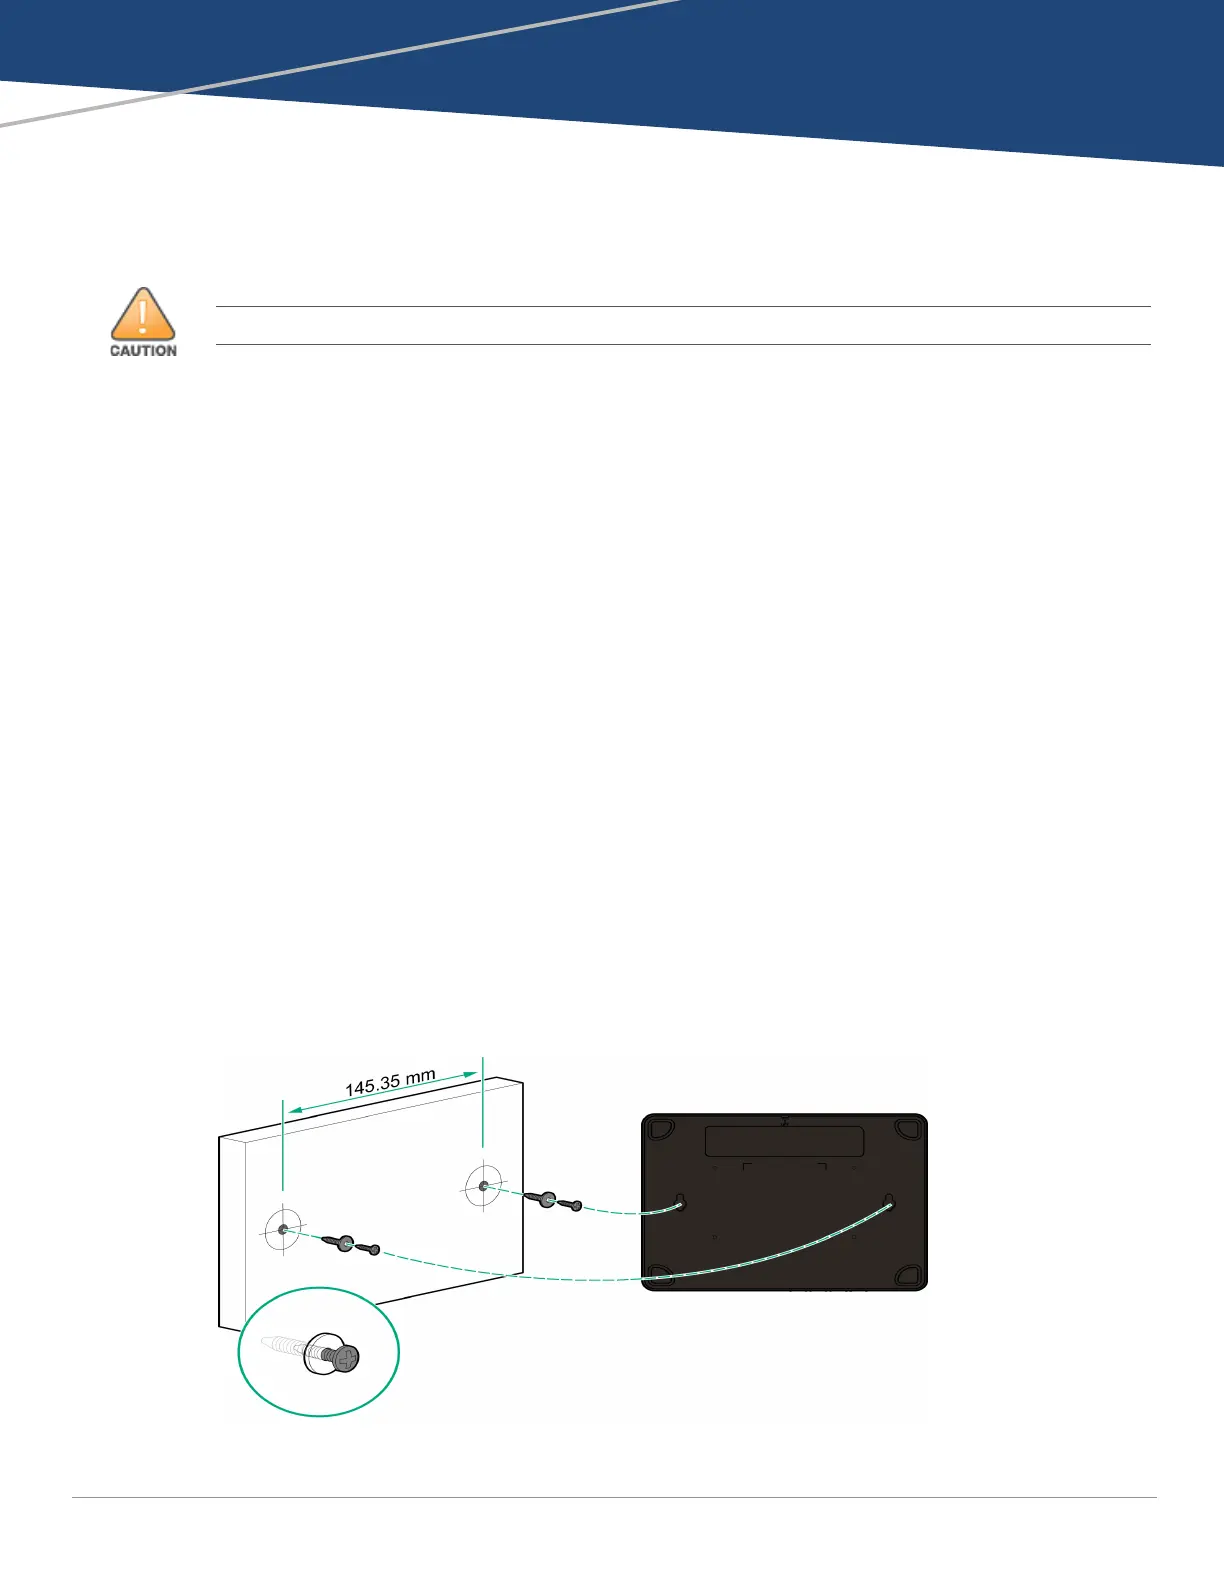
1. At the mounting location, install two screws on the wall or shelf, 145.35 mm apart. If you are
attaching the device to drywall, it is recommended that you use appropriate wall anchors (not
included). See Figure 6.
Use 3/4 inch long #6 pan head wood screws for mounting 9004 unit on wood.
Use 3/4 inch long #6 pan head wood screws with plastic screw anchor #6-8 x 1 inch on dry wall
or concrete wall.
Required quantity: 2 screws per unit
Figure 6 Mounting Using the Integrated Wall-Mounting Slots
Installation of the device should be performed by a trained installation professional.