6 Aruba Instant On AP17 Access Points | Installation Guide
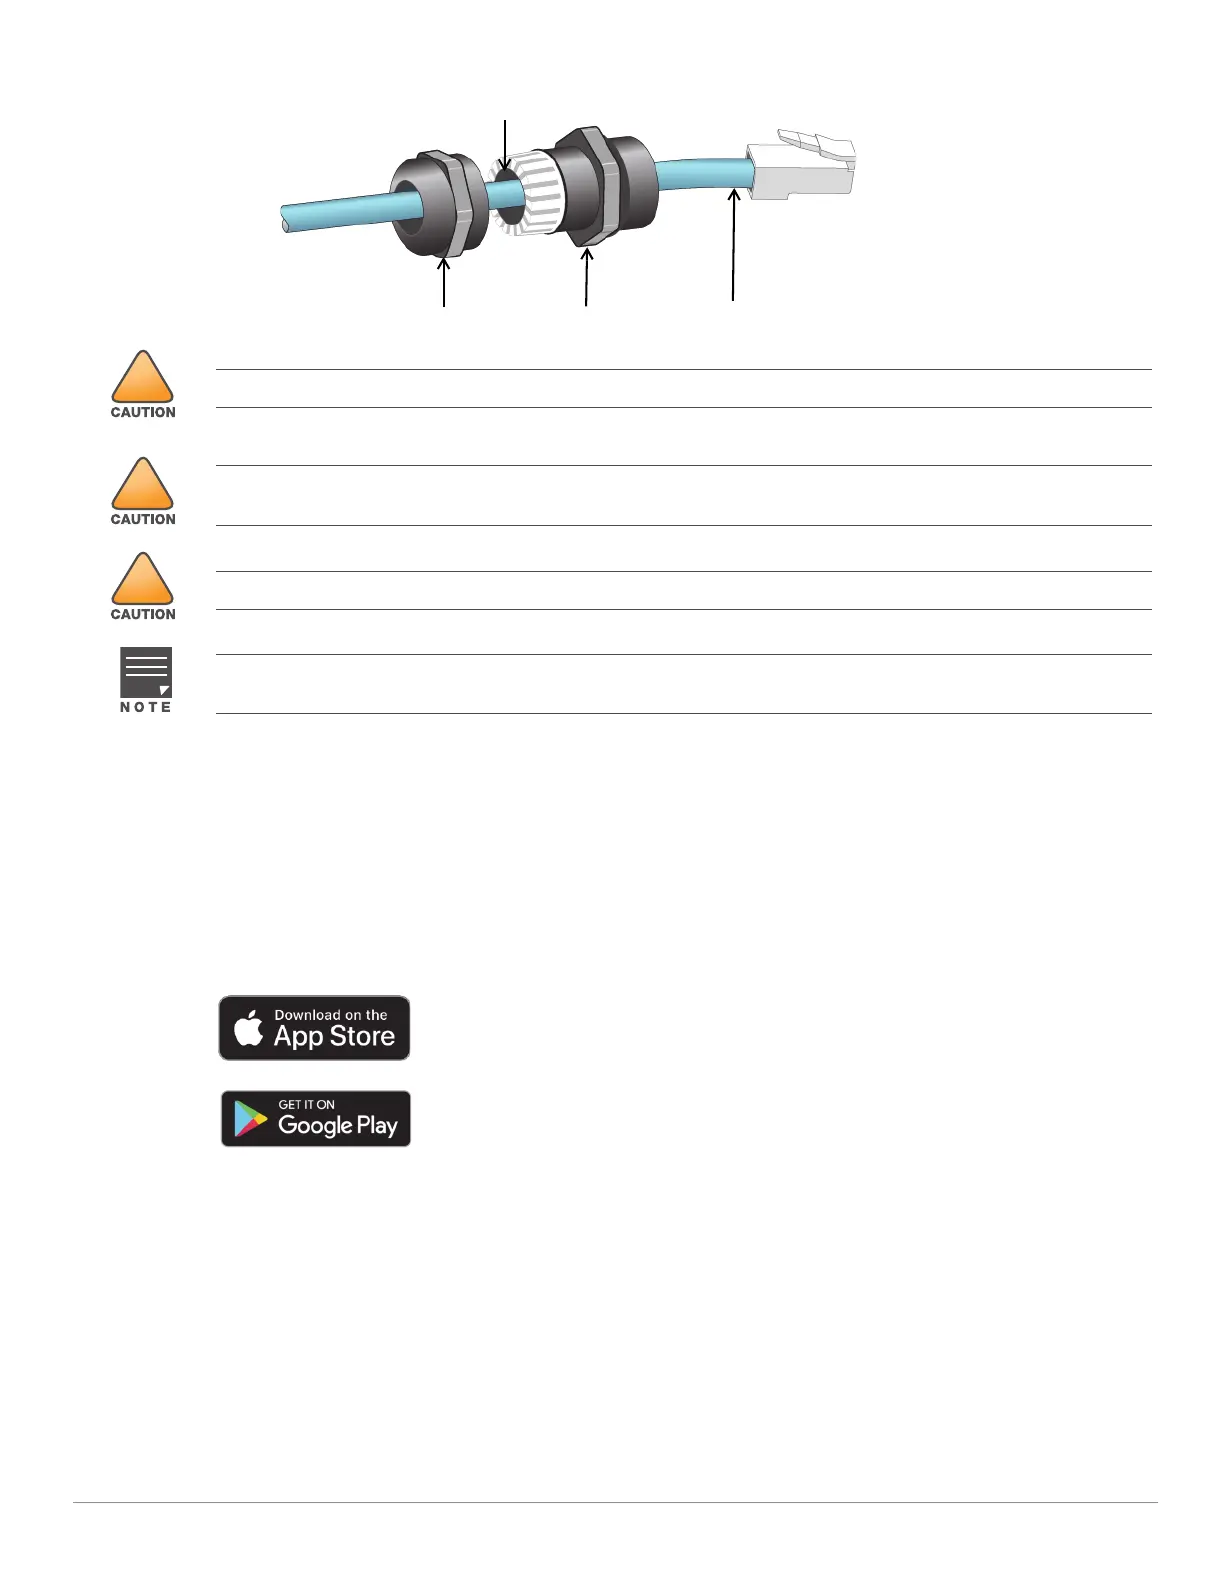
Figure 6 Cable Gland Exploded View
Verifying Post-Installation Connectivity
The integrated LED on the AP can be used to verify that the access point is receiving power and initializing
successfully (see Table 1 and Table 2).
Mobile Application Installation
Click the Apple App Store or Google Play badge below to download and install the Aruba Instant On mobile app
to your phone. Launch the app and follow the instructions to complete the setup. Alternately, simply search for
“Aruba Instant On” app within Apple App Store or Google Play.
Log in to Instant On Portal
Alternately, you can set up the Aruba Instant On access point from a web browser. Open a web browser and
enter https://portal.ArubaInstantOn.com in the address bar to access the Aruba Instant On portal login screen.
In the login screen, enter your Instant On account credentials to access your site.
Sealing Nut
Gland Body
CAT 5E or Better Cable
Seals
Failure to use the included Ethernet cable gland can lead to connectivity and POE issues.
Outdoor rated Cat5e or above cable should be used for all outdoor wired Ethernet connections and should be
grounded through the AC ground of the PoE.
Cable feed must be pointed downwards when wall-mounted.
The seals inside the clamping ring by factory default is applicable for cables with 5-8.5 mm diameter. In the cable
gland kit, another seals is provided for use with the cables with 7-10 mm diameter.