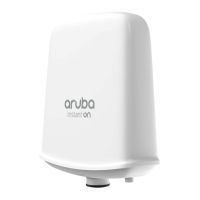
Aruba Instant On AP17 Access Points | Installation Guide 3
Before You Begin
Refer to the sections below before beginning the installation process.
Identifying Specific Installation Locations
Each location should be as close as possible to the center of the intended coverage area and should be free from
obstructions or obvious sources of interference. These RF absorbers/reflectors/interference sources will impact
RF propagation and should be accounted for during the planning phase and adjusted.
Identifying Known RF Absorbers/Reflectors/Interference Sources
Identifying known RF absorbers, reflectors, and interference sources while in the field during the installation
phase is critical. Make sure that these sources are taken into consideration when you attach an access point to its
fixed location.
RF absorbers include:
Cement/concrete—Old concrete has high levels of water dissipation, which dries out the concrete, allowing
for potential RF propagation. New concrete has high levels of water concentration in the concrete, blocking
RF signals.
Natural Items—Fish tanks, water fountains, ponds, and trees
Brick
RF reflectors include:
Metal Objects—Metal pans between floors, rebar, fire doors, air conditioning/heating ducts, mesh windows,
blinds, chain link fences (depending on aperture size), refrigerators, racks, shelves, and filing cabinets.
Do not place an access point between two air conditioning/heating ducts. Make sure that access points are
placed below ducts to avoid RF disturbances.
RF interference sources include:
Microwave ovens and other 2.4 or 5 GHz objects (such as cordless phones)
Cordless headset such as those used in call centers or lunch rooms
Outdoor Planning and Deployment Considerations
Prior to deploying an outdoor wireless network, the environment must be evaluated to plan for a successful
WLAN deployment. Successfully evaluating the environment enables the proper selection of routers and
antennas and assists in the determination of their placement for optimal RF coverage.
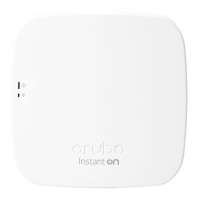
Access Point Installation
The AP17 access point ships with a mount bracket to mount the AP to a solid surface, such as a wall.
The following sections provide instructions on how to use the mount bracket.
1. Use the mount bracket as the template to mark the four mounting points on the wall.
2. Use a drill to make four holes on the four markings from the previous step.
3. Insert an anchor bolt (not included in the package) into each drilled hole.
4. Place the mount bracket over the anchor bolts and press the bracket against the wall.
5. Place the washers and nut onto the bolt’s threaded end and tighten the nut until the mount bracket is firmly
attached to the wall.
The AP17 access point is designed in compliance with governmental requirements so that only authorized
network administrators can change the settings.
Use of this equipment adjacent to or stacked with other equipment should be avoided because it could result
in improper operation. If such use is necessary, this equipment and the other equipment should be observed
to verify that they are operating normally.
Use of accessories, transducers and cables other than those specified or provided by the manufacturer of this
equipment could result in increased electromagnetic emissions or decreased electromagnetic immunity of this
equipment and result in improper operation.