The Review Details screen opens.
8. Review the information presented, then click Next.
The Accept EULAs screen opens.
9. Read the End User License Agreements (EULA) and click Accept, then click Next.
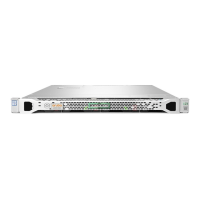
The Select Name and Folder screen opens.
Figure 11 Selecting the Name and Location for the Deployed Template
10. In the Select Name and Folder dialog:
The name of the template is set by default to ClearPass Policy Manager Appliance.
a. Change the name to the desired virtual appliance name.
b. Select the virtual appliance folder or data center where you want to deploy the ClearPass OVF file, then
click Next.
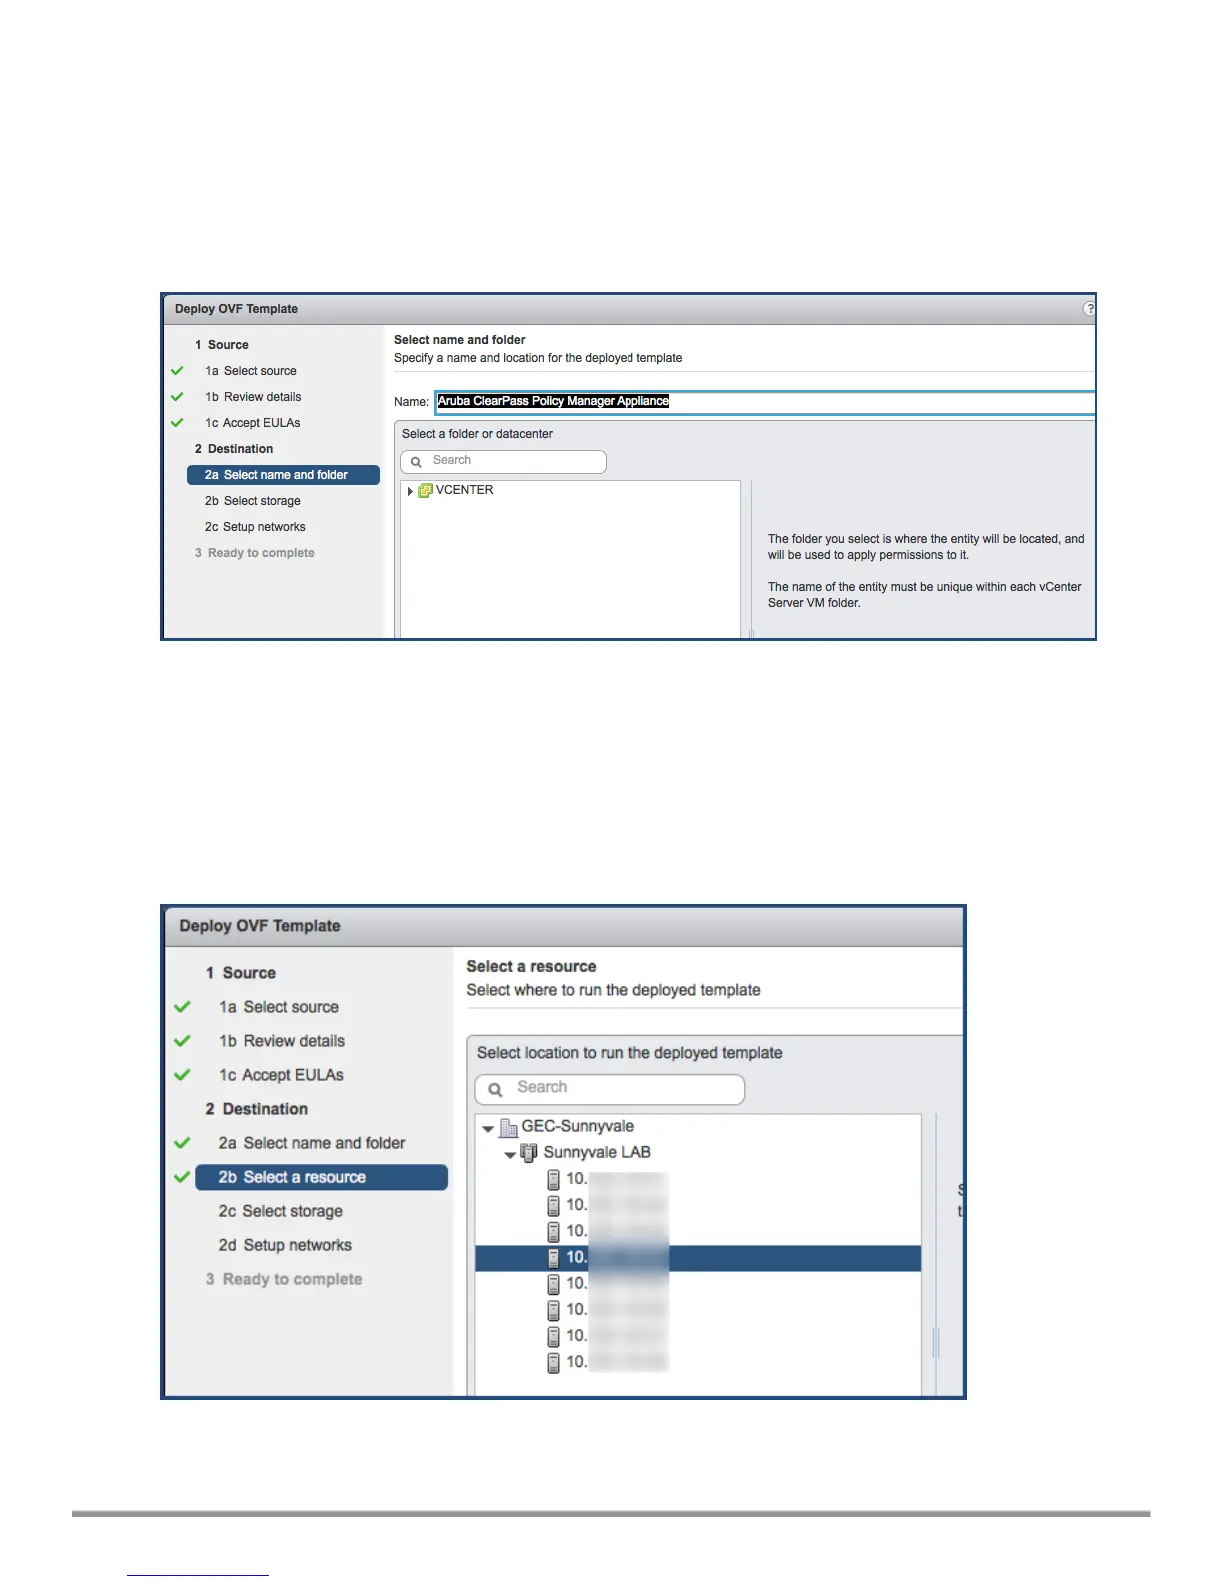
The Select a Resource screen opens.
Figure 12 Selecting a Resource
11. If required, choose the VMware host where ClearPass will be deployed, then click Next.
The Select Storage screen opens.
ClearPass 6.7 Getting Started Guide 24
 Loading...